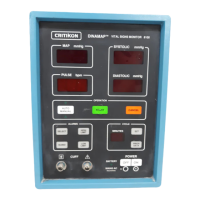
Do you have a question about the Critikon DINAMAP 8100 and is the answer not in the manual?
Provides an overview of the DINAMAP Portable Monitor Model 8100.
Outlines the purpose and intended audience of this operation manual.
Explains how manual updates are handled via reissues and change sheets.
Lists relevant documents like Instruction Labels and the Service Manual.
Details the warranty, repair, and service policy for the product.
Information on purchasing extended warranties for the monitor.
Guidance on contacting Critikon Customer Support for help and troubleshooting.
Procedures for obtaining warranty, extended warranty, or non-warranty repair services.
Recommended steps for safely packing the monitor for shipment or return.
States insurance for product damage is at the customer's discretion.
Information on loaner units provided during service and associated shipping costs.
How to order spare parts via phone or FAX, and required order information.
Instructions for purchasing replacement accessories such as hoses and sensors.
Introduces the DINAMAP Portable Monitor, Model 8100, highlighting its design goals.
Lists key features like automatic patient selection, non-invasive measurement, and artifact rejection.
Covers additional features such as automatic zeroing, data recall, digital displays, and portability.
Lists standard accessories shipped with the monitor and optional accessories.
Details various optional accessories, including different types of disposable and reusable cuffs.
Lists additional optional accessories like calibration kits, hoses, stands, and printers.
Covers cuff pressure, systolic, diastolic, MAP ranges, and BP accuracy.
Details pulse rate determination, accuracy, determination time, and overpressure cutoff.
Covers mechanical specs (dimensions, weight, color, mounting) and portability.
Refers to instructions and alarm interpretations on side panel labels.
Details power cable, battery, power requirements, and fuse requirements.
Lists operating/storage temperatures, humidity range, and altitude range.
Explains the BF SYMBOL and ATTENTION symbol meanings.
Identifies and describes the functions of the front panel controls and indicators.
Continues the description of front panel controls like displays and START/CANCEL buttons.
Continues details on SET, CYCLE MINUTES buttons and their functions.
Details PRIOR DATA, POWER ON/OFF, BATTERY, MAINS AC CHARGE, CUFF CONNECTOR.
Details LOW LIMIT, SILENCE, HIGH LIMIT switches and their functions.
Details the SELECT switch and its multiple functions for setting alarm limits.
Details the AUTO/MANUAL switch and the PULSE display.
Identifies and describes the functions of the rear panel controls and indicators.
Explains how a determination sequence begins and the initial cuff inflation process.
Details the stepped deflation process, matched pulse detection, and data analysis.
Describes the maximum and minimum ranges for Blood Pressure and Pulse Rate determinations.
Outlines the four parts of the operating cycle: inflation, deflation, evaluation, and wait time.
Details Manual Mode and Auto Mode operation, including their differences and starting procedures.
Covers Neonatal/Adult/Pediatric monitoring, Systolic Search, and Undetermined Pressures.
Explains conditions where only MAP may be displayed due to low amplitude fluctuations.
Instructions for unpacking the monitor and checking the contents.
Guidance on what to do if any items are missing or damaged.
States the intended use of the monitor and where it should not be used.
Covers electrical/hose connections, voltage check, battery charging, and site selection.
Details measuring limb circumference and selecting the proper cuff size and placement.
Instructs on connecting cuffs, squeezing air, placing snugly, and checking for correct fit.
Lists warnings related to potential patient harm from prolonged cycling or incorrect accessories.
Further precautions on using non-Critikon accessories, patient conditions, and alarm behavior.
Advises checking alternate means for accuracy, understanding the manual, and observing labels.
Covers precautions on monitor placement, electrical ground, fluids, anesthetics, and hydrostatic effect.
Outlines the general procedures for operating the monitor.
Step-by-step instructions for powering on the monitor and setting alarm silence.
Step-by-step guide to changing default alarm limits for systolic and MAP.
Continues the procedure for setting pulse and diastolic alarm limits.
Final steps for setting diastolic limits and returning to normal operation.
Instructions for operating the monitor in manual mode.
Instructions for operating the monitor in auto mode and setting cycle time.
Explains how alarm indications are presented (audio, visual, LED) and the categories of alarms.
Describes patient alarms (systolic, diastolic, MAP, pulse rate outside limits) and how to silence/cancel them.
Discusses system level alarms for abnormal conditions or internal failures.
Details system alarms like insufficient signal, power-on, calibration mode, and microprocessor failure.
General advice on troubleshooting and checking patient vital signs first.
Explains the 899 alarm, its causes, and recommended actions.
Describes the power-on alarm, its causes, and subsequent monitor state.
Explains the 855 alarm, its causes (long pressure hold), and checks.
Explains the 844 alarm (long determination time), causes, and actions.
Explains the 833 alarm (long inflation time), causes, and checks.
Details the 800 alarm (excess pressure), conditions, and clearing methods.
Troubleshooting steps for when the monitor fails to power on.
Explains causes for high readings (cuff size, position) and compensation.
Explains causes for low readings (cuff size, position) and compensation.
Discusses patient alarms activating constantly due to narrow limits.
General maintenance requirements, cleaning procedures for the monitor and accessories.
Instructions for storing the monitor for extended periods.
Details the procedure for charging the monitor's battery and charging characteristics.
Steps for removing and replacing the monitor's battery, emphasizing qualified personnel.
Explains that the monitor has three fuses and identifies their locations.
Steps to access and replace the AC line power fuses.
Details how to open the fuse compartment, remove fuse holders, and inspect fuses.
Instructions for replacing fuses and fuse holders, and mentions battery fuse replacement.
States that battery fuse replacement requires qualified service personnel due to disassembly.
Recommends checking calibration annually or when pressure readings are doubtful.
Outlines the setup for performing a blood pressure calibration check.
Provides detailed steps for performing a blood pressure calibration check, including using a manometer.
Details verifying pressure readings against tolerance levels and troubleshooting leaks.
Steps to perform a pneumatic leak check on the cuff and hose.
| Brand | Critikon |
|---|---|
| Model | DINAMAP 8100 |
| Category | Medical Equipment |
| Language | English |