Do you have a question about the Crosley CF3001 and is the answer not in the manual?
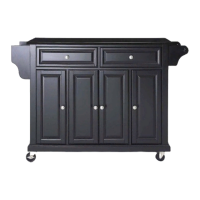
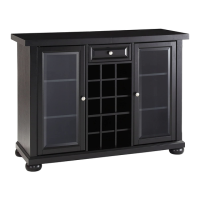
Lists and illustrates all individual furniture parts required for assembly, labeled A through Y.
Details the remaining furniture parts, labeled Z through ZF, including wheels and specialty connectors.
Provides a comprehensive list of all hardware items (cam locks, bolts, dowels, screws) and necessary tools for assembly.
Instruction to insert cam bolts (part #2) into pre-drilled holes of specific cabinet parts.
Attaches rails E, G, F to panel L and connects these assemblies to side panel C.
Installs rails M onto back rail D and attaches rail H to rails M and side panel C.
Attaches side panel B and installs magnets and panels J & K into the cabinet structure.
Attaches base I and secures casters (ZE, ZF) or wood legs, with notes on leg choice.
Assembles spice rack components and attaches them, along with the towel bar, to the cabinet.
Secures the top panel A to the main cabinet structure using dowels and cam locks.
Attaches hardware knobs to doors and mounts the doors onto the cabinet hinges.
Assembles the drawers by connecting fronts, sides, bottom, and back panels.
Provides guidance on how to clean and maintain the furniture's finish using soft cloths and avoiding solvents.
Outlines the 90-day warranty against defects in material and workmanship, including contact information for support.
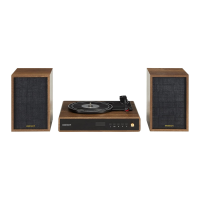
| Playback Speeds | 33 1/3, 45, 78 RPM |
|---|---|
| Power Source | AC Adapter |
| Material | Wood |
| Speakers | Built-in |
| Outputs | RCA |
| Inputs | Auxiliary |
| Assembly | Some Assembly Required |