Do you have a question about the Crosley Cruiser Plus and is the answer not in the manual?
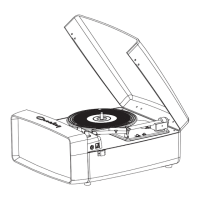
Steps for basic setup of the unit on a flat surface.
Guidance on connecting the unit to stereo systems or powered speakers.
Instructions for connecting external audio devices via the Aux In Jack.
Details on the auto-stop feature and how to adjust it.
Instructions for adjusting the turntable speed using the pitch control knob.
Step-by-step guide on how to remove the stylus assembly.
Step-by-step guide on how to install a new stylus.
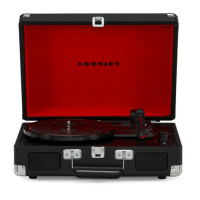
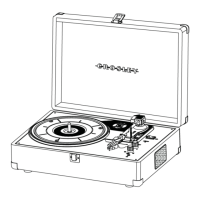
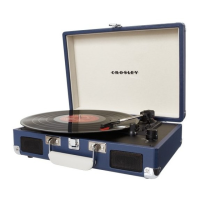
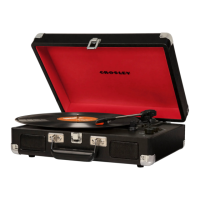
This document describes the Crosley CR8005F-BK Cruiser Plus, a portable turntable designed for playing vinyl records and offering various audio connectivity options.
The Crosley Cruiser Plus is primarily a record player, allowing users to enjoy their vinyl collection. It supports three standard record speeds: 33⅓, 45, and 78 RPM, accommodating a wide range of records. Beyond its core function as a turntable, the device also features Bluetooth input, enabling wireless streaming of music from compatible audio devices. Additionally, it offers Bluetooth output, allowing the turntable's audio to be transmitted wirelessly to Bluetooth headphones or speakers. For wired connections, the unit includes an Aux In jack for connecting external audio devices and RCA Jacks for outputting analog line-level signals to powered speakers or a stereo system. A headphone jack is also provided for private listening.
Initial Setup: Before operation, the turntable should be placed on a stable, level surface free from vibration. Users must remove the tie-wrap securing the tonearm and connect the AC adapter to the Power Jack. It's crucial to ensure all connections are correct before powering on the unit and to always turn off the power when connecting or disconnecting cables.
Turntable Operation: To begin playing a record, the On/Off Volume Knob is rotated to power on the unit. The Function Switch should be set to the PHONO position, indicated by a red light. The Speed Switch must be set to match the record's speed (33⅓, 45, or 78 RPM). A 45 RPM adapter is included for records requiring it. Before playing, the stylus protector needs to be removed from the stylus assembly. To prevent damage, the stylus guard should always be in place when the turntable is moved or cleaned. The tonearm's Hold Down Clip must be released. The Tonearm Lever is used to gently lift the tonearm, allowing it to be positioned over the desired starting point on the record. Lowering the Tonearm Lever will slowly descend the tonearm onto the record, initiating playback. Once a record finishes playing, the Tonearm Lever is used again to raise the tonearm, which is then returned to the Tonearm Rest and secured with the Tonearm Clip. For temporary pauses, the same lifting and lowering steps can be followed.
Platter Auto-stop: The turntable features an Auto-stop Switch. When set to "ON," the platter will automatically stop spinning once the record reaches its end. If the turntable stops prematurely, setting the switch to "OFF" can resolve this issue.
Pitch Control: For fine-tuning playback speed, the Pitch Control Knob allows for approximately 10% adjustment. Turning the knob clockwise increases the speed, while turning it counter-clockwise decreases it.
Bluetooth Input Operation: To stream music wirelessly to the turntable, the Function Switch is set to Bluetooth mode, indicated by a flashing blue light. Users then activate the Bluetooth feature on their audio device, search for "CROSLEY CR8005F," and pair. A short confirmation sound from the unit and a solid blue light on the function indicator confirm successful pairing. Music can then be played and streamed from the device to the turntable. The Bluetooth version is 5.1.
Bluetooth Output Operation: The turntable can also transmit its audio to other Bluetooth devices like headphones or speakers. To use this feature, the audio receiving device should be placed close to the turntable and set to pairing mode. The turntable's function switch is set to the middle position for Bluetooth output, and the function indicator will slowly flash blue. The turntable will automatically connect to the audio device once both are in pairing mode. A solid blue light on the function indicator confirms successful pairing. If pairing fails, users should ensure their audio device is not already paired or connected to another device.
Aux Input Connection: External audio devices can be connected via the 3.5mm Aux In Jack. Connecting an auxiliary cable between the audio device and the turntable allows music to be played through the turntable's speakers. When the Aux In is active, the Function Indicator will be purple, and the turntable and Bluetooth functions will be automatically overridden. To resume turntable or Bluetooth use, the auxiliary cable must be unplugged.
Stereo System Connection (RCA Jacks): The RCA Jacks provide analog line-level output, suitable for connecting directly to powered speakers or the appropriate input of a stereo system. The Red plug is for the Right channel, and the White plug is for the Left channel. It's important to note that these jacks are not designed for direct connection to passive (unpowered) speakers, as the volume level would be very low.
Needle Replacement: The needle can be replaced by gently pulling down its front edge, then pulling it forward and out. To install a new needle, it should be positioned with its tip facing down, aligned with the cartridge, and inserted at a downward angle. The front of the needle is then gently lifted upward until it snaps into place.
Turntable Maintenance: Proper maintenance ensures the longevity and performance of the turntable. Users should avoid touching the stylus tip with their fingers and prevent it from bumping the turntable mat or record edges. The stylus should be cleaned frequently with a soft brush, using a back-to-front motion only. Records should be cleaned with a record cleaning brush and solution to remove dust or grease. The turntable lid and cabinet can be cleaned with a slightly damped microfiber cloth. Harsh chemicals containing alcohol, benzene, or other strong agents should not be used, as they can damage the paint and finish. Crosley offers a range of cleaning accessories, which can be found on their website.
Troubleshooting: The manual provides guidance for common issues. If there is no power, users should check the power adapter connection and the power outlet. If the platter does not turn despite the power being on, the turntable's drive belt might have slipped off, or an aux-in cable might be plugged into the aux-in jack. If the turntable is spinning but there is no sound or the sound is too low, potential causes include the stylus protector still being on, the tonearm being lifted by the lever, or headphones being plugged in. The device also complies with ERP energy-saving standards, meaning it will automatically cut off power after 20 minutes of no audio input. To resume playing, the power needs to be turned off and then on again.
| Drive Type | Belt Drive |
|---|---|
| Speeds | 33 1/3, 45, 78 RPM |
| Built-in Speakers | Yes |
| Bluetooth | Yes |
| RCA Output | Yes |
| Headphone Jack | Yes |
| Tonearm | Manual |
| Platter | Plastic |
| USB Recording | No |
| Power Source | AC Adapter |
| Material | Wood, Plastic |
| Cartridge | NP6 |