Please read these instructions carefully before starting installation
and keep in a safe place for future reference. ENSURE the room is well
heated and ventilated.
Check the contents of the pack carefully before installation. Bauhaus will
y product has
If any fault is found with materials or workmanship, it must be reported
immediately to the manufacturer. Remedial action will be taken, based on
information received, on condition that: 1. Full details are supplied to the
3. The manufacturer is informed of any damage/shortages prior to
installation. 4. The product has not been installed, or attempts have been
made to install.
We do not accept responsibility for any problems that may occur through
incorrect installation.
Advice & Safety
Plumber/
product guarantee maybe considered invalid. For a claim made under our
can be required.
tting to avoid
unnecessary damage occurring.
It is recommended that the furniture and accessories are installed after
product to be easily removed if required in the future.
This document has been prepared for your guidance, you must exercise
due care at all times.
Please note that some units are heavy. Always take care when lifting, and
follow health and safety guidelines. It is recommended that 2 people carry
out the installation of larger basin/vanity units over 30Kgs gross weight.
Warning! Please check for any hidden pipes or electrical cables before
When using power tools always follow the manufacturer’s user instructions.
bathroom has
studded/plasterboard walls, please use appropriate plasterboard
Please ensure the wall can take weight of units detailed above. Before
installing a wooden bathroom unit into a new property, extension or recently
plastered room we strongly advise the building/room is completely dry, well
ventilated and adequately heated.
Important pre-installation notes
To ensure full working use of the drawers we recommend the use of
Bauhaus basin furniture trap BTR0410W.
Care & Cleaning
Cast mineral marble products should be cleaned regularly with warm soapy
water, then rinsed with clean water and, if desired, dried and polished with
a soft cloth. Lime scale deposits can be removed using a 50:50 solution of
warm water and lime scale remover and soft clean cloth. We recommend
regular cleaning with Bauhaus Cream Polish SD150RW, specially
formulated to clean and help protect the surface of cast mineral marble
basins.
Do not use abrasive cleaners or bleach in this will permanently damage the
high gloss surface.
urniture
carcasses.
If any maintenance is required then it must be carried out by a
Plumber.
ions without
prior notice.
IMPORTANT - Advice and safety - Please read before installation
Tools & equipment needed: Drill, 8mm Suitable drill bit, Phillips screwdriver, Spirit level, Ruler/tape measure, Pencil,
Silicone sealant (clear).
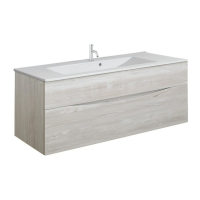
BATHROOM FURNITURE RANGE
GLIDE II
INSTALLATION INSTRUCTIONS
500 Two Drawer Basin Unit,
Ceramic / Cast Marble Basin / Worktop
GL5000T
GL7000T
GL5000D+
GL7000D+
GL1000T
GL1000D+
DE0004SRW
DE0003SRW
DE0002SRW
x8
x2
700 Two Drawer Basin Unit,
Ceramic / Cast Marble Basin / Worktop
1000 Two Drawer Basin Unit,
Ceramic / Cast Marble Basin / Worktop
x8
x2
x8
x2
DE0004SCW
DE0003SCW
DE0002SCW
1