IX.
i-module replacement
1. Ensure you are in a non-hazardous (safe) area.
Switch off the unit
2. Remove any accessories, such as the flow adaptor, if fitted.
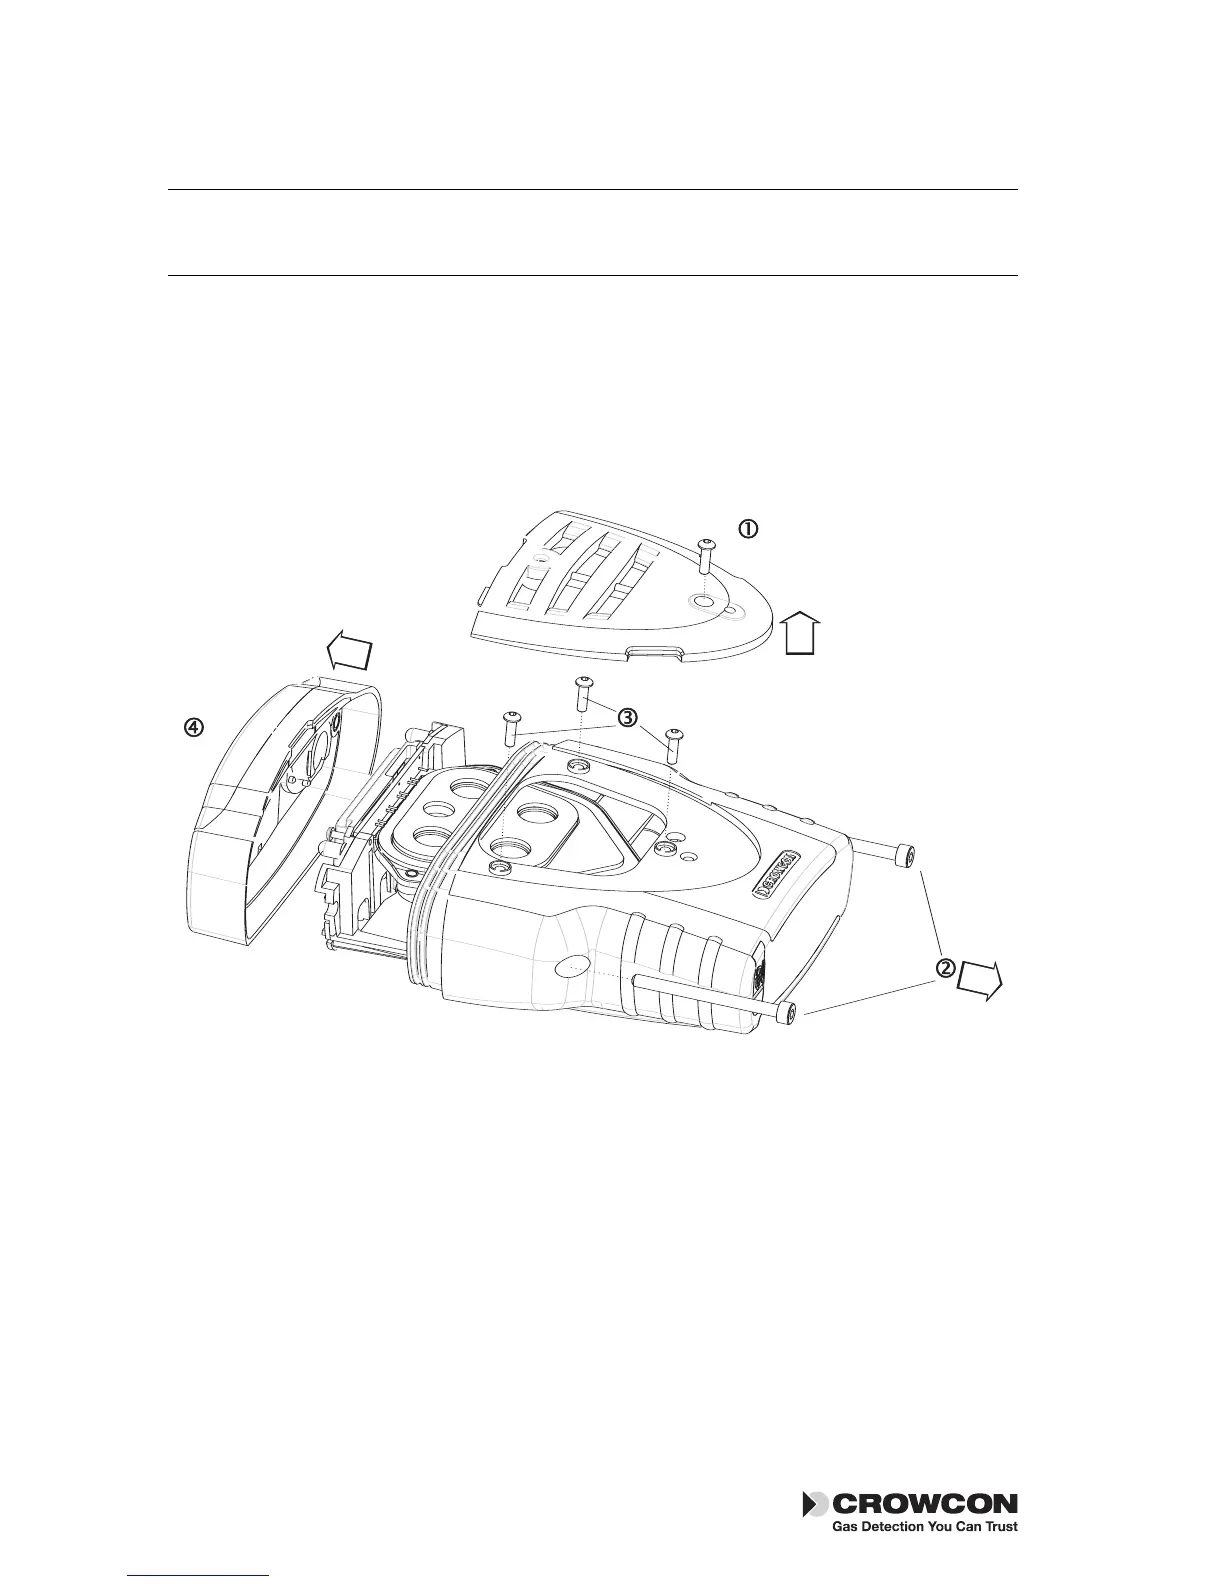
3. Remove the front cover grill by unscrewing the M3, 2 mm Allen screw
as shown the in the drawing, point
4. Unscrew the side retaining M4, 3 mm Allen screws as shown in .
5. Remove the three sensor plate retaining screws as shown by point .
6. Ease the top away from the body, point .
7. Press down lightly on the rubber seal protecting the sensor housing
and slide forward, to clear the internal chassis from the sensor plate
aperture. With care, withdraw the whole instrument assembly.
Removing an installed i-module
1. Locate the i-module connection ribbon, squeeze the two retaining
lugs, on the module board, toward each other and pull out slightly,
this will release the ribbon.
2. Remove the retaining ring from the clips. Unclip the i-module from the
24
i-module replacement Tetra