(Example)
The Smiths
Go wireless installation
- 9 -
Note:
1. When hardwire your doorbell, please operate under the guide of the professionals.
2. The doorbell works with 12V - 24V AC and 12V DC power source. And either cable can connect to either
terminal. The connecting order doesn’t matter.
3. If your doorbell is powered solely on batteries, you may need to charge your doorbell once in a while.
Lab-tested battery life: 12 month standby, 6 month regular using(activate 20 time per day. (The actual
battery life may be different due to different activation freqency).
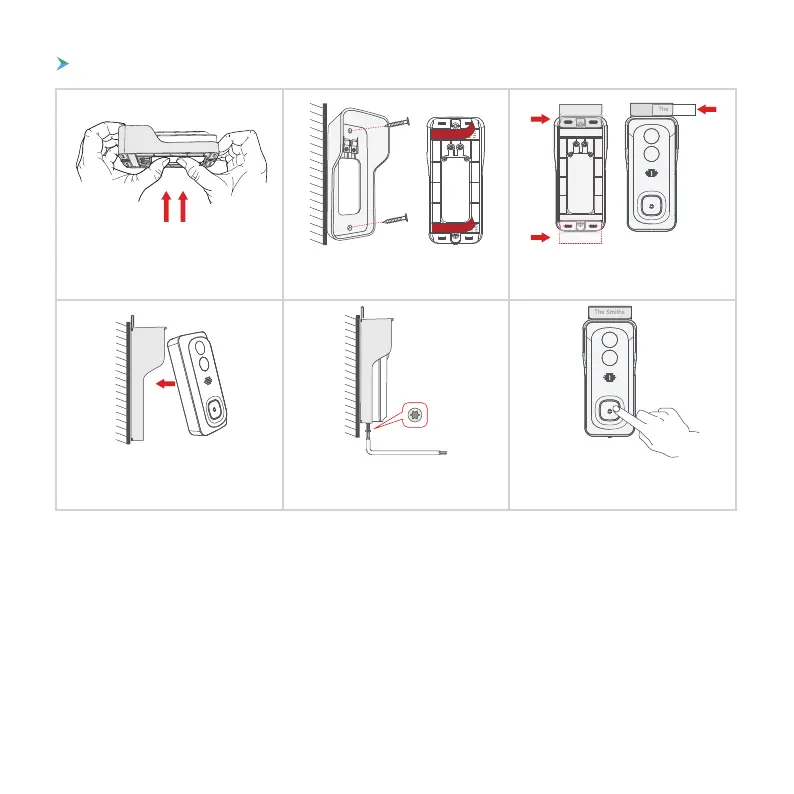
3. (Optional) The nameplate holder can be
mounted on the top rear/ bottom rear of the
bracket, prior to bracket installation.
1. Dismount the bracket by pushing from
the back of your doorbell. Please remove
the insulation film in the battery cell.
4. Mount your doorbell to the fixed bracket.
Make sure it reaches the bottom where you
can hear a click.
5. Secure your doorbell with the provided
star-shape security screw and screw driver.
6. All set, congratulations!
Now you can press the doorbell button
to try it out.
2. Bracket installation: mount the bracket on
the wall with screws & anchors or the double
-sided adhesive tape.
The Smiths
 Loading...