27Section 7 — Service
6. Slide the rod to the right to remove it.
NOTE: Be careful not to damage the wire harness when
removing the rod.
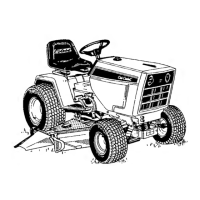
7. Remove the bow pin that secures the PTO cable to the
bracket on the deck, slide the PTO cable out of the bracket
and unhook the spring from the idler bracket. See Figure 7-2.
Figure 7-2
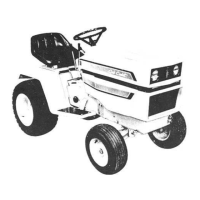
8. Working on the right side of the tractor, insert a ⁄” drive
ratchet wrench, set to tighten, into square hole found on
the idler bracket. See Figure 7-3.
Figure 7-3
9. Pivot the wrench forward to move the deck drive pulley
forward. See Figure 7-3.
WARNING! Avoid pinching injuries. Never place
your fingers on the idler spring or between the belt
and a pulley while installing the belt.
10. Carefully remove the belt from around the PTO pulley.
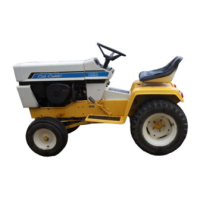
11. Looking at the cutting deck from the left side of the tractor,
locate the bow-tie pin on the rear left side of the deck. See
Figure 7-4.
Figure 7-4
12. Remove the pin and slide the deck pin out of the deck lift
arm. See Figure 7-4.
13. Repeat the above steps on the tractor’s right side.
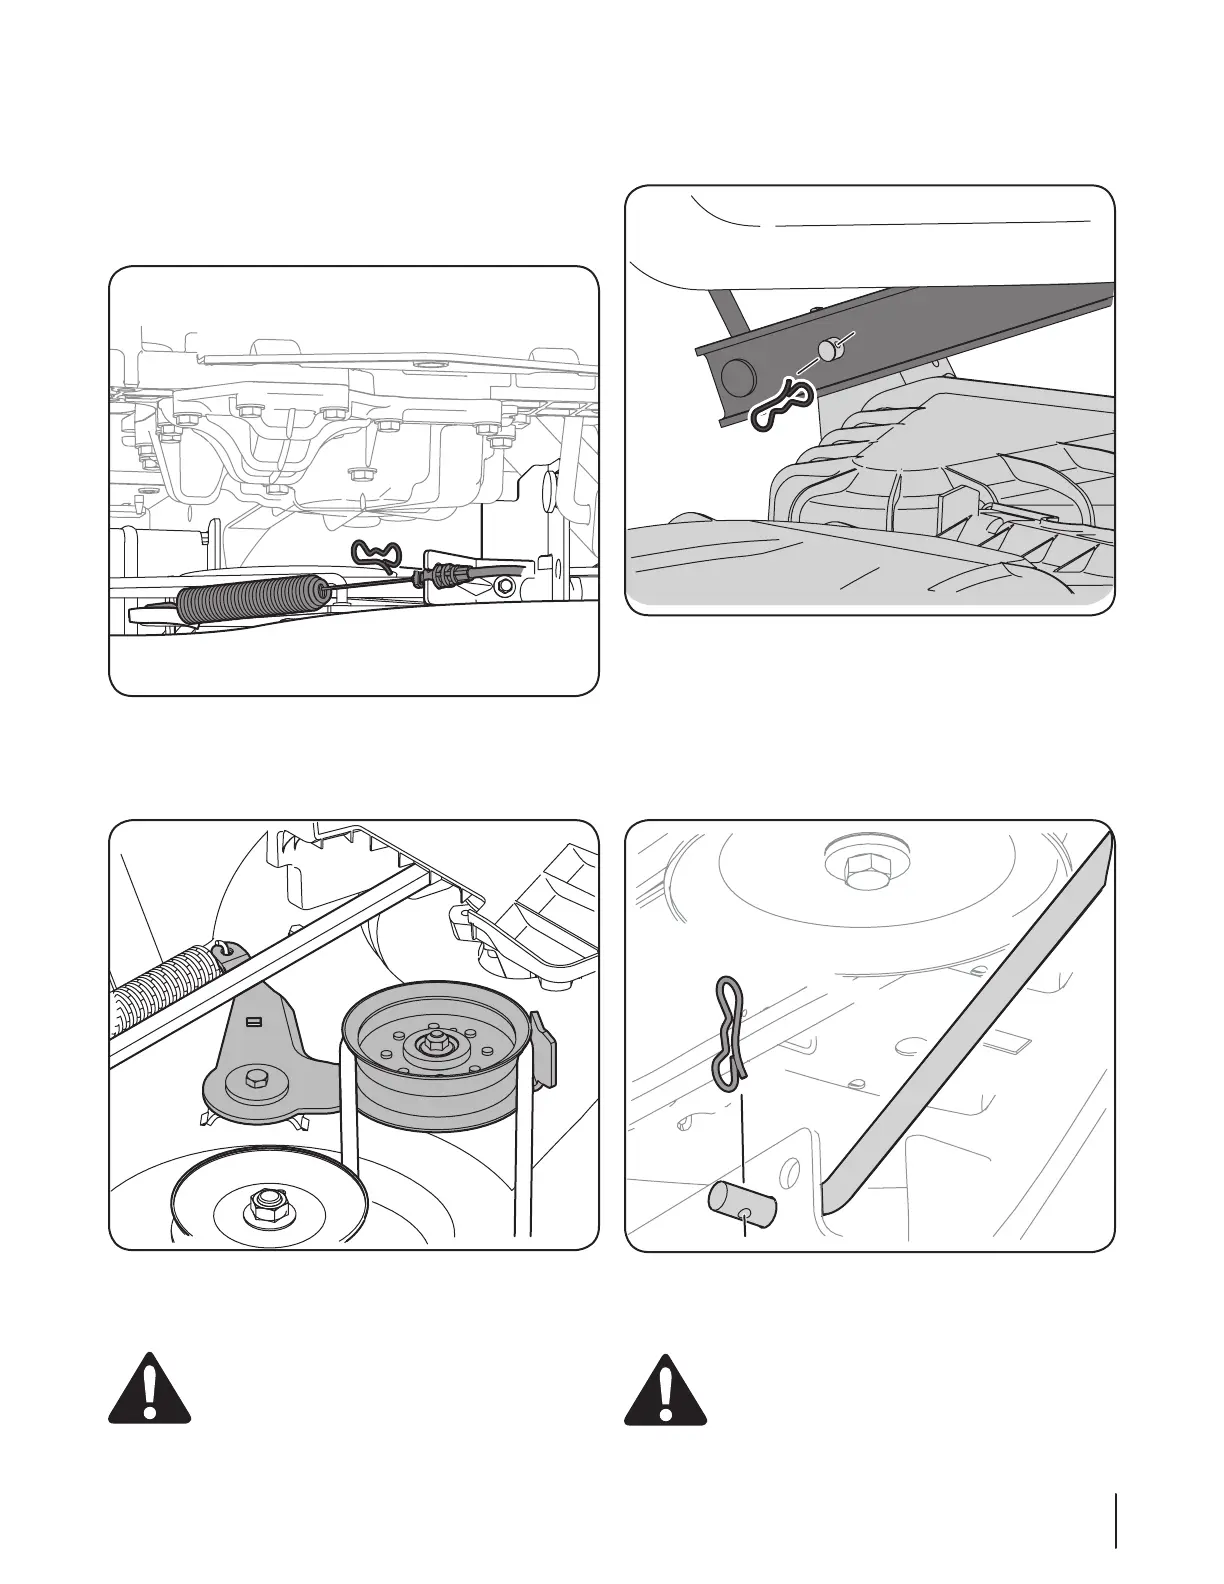
14. Pull the bow-tie pin out of the front deck lift rod securing it
to the deck. See Figure 7-5. Slide the deck lift rod out of the
front hanger bracket.
Figure 7-5
15. Move the deck lift lever into the top notch to raise the deck
lift up and out of the way.
CAUTION: There is a certain amount of spring tension
due to the weight of the deck. When removing the lift
linkage from the deck the tension of the springs will go
from the deck to the deck lift handle and snap back.
16. Gently slide the cutting deck out from underneath the tractor.
 Loading...