3
Recommended Position
Any available position is acceptable.
2
Illustrated
Parts List
IMPORTANT
Refer to your Cub Cadet
Owner’s Manual for
any information relating
to the use of your 4x4
unit. These instructions
are for assembly of
your new accessory to
further enhance your
4x4 experience.
NOTE:
You must have the
optional Electric Wiring
Harness accessory
(39A-209-100) to
complete installation
of this bedlift unit.
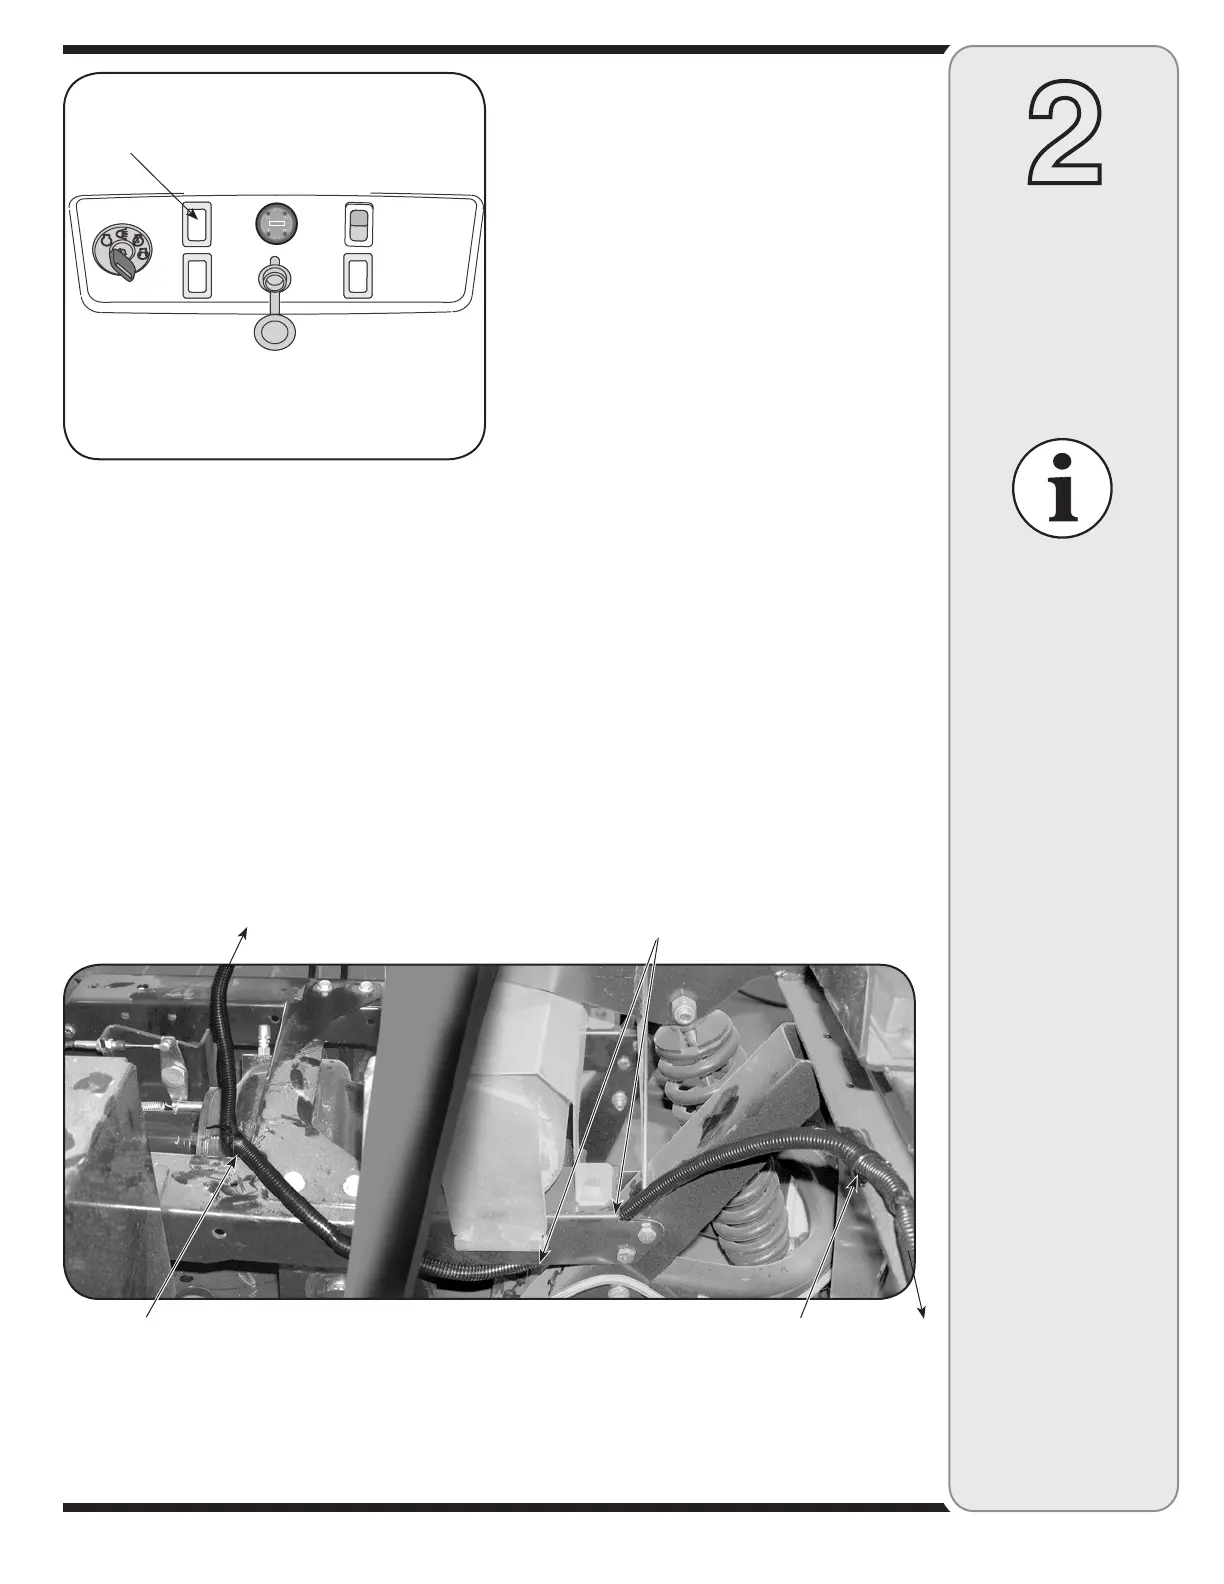
7. Install the bed lift switch included with this kit into the
dashboard. First, remove a dash plug. Then push in
and click the switch into place. The upper left position
is recommended, however this is not mandatory. Any
available position may be used. See Figure 1-4.
8. Plug the dash-mounted bed lift switch into the appro-
priate plug of the optional electric accessory harness
(39A-209-100). The bed lift plug can be identified by a
yellow/white wire, an orange wire and an orange/white
wire. See the electric accessory harness manual to
confirm the appropriate color coded plug.
NOTE: You must have the optional Electric Wiring Har
-
ness accessory (39A-209-100) to complete installation of
this bed lift unit.
Figure 1-4
9. Route the wire from the bed lift motor along the frame
and attach with the included tie straps as seen in
Figure 1-5.
NOTE: Be sure to leave enough slack in the wire to
account for when the bed is raised and lowered.
Then route the wire under and through the cross-
frame and secure with tie-strap as seen in Figure
1-5. Routing the wire under the cross-frame will
protect it from coming in contact with the muffler.
This is very important!
IMPORTANT: It is important to route the wire coming
from the bed lift motor properly
10. Once the optional electric accessory harness is
installed and plugged into the main wiring harness,
the wires already routed to the rear of the unit become
active. Plug these wires into the bed lift assembly.
11. Test the bed lift switch by pushing it up and down,
watch the bed lift motor to make sure that it is
operating.
12. Push the bed lift switch until the unit fully expands.
Stop as soon as it reaches its fully expanded
position. At this time, attach the bed lift motor to the
bottom of the utility vehicle’s bed by inserting the
clevis pin and securing it with a cotter pin.
NOTE: It may be necessary to move the bed up and
down with your hand to get the holes to line up so you
can insert the clevis pin.
13. Push the bed lift switch up or down to operate.
Figure 1-5
Tie-Strap Here
Tie-Strap Here
Route Wire Under and
through the Frame
Goes to bedlift unit
Towards cab
HEAT Shield
 Loading...