12 Section 3— ASSembly & Set-Up
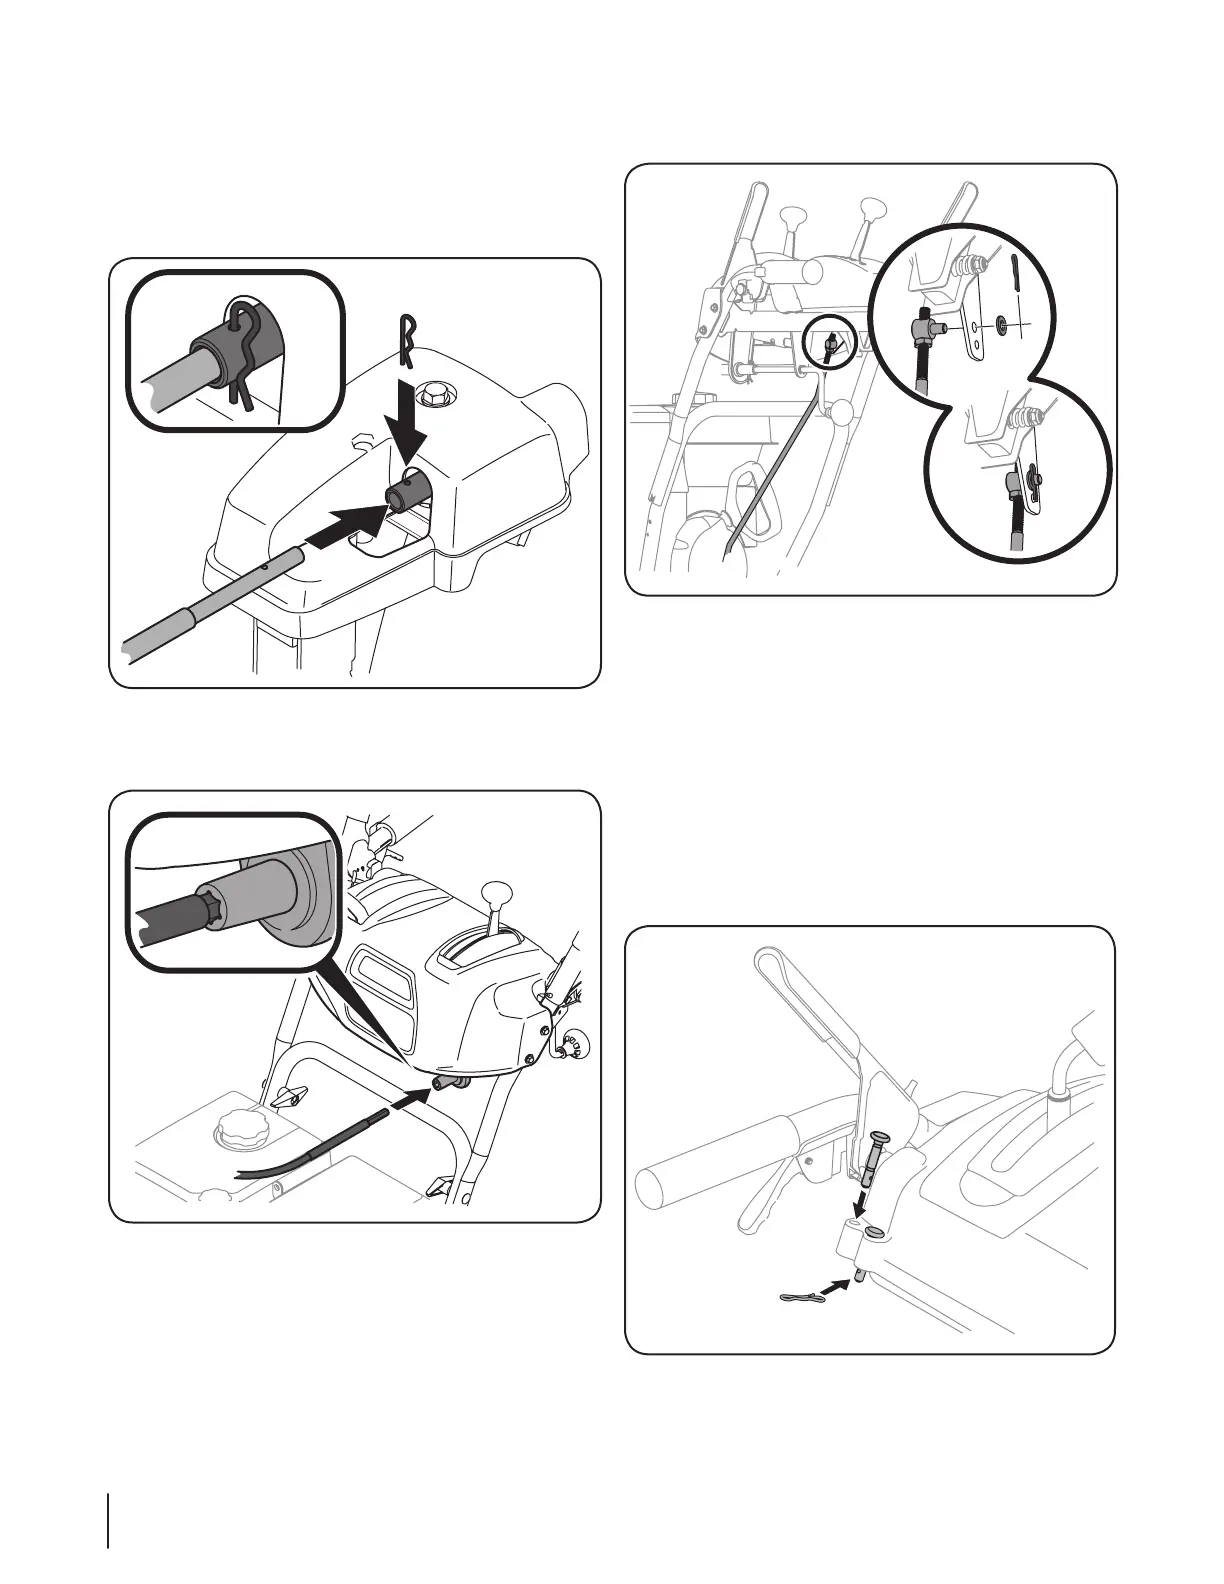
4. Remove the hairpin clip from the rear of the chute control
assembly.
5. Insert flex shaft removed earlier from the lower handle
into rear of the chute directional control head. Secure the
flex shaft to the chute control head with the hairpin clip
removed earlier. See Figure 3-17 .
Figure 3-17
6. Insert the flex shaft into the chute control rod coupling
under the dash panel. See Figure 3-18.
Figure 3-18
7. Remove the cotter pin and washer from the ferrule on the
end of the shift rod. See Figure 3-19 inset.
Figure 3-19
8. Insert the ferrule into the top hole of the shift lever and
secure with the cotter pin and washer removed in the
previous step.
9. Check that all cables are properly routed through the cable
guide on top of the engine. See Figure 3-10.
Set-Up
Shear Pins Storage
Replacement auger shear pins and bow tie cotter pins are
included with your snow thrower. Store them in your snow
thrower’s dash panel until needed. See Figure 3-20.
Figure 3-20
 Loading...