Big Country 4 x 2
8
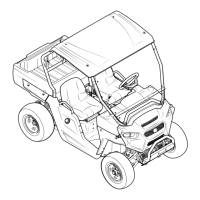
4.4. Disconnect the clevis on the end of each brake
cable from the brake actuator extension arm by
removing the cotter pin and clevis pin.
See Figure 4.4.
NOTE: This step isolates the brake form the link-
age that actuates it, so that the two portions of
the system do not interfere with each other.
4.5. Install the brake drum using two of the five lug
nuts. Install the lug nuts inside-out, so that the
flat side of the nut faces the drum. Rotate the
drum during installation to center it.
See Figure 4.5.
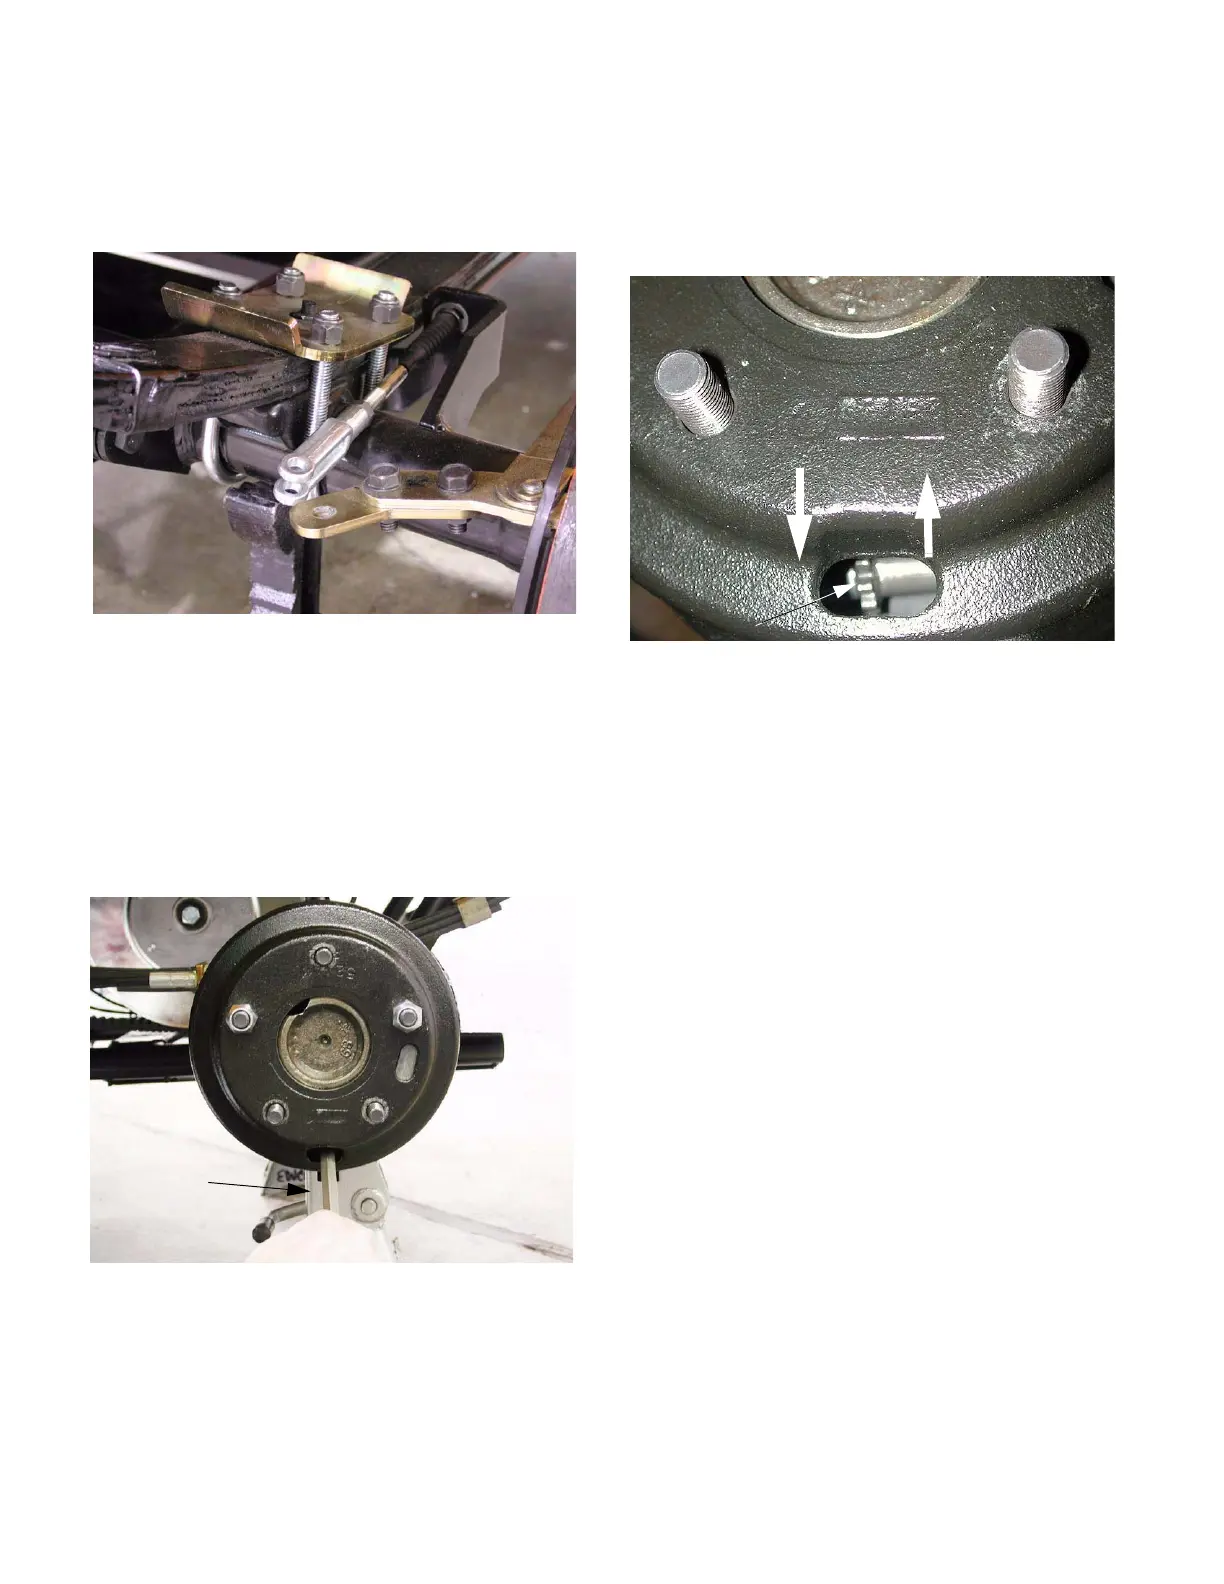
4.6. Position the access slot in the drum at the 6 o-
clock position, so that a brake adjuster spoon or
flat blade screwdriver can be inserted to reach
the star wheel on the brake adjuster.
4.7. Set the adjuster so there is slight drag on the
brake drum when turned by hand. Then adjust
until no drag is present. At this point, play
should be absent from the actuator.
See Figure 4.7.
4.8. Repeat the process for the second brake, and
proceed with the brake linkage adjustment.
Figure 4.4
Figure 4.5
Flat blade
screw driver
Figure 4.7
Loosen Tighten
Star Wheel

 Loading...