27se c t i O n 7 — se r v i c e
Route the deck belt around the spindle pulleys and idler 5.
pulleys as shown in Fig. 7-5.
Reinstall the spindle covers on the deck using the self-6.
tapping screws. Do not overtighten the screws.
Reinstalling the Cutting Deck
There are two methods for reinstalling the mower deck on the
tractor. One method involves rotating the PTO belt idler bracket
to relieve enough belt tension to allow the belt to be placed
in either the PTO pulley or the fixed idler pulley. Because that
method is difficult, we recommend using the second method of
rolling the belt onto the PTO pulley.
Install the cutting deck as follows:
From the right side of the tractor, slide the deck under the tractor 1.
and align the rear deck hanger brackets with the deck lift
arms.
Slide the deck forward and place the deck front hanger rod into 2.
the slots of the deck front hanger bracket. Then slide the
deck rearward so that the front hanger rod is at the front of
the slots.
Using the deck lift lever, lower the deck lift arms. From either side 3.
of the tractor, pull the support pin in the deck rear hanger
bracket outward, align the deck lift arm hole with the deck
support pin and release the pin so that it goes through
the deck lift arm. Repeat on the other side of the tractor to
secure the deck.
After first making sure the deck belt is properly engaged in all of 4.
the deck pulleys, route the deck belt forward through the
center of the front deck hanger rod and toward the PTO
pulley on the bottom of the engine.
Using the deck lift handle, raise the deck to the position that 5.
gives you the most horizontal run of the belt between
the deck pulleys and the PTO pulley on the bottom of the
engine.
Sitting in front of the tractor, facing rearward, make certain the 6.
belt is not twisted; then reach beneath the tractor to grasp
the belt and pull it toward the PTO pulley.
NOTE: References to left and right are from the front of the
tractor in the following instructions.
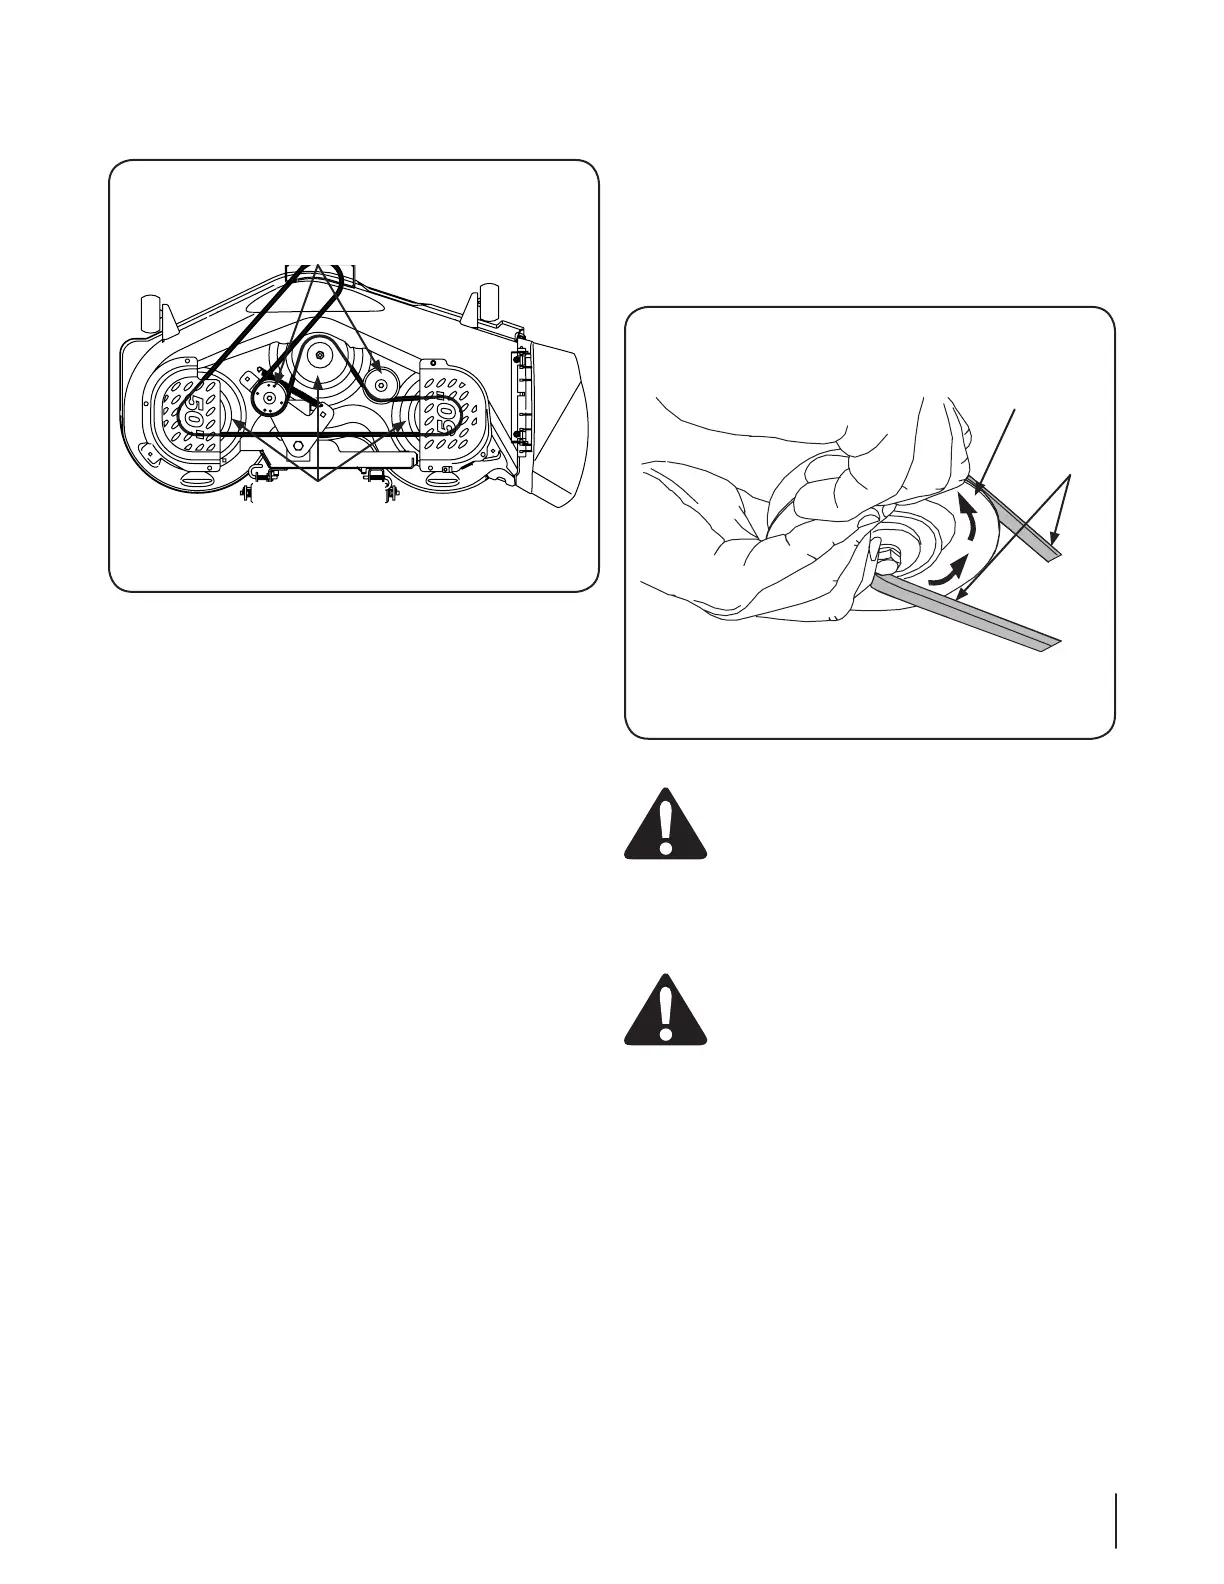
Pull the right side of the belt forward and place the narrow V side 7.
of the belt into the PTO pulley.
While holding the belt and pulley together, rotate the pulley to 8.
the left. Continue holding and rotating the pulley and belt
until the belt is fully rolled into the PTO pulley. See Fig. 7-6.
WARNING! Use caution to prevent pinching your
fingers when rolling the belt onto the PTO pulley.
Off-Season Storage
If the machine is to be inoperative for a period longer than 30
days, the following procedures are recommended:
WARNING! Never store the machine or fuel
container indoors where there is an open flame,
spark or pilot light such as on water heater, furnace,
clothes dryer or other gas appliance.
NOTE: Fuel left in the fuel tank during warm weather deteriorates
and will cause serious starting problems.
To prevent gum deposits from forming inside the engine’s
carburetor and causing possible malfunction of the engine, the
fuel system must be either completely emptied, or the gasoline
must be treated with a stabilizer to prevent deterioration.
If using a fuel stabilizer:1.
Read the product manufacturer’s instructions and a.
recommendations.
Add to clean, fresh gasoline the correct amount of b.
stabilizer for the capacity of the fuel system.
Fill the fuel tank with treated fuel and run the engine for c.
2-3 minutes to get stabilized fuel into the carburetor.
Spindle Pulleys
Idler Pulleys
Figure 7-5
Figure 7-6
 Loading...