Kawasaki Engines
3. Remove the oil fill cap/ dipstick from the oil fill tube.
4. Push the oil drain hose (packed with this manual) onto the
oil drain port. Route the opposite end of the hose into an
appropriate oil collection container with at least a 2.5 quart
capacity, to collect the used oil.
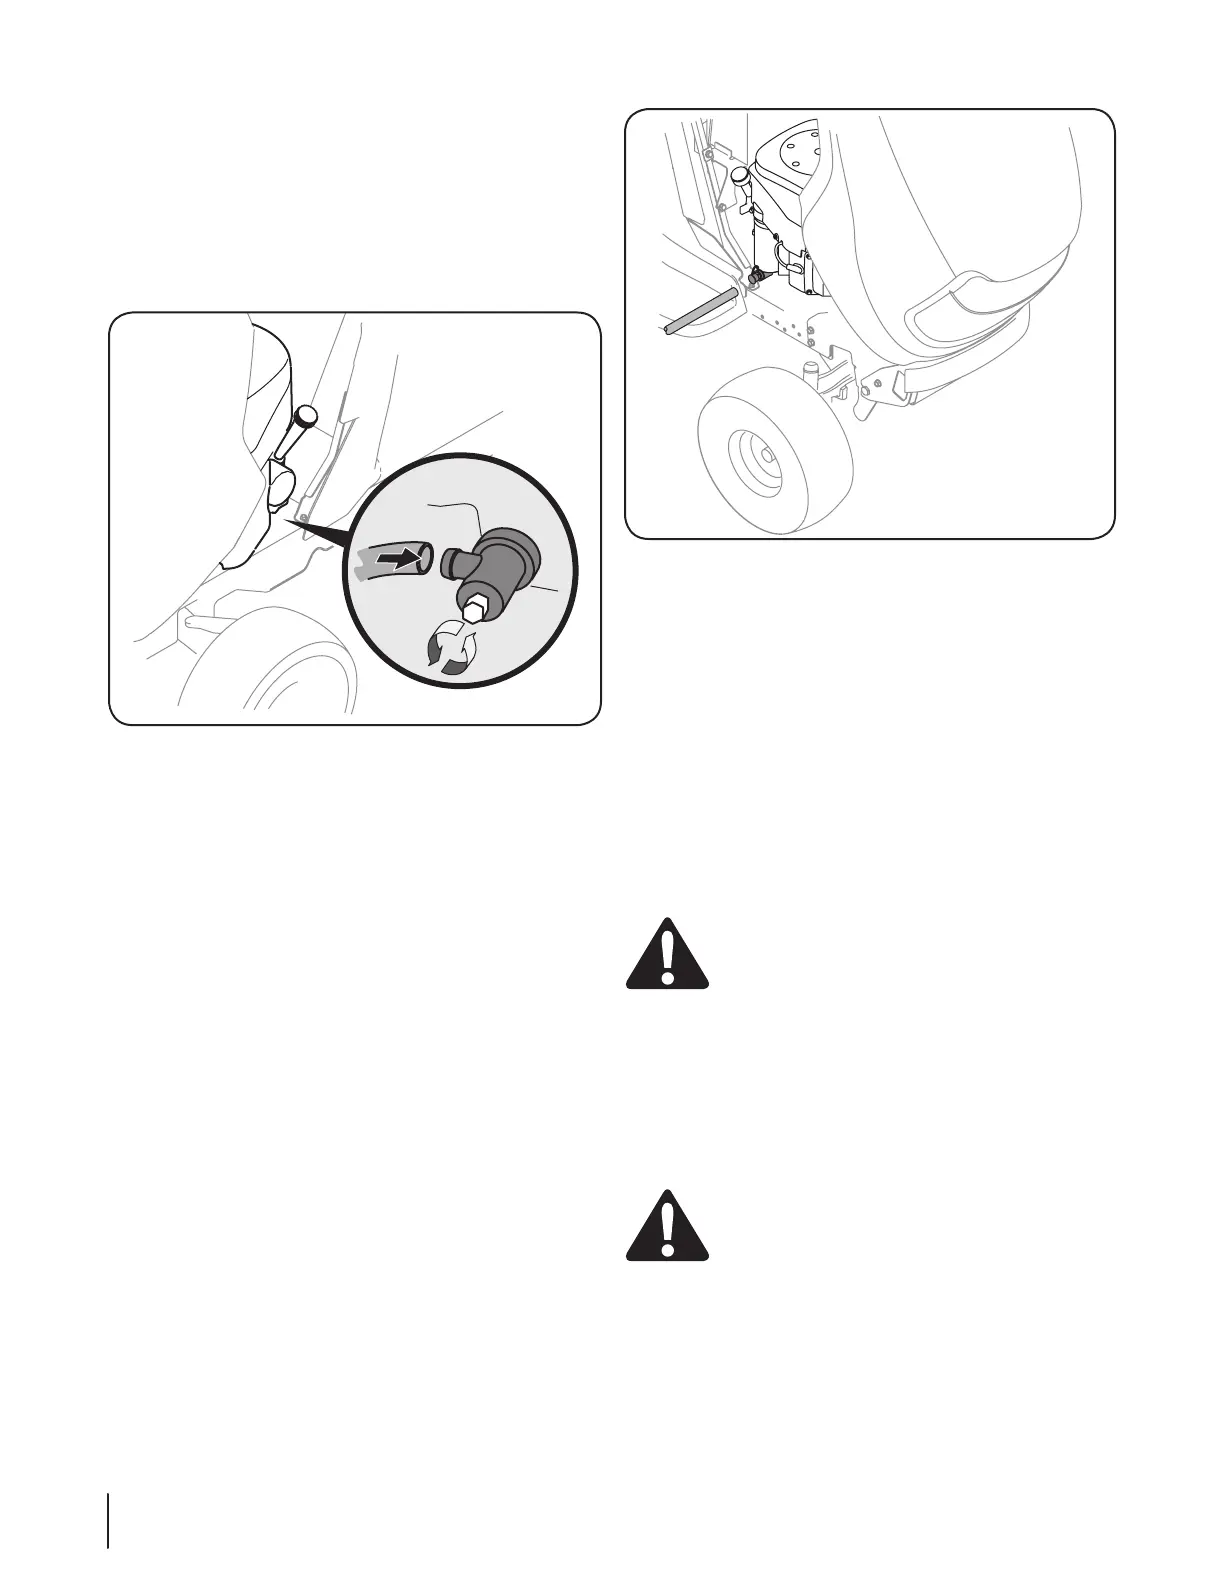
5. Open the oil drain plug by loosening the bolt on the side of
the plug. See Figure 6-1.
6. After the oil has finished draining, retighten the bolt.
Remove the oil drain tube.
7. Replace the oil filter as instructed in the separate engine
manual.
8. Refill the engine with new oil. Refer to the engine manual
for information regarding the volume and weight of engine
oil
Kohler Engines
3. Pop open the protective cap on the end of the oil drain
valve to expose the drain port. See Fig 6-2.
4. Remove the oil fill cap/ dipstick from the oil fill tube.
5. Push the oil drain hose (packed with this manual) onto the
oil drain port. Route the opposite end of the hose into an
appropriate oil collection container with at least a 2.5 quart
capacity, to collect the used oil.
6. The engine is equipped with either a twist-and-pull drain
port or a tabbed drain port. Turn the oil drain valve 1⁄4-
turn, then pull outward to begin draining oil. After the oil
has finished draining, push the end of the oil drain valve
back in and turn 1⁄4-turn to secure it back in place. Re-cap
the end of the oil drain valve to keep debris from entering
the drain port.
7. Replace the oil filter as instructed in the separate engine
manual.
8. Refill the engine with new oil. Refer to the engine manual
for information regarding the volume and weight of engine
oil
Air Cleaner
Service the pre-cleaner and cartridge/air cleaner element as
instructed in the separate engine manual.
Spark Plug
The spark plug should be cleaned and the gap reset once a
season. Refer to the separate engine manual for correct plug
type and gap specifications.
Hydrostatic Transmission
The hydrostatic transmission is sealed at the factory and is
maintenance-free. The fluid level cannot be checked and the
fluid cannot be changed.
Battery
CALIFORNIA PROPOSITION 65 WARNING!
Battery posts, terminals, and related accessories
contain lead and lead compounds, chemicals known
to the State of California to cause cancer and
reproductive harm. Wash hands after handling.
The battery is sealed and is maintenance-free. Acid levels cannot
be checked and fluid can not be added.
• Always keep the battery cables and terminals clean and
free of corrosive build-up.
• After cleaning the battery and terminals, apply a light coat
of petroleum jelly or grease to both terminals.
CAUTION: If removing the battery for cleaning,
disconnect the NEGATIVE (Black) wire from it’s
terminal first, followed by the POSITIVE (Red) wire.
When re-installing the battery, always connect the
POSITIVE (Red) wire its terminal first, followed by the
NEGATIVE (Black) wire. Be certain that the wires are
connected to the correct terminals; reversing them
could result in serious damage to your engine’s
alternating system.
Figure 6-2
Figure 6-1
20 Section 6 — Maintenance & adjuStMentS

 Loading...