Step 5 – Checking Attack
®
’s Detection Zone
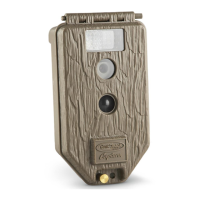
1) Turn the rotary knob to the Test position. Close the cover
and tighten the thumb screw. Put Attack back onto the tree
bracket. (Note: there is a more convenient method to enable
test mode, see Step 7 - Checking your Attack for details).
2) Walk back and forth in front of Attack. The red LED will
illuminate
when Attack’s sensor has detected you. Using
this method you can accurately position your Attack as
desired. For more details on how Attack’s motion/heat
sensor works see our website, www.cuddeback.com/support.
Step 6 – Arming the Attack
®
Turn the rotary knob to one of the Armed delay settings. These
settings represent the amount of time Attack will wait before it will
take
another image. This dwell time prevents multiple images of the
same animal. Here is our recommendation for the various Armed
settings:
a. 15 and 30 seconds – game trails
b. 1 and 3 minutes – scrapes
c. 5 to 30 minutes – food plots or feeders
When first armed, Attack will display the indicated delay for
5 seconds and then begin counting down from 45 to 0. When the
counter gets to 0, Attack will arm and be ready to record images.
When Attack detects a subject and takes a picture a “worm” will
be displayed and the LED will flash red and green – do not remove
the SD card until the LCD and LED are both OFF. After the image
is saved to the SD card the LCD will display the delay
setting and
begin counting down. Once the counter reaches 0,
Attack is ready to record the next image.
5
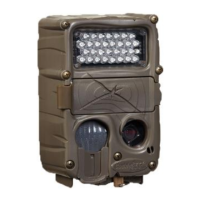
Step 7 – Checking Attack
®
When you check Attack it is not necessary to turn the rotary knob.
Instead, press the A or B button to temporarily suspend Armed
mode and view pertinent information, such as the number of im-
ages on the SD card and battery level. Each time you press the A or
B button new information will be displayed. Here is the sequence
of information that is displayed each time the A or B
button is pressed.
1) Images on SD card. Note the ARMED, DWELL, and
IMAGES icons are displayed.
2) Free Space on SD card in MB. Note that ARMED and
DWELL icons are displayed.
3) Battery Level as a percentage. For example, bt:99 means
there is 99% battery power left.
4) Time
5) Date
6) Year
7) Test indicates Attack is in Test mode and will
illuminate the red Test LED when activity is sensed.
8) Pressing A or B again will Arm the camera and
the current delay setting will be displayed.
You can leave Attack in any of the states 1 thru 7 and Attack will
automatically re-arm in about 5 minutes. This allows you to close
the cover and leave the area without triggering an image.
Step 8 – More Features
Video Mode - Daytime Only
Attack can be set to record a 30 second video (day only) when it
records an image. Video recording is enabled by moving the Video
Switch to ON. To disable video recording move the switch to OFF.
Attack
will take an image before it begins recording the video,
thus you
do not give up images to get video.
6