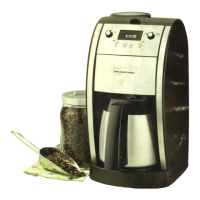
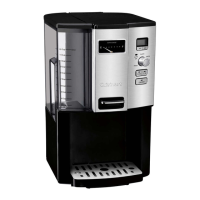
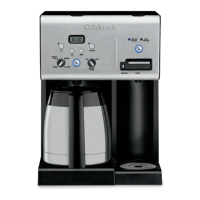
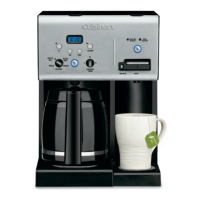
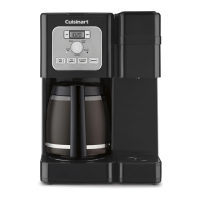
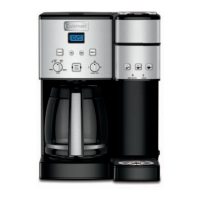
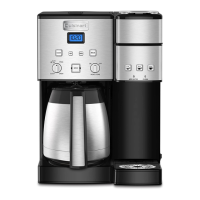
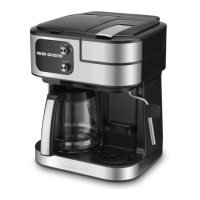
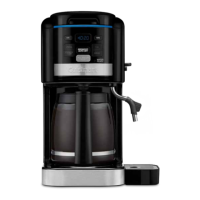
The Cuisinart Coffee PLUS® 12-Cup Programmable Coffeemaker & Hot Water System (CHW-16 SERIES) is a versatile kitchen appliance designed to brew coffee and dispense hot water, either simultaneously or independently. This 2-in-1 system aims to provide a premium coffee experience and convenient access to hot water for various uses.
Function Description:
The primary function of this appliance is to brew up to 12 cups of coffee and to heat and dispense hot water. The coffeemaker side features a programmable brew start time, allowing users to wake up to freshly brewed coffee. It also includes an adjustable heater plate to keep coffee at a desired temperature (Low, Medium, or High) for up to 4 hours after brewing. The hot water system provides on-demand hot water, ideal for tea, hot chocolate, instant oatmeal, or other hot beverages and foods. Both systems are designed for ease of use and incorporate features to enhance the quality and convenience of the user experience.
Important Technical Specifications:
- Capacity: 12-cup coffeemaker.
- Power: Designed for use in 120-volt outlets.
- Water Filtration: Includes two charcoal water filters (one for the coffeemaker and one for the hot water system) to remove chlorine, bad tastes, and odors from tap water. Filters should be changed every 60 days or 60 uses, or more often with hard water.
- Maximum Ground Coffee Capacity: 15 tablespoons for the coffeemaker. Exceeding this may cause overflow.
- Hot Water Dispensing: Dispenses up to 13 ounces of hot water at a time.
- Auto Off: Programmable auto-off feature for the coffeemaker, from 0 to 4 hours after the brew cycle finishes.
- Power Loss Backup System: Provides one-minute protection for programmed information (time of day, Auto On, Auto Off) in case of power interruption.
- Materials: All materials in contact with coffee or water are BPA-free.
Usage Features:
Coffeemaker Controls:
- Clock Display: Shows current time, PM indicator, and "Add Water" indicator. Also displays warming plate indicators (L, M, H).
- Hour and Minute Buttons: Used to set time of day, Auto On, and Auto Off times.
- Prog Button: Programs the brew start time for automatic brewing. An indicator light illuminates when activated.
- Carafe Temp Button: Adjusts the heater plate temperature to Low (L), Medium (M), or High (H) to keep coffee warm. This can be set before or during brewing.
- 1-4 Cup Setting: Improves extraction, flavor, and temperature when brewing fewer than 5 cups.
- Clean Indicator: Illuminates when it's time to decalcify the coffeemaker to remove calcium buildup.
- Brew/Off/Auto Off Button: Turns the coffeemaker on and off. Also used to program the auto-off time (0 to 4 hours after brewing).
Hot Water System Controls:
- Hot Water On/Off Button: Activates and deactivates the hot water system.
- Water Ready Indicator: Flashes while water is heating and becomes solid when water is ready.
- Add Water Indicator: Appears in the LCD display when the hot water reservoir needs refilling.
- Safety Lock: Prevents hot water from being dispensed when in the locked position. Users must slide the switch to the left to unlock before dispensing.
Brewing Coffee:
- Water Filter Insertion: Install charcoal water filter in the coffeemaker reservoir.
- Fill Reservoir: Lift the reservoir cover and pour cold water up to the desired level using the water level indicator.
- Add Ground Coffee: Lift the coffeemaker lid, remove the filter basket, insert a #4 paper filter or permanent filter, and add 1 level scoop of ground coffee per cup (up to 15 tablespoons maximum).
- Position Carafe & Plug In: Place the carafe on the heating plate, ensure covers are closed, and plug the unit into an electrical outlet.
- Set Preferences: Optionally press the "1-4 Cup" button for smaller brews and adjust the "Carafe Temp" button for desired warming plate temperature.
- Start Brewing: Press the "Brew/Off/Auto Off" button.
- After Brewing: Five beeps signal the end of the brew cycle. The reservoir cover may be hot; wait 10 minutes before opening.
- Brew Pause™ Feature: Allows temporary removal of the carafe to pour a cup mid-brew. Removing the carafe for more than 20 seconds may cause overflow.
Using Hot Water System:
- Water Filter Insertion: Install charcoal water filter in the hot water reservoir.
- Fill Reservoir: Open the hot water reservoir cover and fill with water up to the max fill line.
- Heating: Press the "Hot Water On/Off" button. The "Water Ready" indicator will flash during heating and become solid when ready.
- Dispensing Water: Unlock the safety switch (slide left), place a cup on the drip tray, and press the dispensing lever down. The unit dispenses up to 13 ounces. The drip tray can be removed for taller mugs.
- After Dispensing: The unit immediately begins reheating water. The "Water Ready" indicator will flash until the serving temperature is reached again. The "Add Water" indicator will appear if more water is needed.
- Turning Off: Press the "Hot Water On/Off" button. The indicator light will turn off, but "Water Ready" remains lit until water cools.
Maintenance Features:
General Cleaning:
- Always unplug the unit and allow it to cool before cleaning.
- Filter Basket & Permanent Filter: Wash in warm, soapy water, rinse thoroughly, or clean in the upper rack of the dishwasher.
- Carafe & Lid: Wash in warm, soapy water, rinse thoroughly, or place in the upper rack of the dishwasher.
- Base Unit: Wipe with a clean, damp cloth. Avoid immersing the base unit in water or other liquids.
- Housing: Wash fingerprints and blemishes with soap and water or a nonabrasive cleaning solution.
- Heater Plate: Wipe with a clean, damp cloth. Do not use rough, abrasive materials or cleansers.
- Do not dry the inside of the water reservoir with a cloth to avoid lint.
- Do not put water in the unit once the filter basket is removed; wipe the area with a damp cloth.
Decalcification (Coffeemaker):
- The "Clean" light will flash when decalcification is needed.
- Fill the water reservoir with a mixture of one-third white vinegar and two-thirds water.
- Press and hold the "Clean" button until the LED indicator flashes, then release.
- Allow one cycle to complete. The coffeemaker will shut off after 5 beeps.
- If the "Clean" light still flashes, repeat with a fresh solution.
- After cleaning, run one cycle of fresh cold water through the unit before brewing coffee.
- To exit clean mode, press the "Clean" button again.
Decalcification (Hot Water System):
- Recommended twice a year.
- Dispense all water until "Add Water" displays.
- Add 32 oz. of white vinegar to the hot water reservoir. Turn the unit on to heat the vinegar.
- Dispense 16 oz. of vinegar and dispose. This fills the inner tank.
- Let the vinegar solution sit for 20 minutes (do not dispense).
- After 20 minutes, turn the unit off and allow the vinegar to cool.
- Drain the internal reservoir by removing the water release tab from the bottom of the unit.
- Replace the tab when drained.
- Refill the reservoir with water and drain again to flush thoroughly. Replace the tab.
- Continue filling and dispensing water until the vinegar taste/smell is gone.
Emptying Hot Water Reservoir:
- If not used for over a week or for storage, empty the reservoir when the unit is cool.
- Place the unit over a sink and pull the water release tab from the bottom to drain. Replace the tab when empty.
- Caution: Do not empty when there is hot water in the unit to avoid injury.
Safety Features:
- Important Safeguards: Comprehensive list of safety precautions, including warnings against touching hot surfaces, immersing the cord/plug/base in liquids, operating with damaged parts, and using non-recommended attachments.
- Operating Notice: Warnings about potential filter basket clogging due to finely ground coffee, multiple paper filters, or improper cleaning.
- Warning: Risk of Fire or Electric Shock: Do not remove the base panel; no user-serviceable parts inside. Repairs should be done only by authorized personnel.
- Polarized Plug: Designed to fit into a polarized outlet only one way to reduce the risk of electric shock.
- Appliance Garage Warning: Do not operate or store in an appliance garage with the unit plugged in, as this could create a fire risk.