Assembly Tip: To avoid scratching grill and to protect floor/patio surfaces, reuse cardboard packaging and lay
parts on top of while assembling.
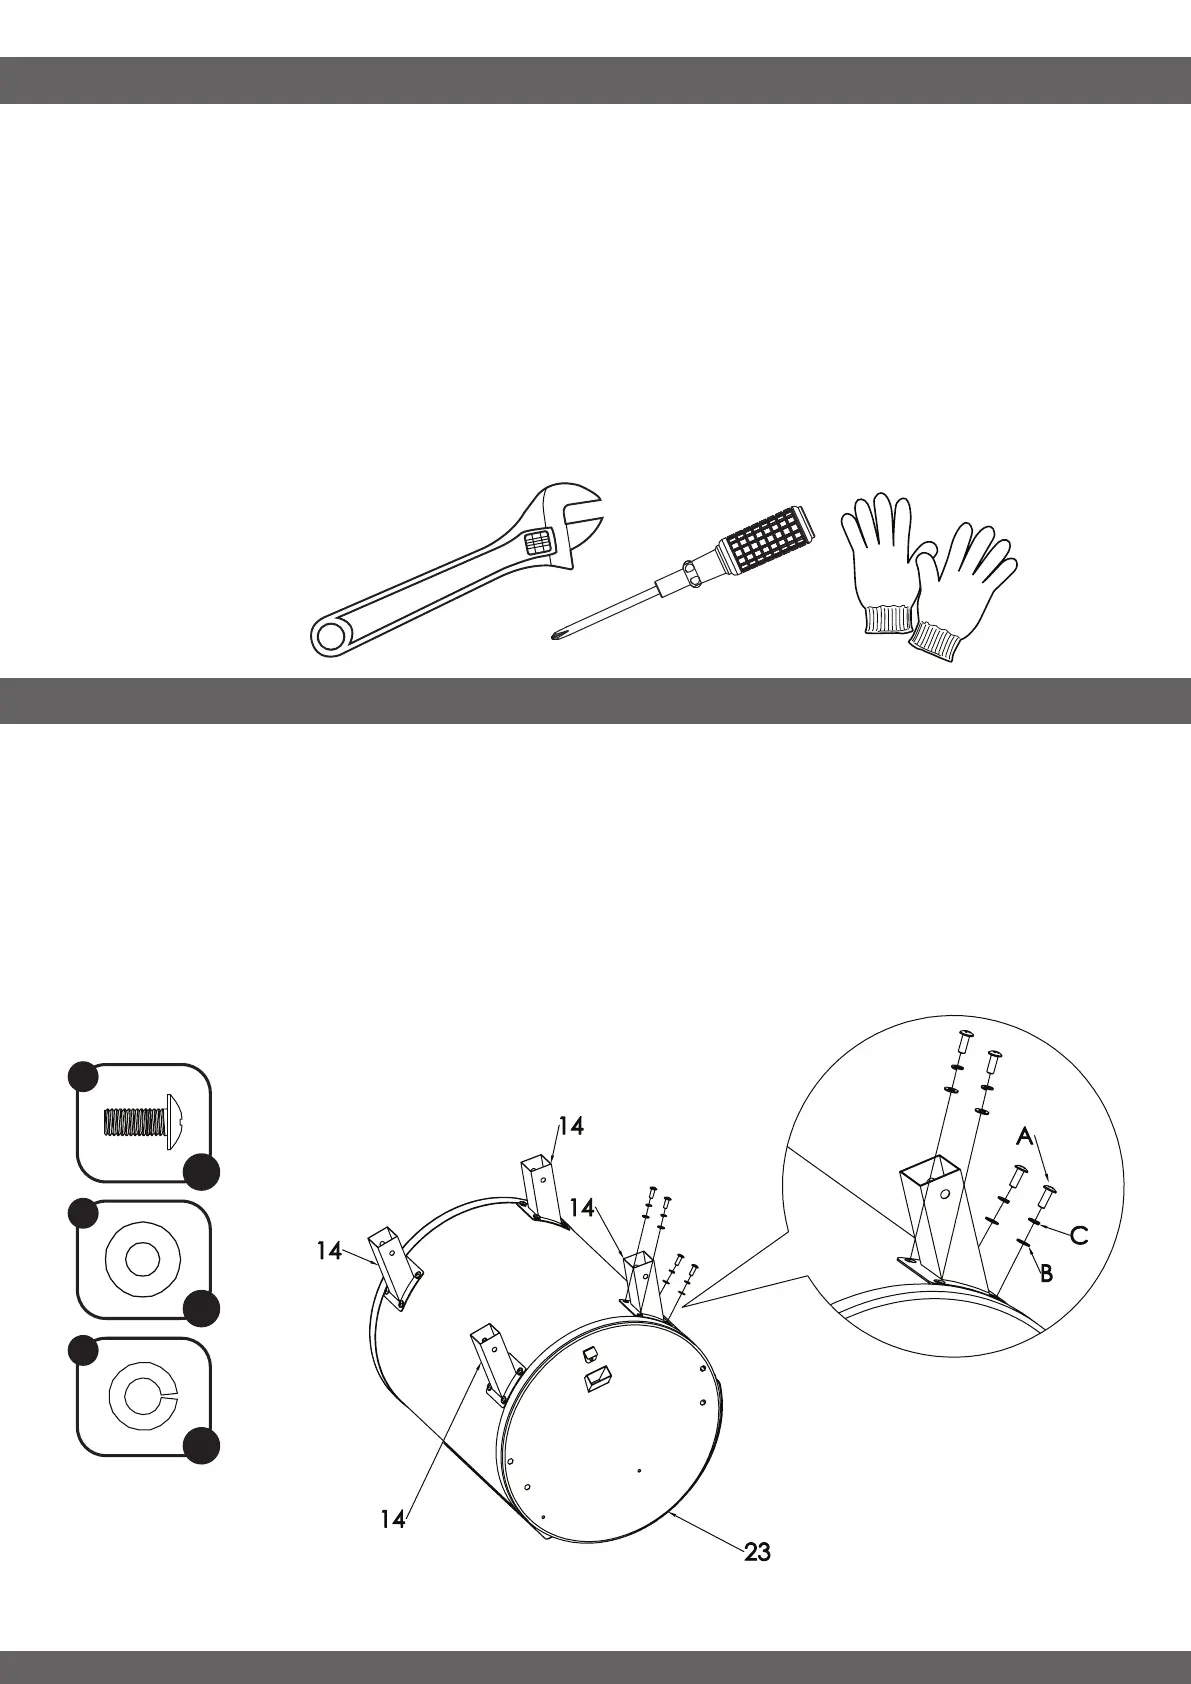
STEP 1 - ATTACHING LEG BRACKETS
-----------------------------------------------------------------------------------
ASSEMBLY INSTRUCTIONS
Some parts may contain sharp edges. Wear protective gloves during assembly and set up. Read and follow
all safety statements, warnings, assembly instructions and use and care instructions before attempting to
assemble and use.
Before you Begin: Unpack all the components and verify that everything is present before beginning assembly.
Several components are packed inside the cooking chamber, it is important to remove these as well.
If any part is missing or damaged, DO NOT attempt to assemble the product.
Estimated assembly time: 1 hour.
NOTE: During assembly two people will be required to lift the Main Body (23) onto the cart.
Tools required for assembly: Wrench, Phillips Head Screwdriver and Gloves (NO TOOLS ARE INCLUDED).
ASSEMBLY PREPARATION
8
A
B
C
x 16
x 16
x 16
• Place the cardboard on the floor to prevent scratching the unit. Lay the main barrel on its back, on the
cardboard. Attach the Leg Brackets (14) to the Main Barrel (22) using x4 Screws (A), Locking Washers
(C), and Washers (B), through the four threaded holes as shown. Repeat installation for each Leg Bracket.
NOTE: Fasten screws of the support legs only half-way to allow easier installation of the bottom shelf in the
next step.
NO TOOLS ARE
INCLUDED