Do you have a question about the Cuisinart GAS9456AS and is the answer not in the manual?
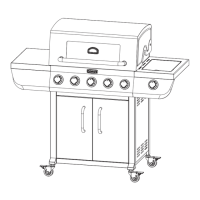
Connect the front panel to the frame using keyholes and tighten screws.
Connect a side panel to the frame and secure it with screws.
Loosen screws, attach the left side panel, and then tighten all screws.
Remove existing screws, attach the cart brace, and tighten it.
Attach the cart base, ensuring tank brackets are correctly oriented.
Loosen, remove, attach, and tighten screws for the back panel.
Connect the cart base to the back legs and tighten the mounting screws.
Attach the left side panel and cart brace, then tighten all four screws.
Attach the casters securely to the grill legs and lock them in place.
Carefully set the partially assembled cart upright onto the installed casters.
Loosen bottom screws, install the bar, and tighten the screws.
Carefully position the main grill body onto the assembled cart base.
Align grill body, rotate brackets, and tighten four screws.
Align grill body, rotate brackets, and tighten the remaining screws.
Remove hardware, attach side control panels, and tighten screws.
Loosen screws, attach side control panels, and tighten them securely.
Loosen screws, attach left side table using keyholes, do not tighten yet.
Install the specific mounting screw removed previously and tighten it.
Install screws/washers, ensure panels align, then tighten all screws.
Loosen screws, attach right side table using keyholes, do not tighten yet.
Install the screw removed in Step 14 and tighten it to secure the component.
Align panels and tighten screws from steps 20 and 22.
Install the screw removed in Step 15 to properly secure the side panel.
Remove burner, install valve, rotate, and tighten screws for the valve.
Attach the side burner control knob onto the valve stem.
Attach the wire clip to the side burner for the ignition system.
Attach the ignitor wire to the electrode to complete the ignition circuit.
Place the side burner grate onto the side burner assembly.
Loosen screws, attach the heat shield, and tighten securely.
Install the grease tray and grease cup through the back of the grill.
Install heat tents, cooking grates, and the warming rack into the grill.
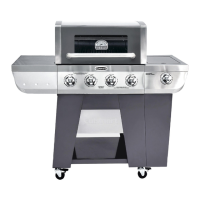
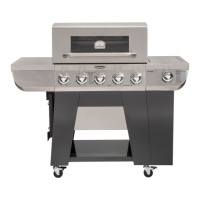
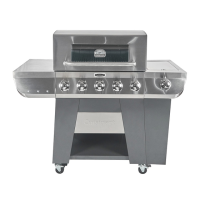
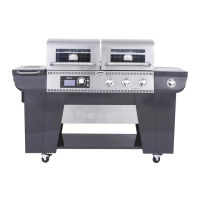
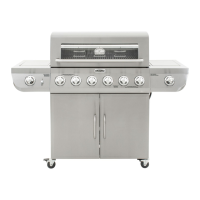
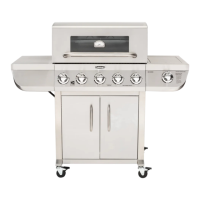
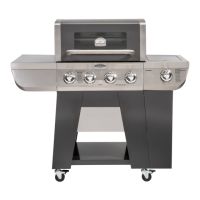
| Type | Gas Grill |
|---|---|
| Material | Stainless Steel |
| Grill Material | Stainless Steel |
| Fuel Type | Propane |
| Ignition System | Electronic |
| Ignition Type | Electronic |
| BTU | 45, 000 BTU |
| BTU Output | 45, 000 BTU |