Do you have a question about the Culina CUL57PGSS and is the answer not in the manual?
Crucial warnings about fire hazards and safe operation practices.
Specific warnings regarding explosive hazards from certain food heating practices.
Guidelines and warnings regarding children's interaction with the appliance.
Broad safety advice for using the oven, including object placement and door handling.
Essential information and precautions related to the electrical connection and supply.
Details on connecting the appliance to the power supply and potential hazards.
Instructions for cleaning the oven cavity, surfaces, and door glass.
Reiteration of installation requirements and electrical connection safety checks.
Details for the first method of installing the oven into a cabinet.
Details for the second method of installing the oven into a cabinet.
Specific ventilation cut-outs and requirements for oven installation.
Technical specifications of the oven, including dimensions and capacity.
Explanation of the digital display and its icons for timer functions.
Instructions for setting and operating the oven's timer functions.
Details the initial power-on procedure and standby mode of the timer.
Steps for starting the oven timer and setting the system time.
Guidance on selecting oven functions using the selector knob.
Overview of the four available cooking functions and their descriptions.
Explanation of the thermostat knob for regulating oven temperature.
Recommendations for optimal cooking based on food packaging and oven performance.
Important cautions regarding oven use, hot surfaces, and cleaning.
Step-by-step guide to safely replace the oven's internal light bulb.
Instructions for safely removing, reinstalling, and servicing the oven door.
Procedure for removing and reinserting the oven door's internal glass panel.
Recommendations for periodic checks and technical inspections of the oven.
Guidance on the correct disposal of the appliance and its packaging according to WEEE directives.
This document provides comprehensive instructions for the CUL57PGSS oven, covering its functions, usage, and maintenance. It emphasizes safety precautions throughout, from installation to operation and cleaning.
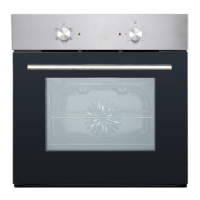
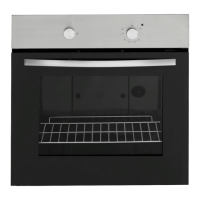
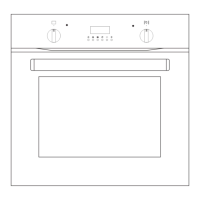
The CUL57PGSS oven is designed for domestic household use and can be built into a standard kitchen cabinet or housing unit. It offers four cooking functions, allowing users to select the appropriate mode for different types of food. The oven features a thermostat control knob for precise temperature regulation, ranging from 50°C to 250°C. A tangential cooling fan is integrated to maintain stable internal temperatures and keep external surfaces cooler during operation, continuing to run for a period after use until the oven is sufficiently cooled.
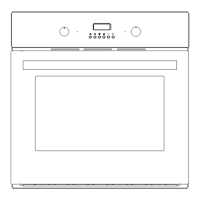
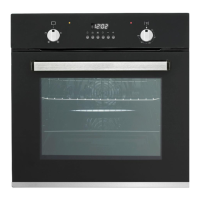
The control panel includes an oven function selector knob, a power lamp, an alarm button (K1), cooking time setting button (K2), cooking end time setting button (K3), system time setting button (K4), decrease button/ring selection button (K5), increase button (K6), heating lamp, thermostat control knob, and a digital tube display.
The available cooking functions are:
The oven also incorporates a programmer/timer with three statuses: standby, select function, and working. Users can set system time, alarms, cooking time, and cooking end time. The timer provides visual cues through icons on the digital display, such as "Auto" function icon, "Oven in use" icon, second icon, and alarm icon, to indicate the current status and programmed settings. An intermittent sound signal alerts users when an alarm or cooking time has ended.
Before first use, it is crucial to clean the oven thoroughly. Users should pre-heat the oven to the desired cooking temperature before placing food inside, especially when not using the fan oven mode, in which case an additional ten minutes of cooking time is recommended. All unnecessary oven accessories should be removed before cooking. Cooking trays should be placed in the center of the oven, leaving space between multiple trays for proper air circulation. Oven trays should not be placed directly on the base of the oven or covered with aluminum foil, as this can lead to thermal accumulation and potential enamel damage.
When opening the oven door, caution is advised to avoid contact with hot parts and steam. The oven light remains on during cooking, allowing users to monitor dishes with minimal door opening.
The timer functions allow for flexible cooking schedules:
All timer settings are confirmed automatically after a 5-second delay if no further buttons are pressed. Settings can be queried or reset during operation. The "AUTO" function icon indicates when a program is active.
Regular cleaning is essential for maintaining the oven. The oven should be cleaned after every use, with the oven light switched on for better visibility. The oven chamber should be cleaned with warm soapy water and a soft cloth or sponge, then wiped dry. Abrasive cleaners or metal scrapers should not be used on the oven door glass or cavity surfaces, as they can cause scratches or damage the enamel. Steam cleaners are also not recommended.
Any stains on the oven bottom are typically from food splashes and should be cleaned regularly. Selecting appropriate cooking temperatures, functions, and using adequately sized dishes with a drip tray can help prevent such stains.
For external parts, warm soapy water and a soft cloth or sponge are suitable. If using an oven cleaner, verify its compatibility with the appliance manufacturer. Damage caused by unsuitable cleaning products may not be covered under warranty.
| Fuel Type | Gas |
|---|---|
| Number of Ovens | 1 |
| Model Number | CUL57PGSS |
| Oven Capacity | 5.7 cu. ft. |
| Number of Oven Racks | 2 |
| Color | Stainless Steel |