WWW.CURRENT-USA.COM
4
1. Before removing your Prime Chiller from the box, please note any exterior shipping damage
to the box. It is strongly recommended to keep the box and packaging material in the
unlikely event there is shipping damage or service is required.
2. Remove the chiller and controller from the box and inspect thoroughly for any signs of
damage, even if the box does not show damage. If you notice any damage (cracked or bent
cover, damaged condenser, fins, etc...) please stop and contact your dealer immediately.
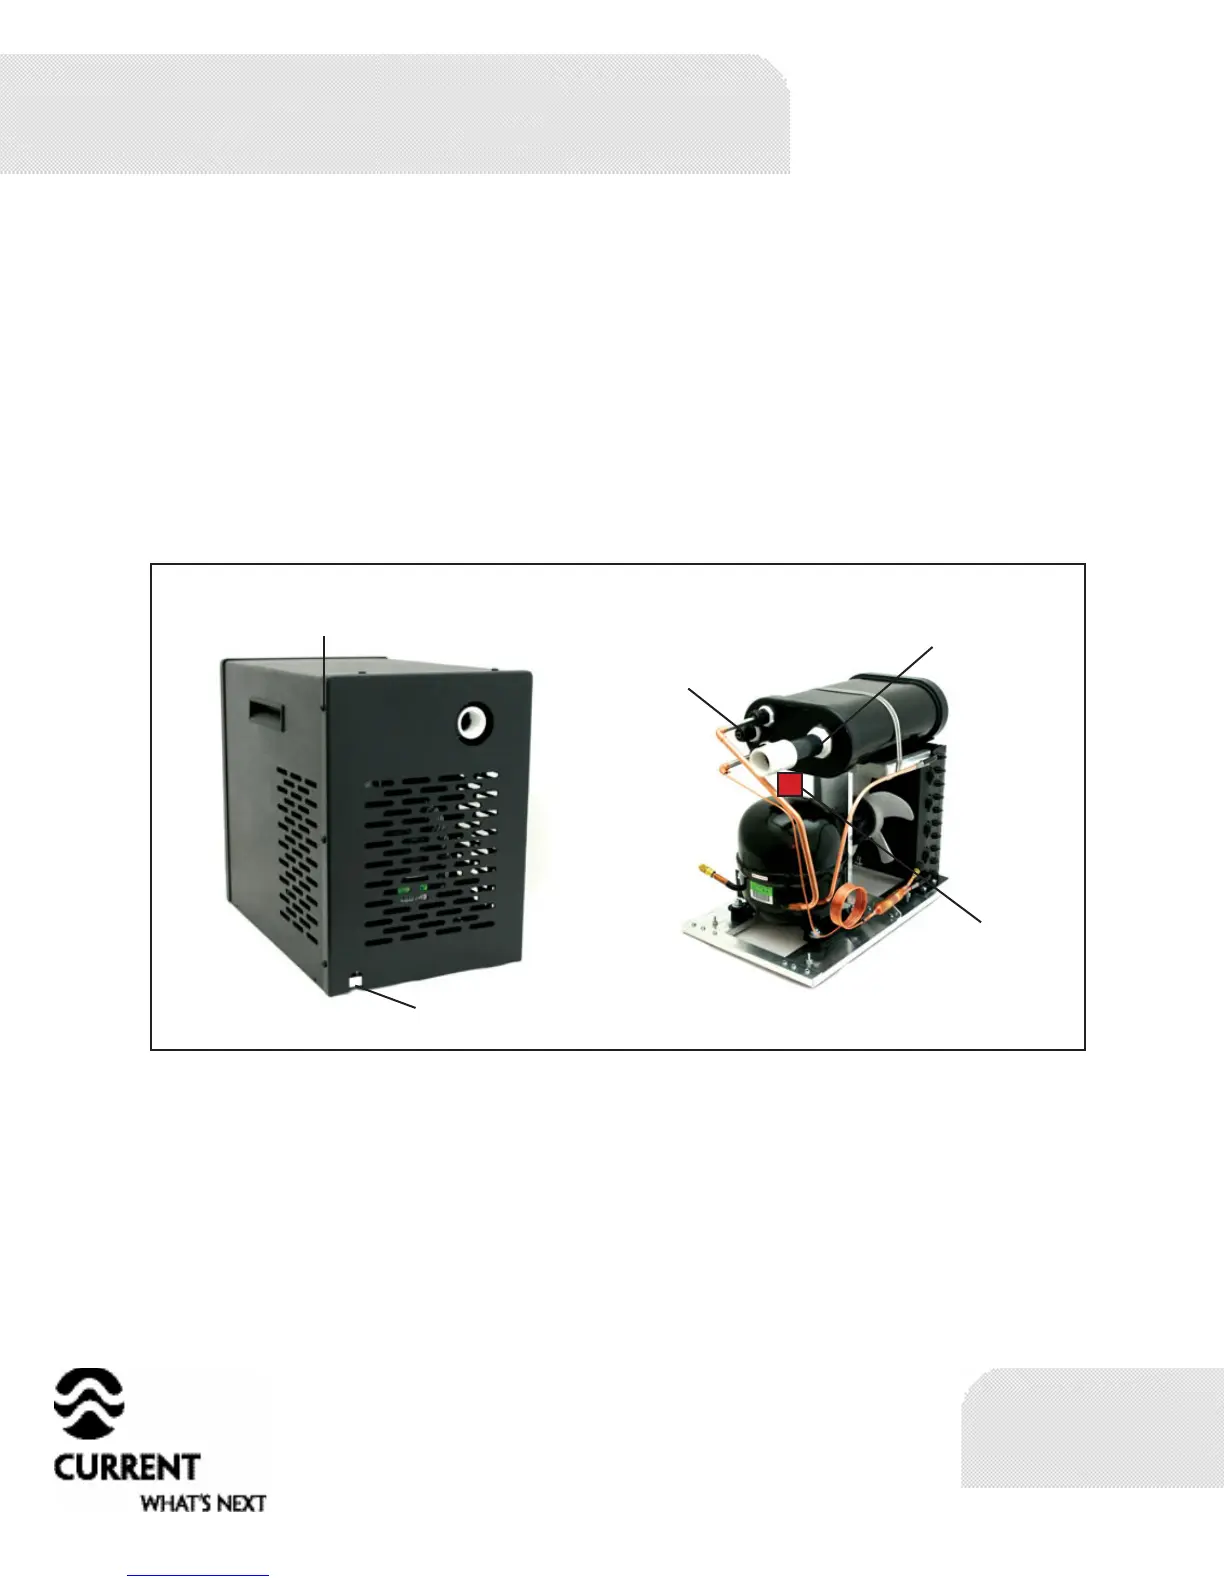
3. Remove the 8 screws that hold the front cover in place and tilt the chiller up to remove
the wooden brace from underneath. The wooden brace is used to secure the motor during
shipping. Keep wooden brace with other packaging materials.
With the front panel still removed
1. Plug the chiller’s power cord (not the controller) into 120V wall outlet and check to make
sure that both the fan and compressor come on. Do not leave chiller plugged in for more
than 2 minutes.
2. The temperature sensor for the controller MUST be installed inside the sensor port of
the chillers evaporator housing. Failure to install the sensor into this port may cause an
inaccurate temperature reading and, in the event of low or no water flow, may cause damage
to the chiller. Locate and install the temperature sensor for the controller. Insert sensor
completely into the sensor port. It is not necessary to remove the compression fitting
holding the sensor port in place. Use the supplied piece of cork tape to hold the sensor in
place by wrapping the tape around the entrance to the sensor port. This will isolate the
temperature sensor from ambient heat.
Chiller installation
8 Screws Holding
Cover in Place
P o w e r c o r d
Location
Chiller with Cover
Removed
Te mp e r at u r e
Sensor Port
Inlet or Outlet
Remove wooden
shipping brace
here before
operation