INSTALLATION WALKTHROUGH:
For more information log onto www.curtmfg.com, & for helpful towing tips log onto www.hitchinfo.com
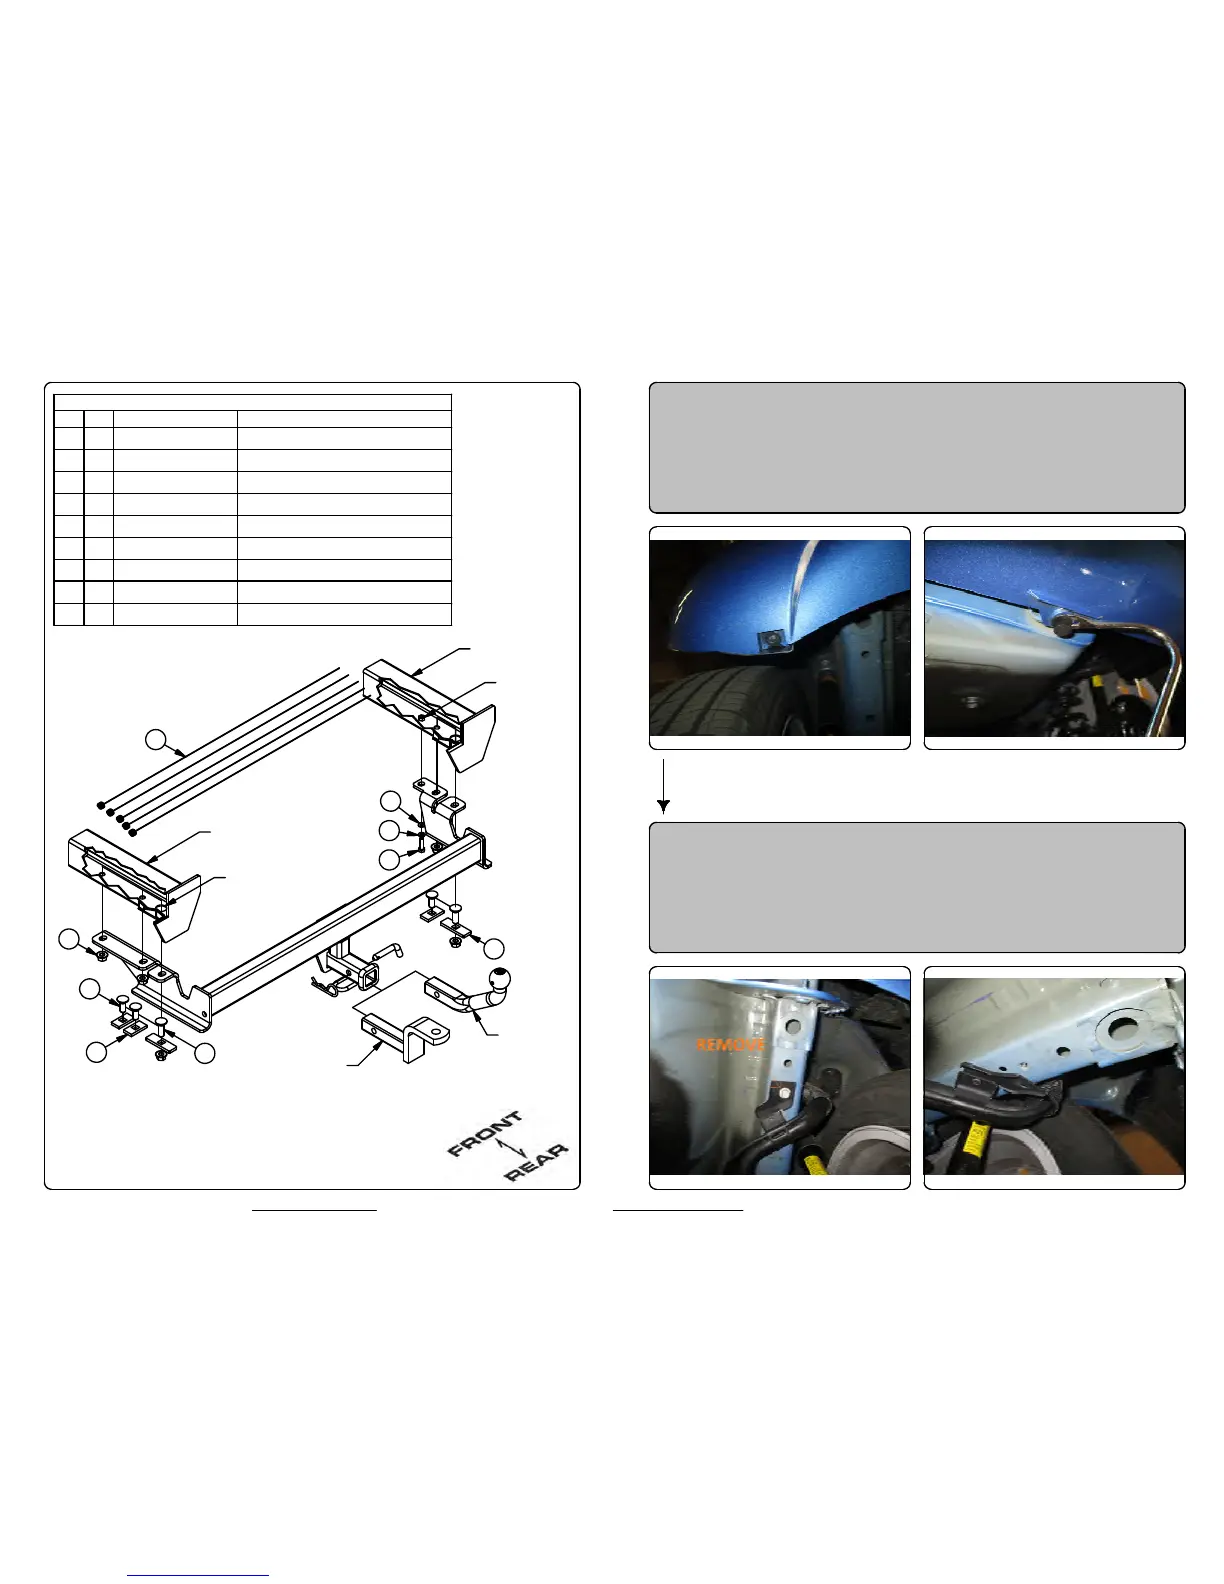
Parts List
DESCRIPTIONPART NUMBERQTYITEM
.250 x 1.00 x 2.00" SQUARE HOLE SPACERCM-SP12
31
.250 x 1.00 x 3.00" SQUARE HOLE SPACERCM-SP622
CARRIAGE BOLT1/2-13 x 1 1/4, GR833
CARRIAGE BOLT1/2-13 x 1 1/2, GR8
24
HEX HEAD BOLT (CLASS 10.9)M8 - 1.25 x 30 HEX BOLT1
5
WASHER1/4"16
LOCK WASHER5/16"
17
HEX FLANGE NUTHFN 1213, GR8
5
8
1/2" x 30" FISHWIRE1_2 x 30 FISHWIRE
5
9
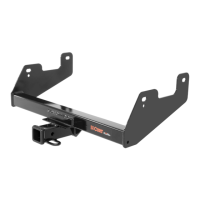
1. Remove two (2) push button fasteners and two (2) hex bolts
from vehicle fascia using a 7mm socket. Save and set aside
for reinstall later.
2. Remove one (1) M8 bolt on passenger side frame rail using
a 13mm socket. Pull plastic away from frame rail as shown
in photo below.
6
7
5
1
4
3
8
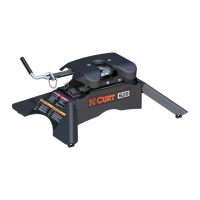
ENLARGED
ACCESS HOLE
(BOTH SIDES)
DS FRAME RAIL
PS FRAME RAIL
9
EXISTING
WELDNUT
2
EURO MOUNT
OPTION AVAILABLE
#45571 (1 7/8" BALL)
#45572 (2" BALL)
DESIGNED FOR USE WITH
BALL MOUNT #45521