INSTALLATION WALKTHROUGH:
For more information log onto www.curtmfg.com, & for helpful towing tips log onto www.hitchinfo.com
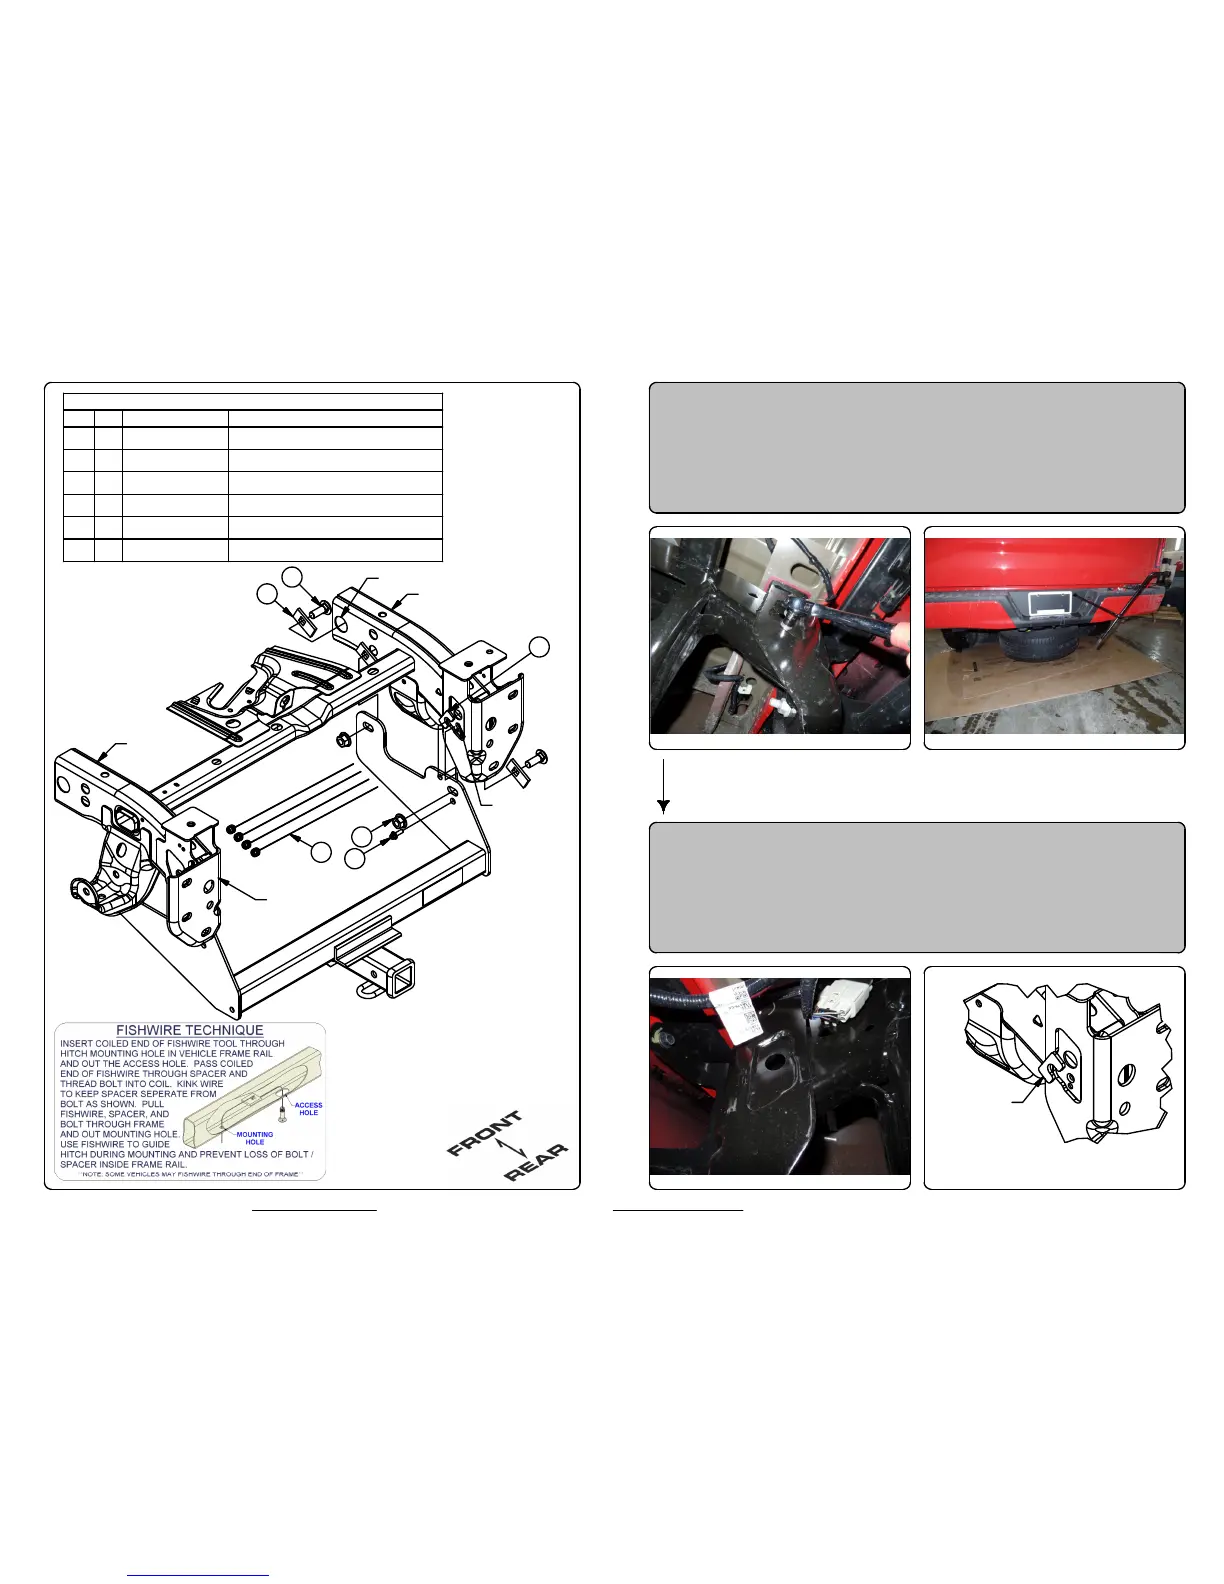
Parts List
DESCRIPTION
PART NUMBER
QTY
ITEM
.188 x 1.00 x 2.00" U-SHAPE SPACERCM-SP2721
.250 x 1.25 x 2.50" SQUARE HOLE SPACERCM-SP9
62
CARRIAGE BOLT5/8-11 x 1 3_4, GR843
HEX FLANGE NUT5/8-11
44
5/8" FISHWIRE5_8 FISHWIRE4
5
M8-1.25 x 25 HEX FLANGE BOLTM8 - 1.25 x 25 HFB16
END OF FRAME
DRIVER SIDE
FRAME RAIL
GROUND CABLE
MOUNTING
LOCATION
EXISTING ACCESS HOLE (BOTH SIDES)
PASSENGER SIDE
FRAME RAIL
5
4
1
2
3
1. If present, remove the grounding cable from
the rear of the passenger side frame rail.
Return fastener to owner. Lower spare tire
for installation.
6
TAPE
TO
FRAME
2. For the rearward most holes, tape a U-shaped spacer
into the recess in the frame. Thread the forward most
fishwires through another rectangular spacer on each
side and then thread all of the fishwires through their
appropriate mounting holes as shown above.
(BOTH SIDES)