Arc Trainer
®
Right Foot Plate
Kit No. 610AK002
Installation Instructions
NOTE: This instruction sheet describes how to replace
the foot plate on the Arc Trainer 600A/610A.
Tools Required
• 3/16” Allen wrench
1. Read and understand all instructions thoroughly
before installing this kit.
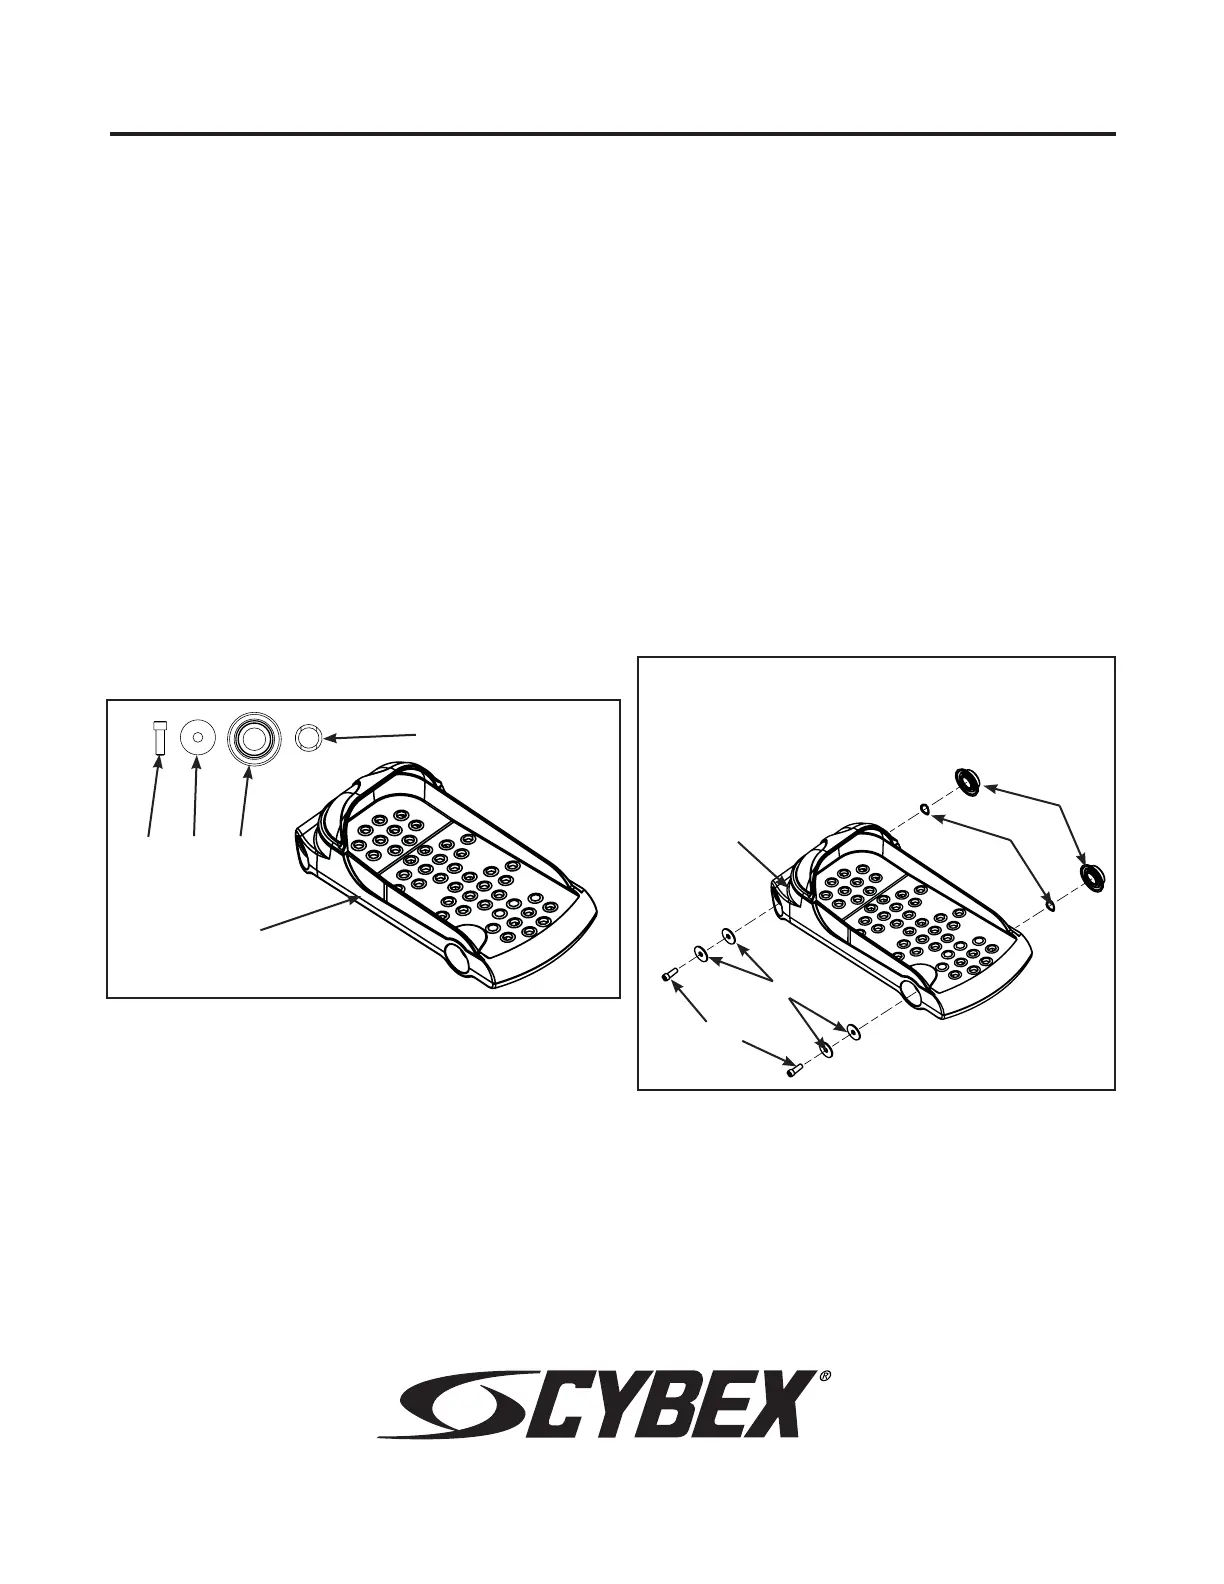
2. Verify you received the following (see Figure 1):
A. Right foot plate assembly (1), 610AK002 (this kit)
B. Flat washer (4), HS307602
C. SHCS .250-20 x .75 (2), HX622815
D. Spacer (2), PL-17279
E. Loctite (not shown), YA000201
F. Wave washer (2), HS427100
4. Install new (right) foot plate assembly.
A. Install the new spacers (D) and wave washers (F)
onto the foot plate shaft as shown in Figure 2.
B. Slide the new foot plate (A) onto the foot plate
shaft.
C. Place a drop of loctite (E) on one of the SHCS
(C). Place another drop of loctite in the shaft
(where the SHCS will be tightened into).
D. Install two flat washers (B) and SHSC (C) and
securely tighten.
E. Repeat steps 4C and 4D for the other washers
(B) and SHCS (C).
Figure 1 (right foot assembly)
Figure 2 (right foot assembly)
A
3. Remove (right) foot plate assembly.
A. Turn the main power switch above the power
inlet to the off (0) position.
B. Using a 3/16” Allen wrench, remove the two
SHCS securing the (right) foot plate. NOTE:
The right and left foot plates are not
interchangeable.
C. Remove all hardware securing the old foot plate.
F. Turn the main power switch to the on (I)
position.
G. Test the unit to verify proper operation.
C
A
F
D
D
C, E
B
NOTE: Add a drop of
loctite (E) into the shaft
(not shown) where the
SHCS is tightened into.
B
F
Cybex
®
and the Cybex logo are registered trademarks of Cybex International, Inc.
Arc Trainer
®
and its mark are registered trademarks of Cybex International, Inc.
10 Trotter Drive Medway, MA 02053 • 508-533-4300 • FAX 508-533-5183 • www.cybexinternational.com • techhelp@cybexintl.com
techpubs@cybexintl.com • Copyright © 2008, Cybex International, Inc. All rights reserved • 610A-393 B • March 2008

 Loading...