Figure 18
Lower
Display
Cable
Upper
Display
Cable
Console
Assembly
BHSCS
(4)
Lockwasher
(4)
Main Frame
Assembly
Coax & Power
Cables
D
D
Figure 19
(Q)
Back
Cover
Tab
Tab
NOTE: Press in bottom of tabs and rotate out.
Figure 20
(Q)
(V)
(T)
Monitor
Mount
(U)
RJ-45
Cable
(F)
Power
Cable
(F)
Coax
Cable
Monitor
Bracket
C. Insert the power cable end of (F) through
hole on left side of monitor mount. See
Figure 20.
D. Insert RJ-45 cable and the coax end of (F)
through hole on right side of monitor mount.
See Figure 20.
E. Using a 3 mm Allen wrench, secure the
monitor bracket to the monitor mount
using the four mounting screws (T), four
lock washers (U) and four flat washers (V).
See Figure 20.
F. Insert the power cable, coax cable and
RJ-45 cable into the monitor as shown in
Figure 21. NOTE: Use of the CSAFE port is
optional and requires a CSAFE cable and
device.
B. Plug the heart rate cable connector from
the console assembly to the heart rate
connector from the handle assembly.
See Figure 5.
NOTE: Ensure cable connectors are securely
fastened.
C. With 8” of coax and power cables exiting
the top of the console assembly, pull the
extra coax and power cables out of the
bottom of the main frame.
NOTE: Exactly 8” (20 cm) of cable must exit
the top of the monitor mount.
D. Using a 7/32” Allen wrench, attach the two
BHSCS securing the handle assembly to
the console assembly. See Figure 5.
E. Attach the console assembly to the main
frame assembly and hand thread each of
the four BHSCS and four lockwashers
removed in step 4A. See Figure 4.
NOTE: Confirm that no cables are pinched
lowering the console.
F. Securely fasten the four BHSCS using a
7/32” Allen wrench.
15. Install monitor
A. Locate monitor (Q), four mounting screws
(T), four lock washers (U) and four mounting
washers (V).
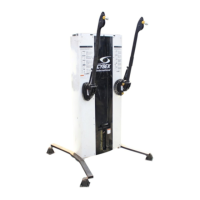
14. Attach Console Assembly.
A. Plug the upper display cable into the lower
display cable in the main frame assembly.
See Figure 18.
B. Remove the back cover from monitor (Q) by
pressing the bottom tabs of the cover in and
rotating out. See Figure 19 .

 Loading...