PRESS!
2
1
3
A
y
o
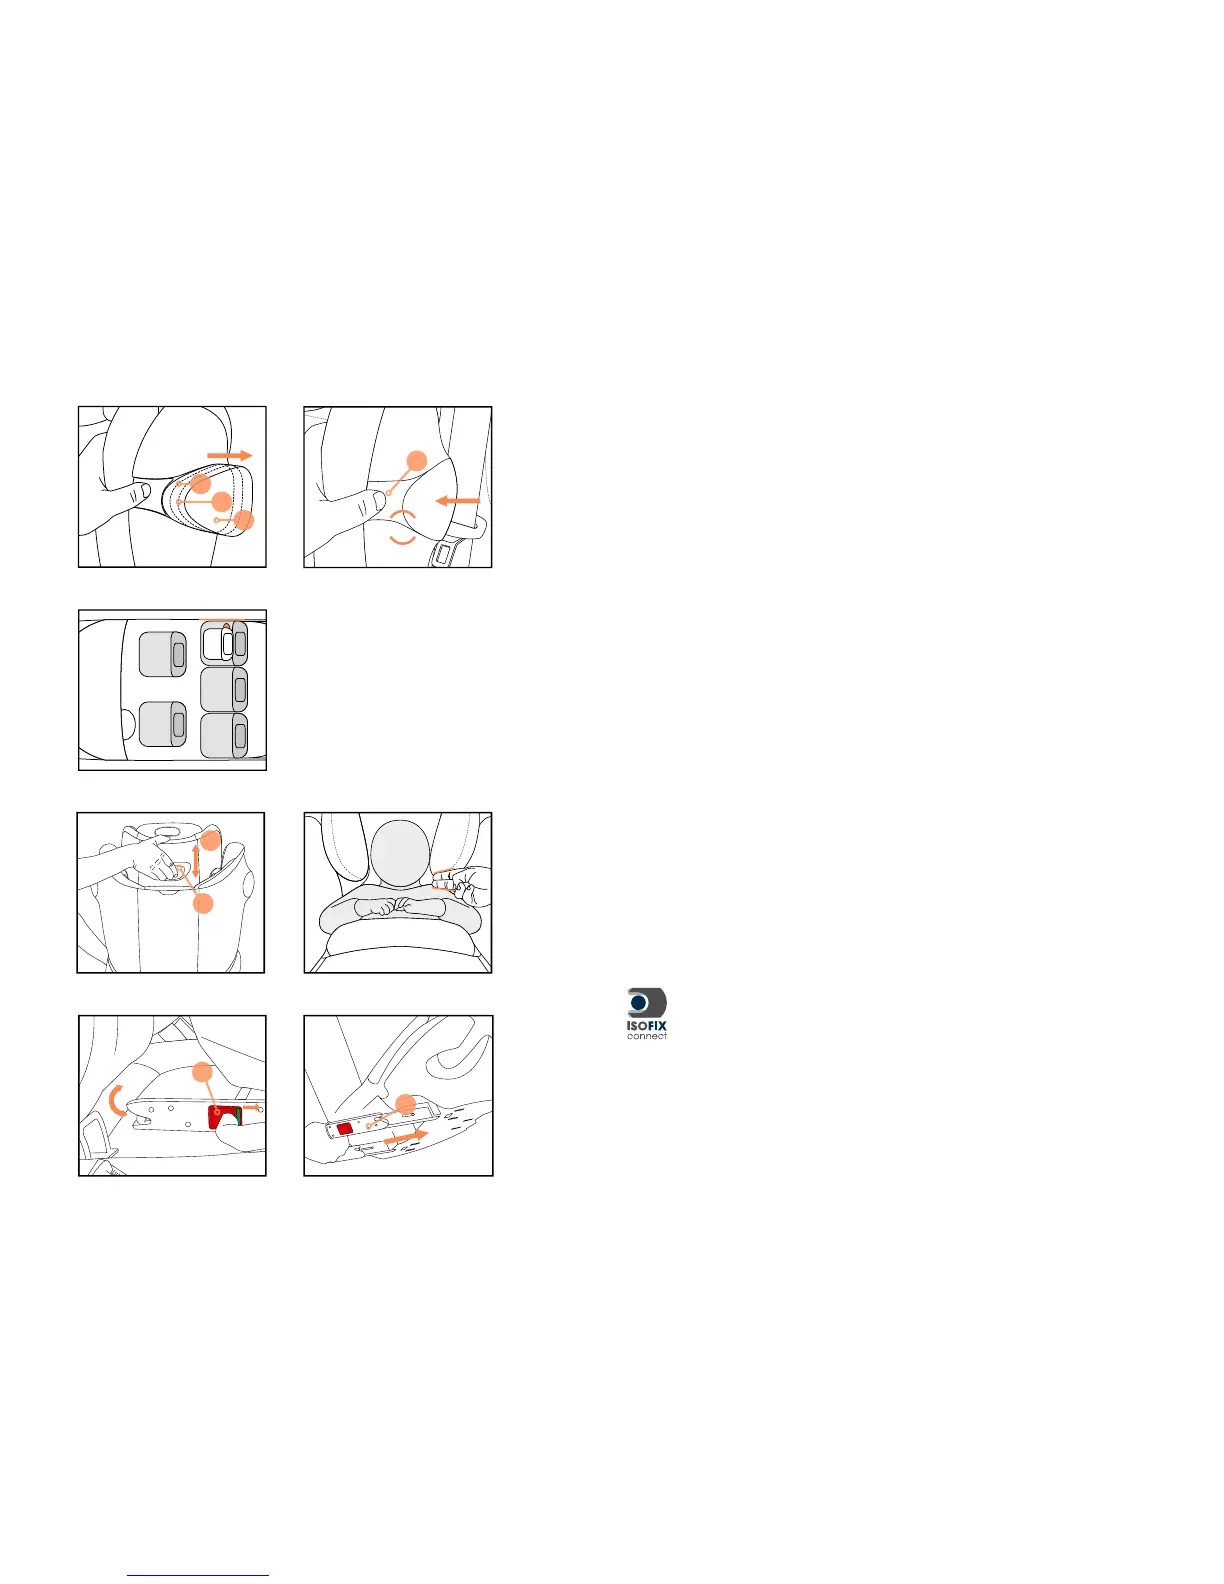
ACTIVATING THE L.S.P.
The “Linear Side-impact Protection” system (L.S.P.) can be extended in two steps by
pressing the L.S.P. button(s).Together with the initial position, this provides a total of
three different L.S.P. settings.
To push the L.S.P. back into the housing, press the L.S.P. button again and push the
L.S.P. back into the starting position.
Note! Always activate the L.S.P. on the side of the seat facing the car door.
REMOVAL OF THE CYBEX SOLUTION M-FIX
Perform the installation steps in the reverse order.
Note! By folding in the locking arms (o), you are not just protecting the vehicle seat
but also the locking arms of the ISOFIX Connect system from dirt and damage.
• Unlock the ISOFIX locking arms (o) on both sides by pushing the red
release buttons (y) and pulling them back simultaneously.
• Pull the seat out of the ISOFIX guides (u).
• Rotate the locking arms (o) 180°.
• Operate the adjustment lever (v) on the frame (d) of the CYBEX SOLUTION M-FIX
and push the locking arms in as far as they will go.
h
e
Note! Only an optimally adjusted headrest (e) can offer your child maximum
protection and comfort while ensuring that the diagonal belt can be tted smoothly
(f). The height of the CYBEX SOLUTION M-FIX can be adjusted to one of twelve
positions.
ADAPTING TO BODY SIZE
• The seat can then be adjusted to your child’s body simply by using the adjustable
headrest (e). To do this, pull the adjustment level (h) upwards to unlock the
headrest (e).
• Adjust it so that there is space for two ngers between the lower edge of the
headrest (e) and the shoulder of the child.