User Instructions Cyrus MR3
4
GB
GB
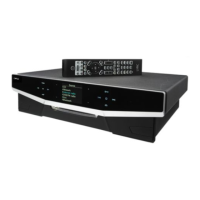
THE
CYRUS X-PANDER
RF HANDSET
Key to the X-pander drawing (Fig.5):
1. Balance key 6. Track / Preset Down
2. Indicator light 7. Mute / Standby key
3. Volume +(Up) key 8. Zone 1 select key
4. Volume -(Down) key 9. Zone 2 select key
5. Track / Preset Up key 10 Zone 3 select key
Setting up RF channels on the
MR3
To avoid any interaction between neighbouring MR3 installations, the MR3
offers a choice of four RF channels for remote commands.
As delivered, the MR3 main unit is set to Channel Zero. This will not normally
need alteration. At installation and when the batteries are replaced, the X-
pander remote control must also be set to channel 0 to ensure communication
between the two units..
Inserting the Batteries and setting RF channel 0 for
the
X-pander
remote control
CAUTION:- Inserting the batteries in the X-pander handset forms part of the
RF Channel setup procedure
-
avoid touching the handset buttons when
inserting the batteries.
1.
Remove the battery compartment cover.
2.
Hold the handset by the edges and insert the supplied AAA batteries
into the battery compartment. Observe polarity markings on the
batteries and battery compartment.
3.
Replace the cover.
4.
Press the mute key.
Changing the
MR3
RF
Channel setting
1.
Switch the MR3 off at the rear panel power switch.
2.
Wait 30 seconds for the internal memory to discharge.
3.
Hold down the key shown in the list to select a new RF channel and
switch the power on.
Standby......................Select channel 0
Zone 1........................Select channel 1
Zone 2........................Select channel 2
Zone 3........................Select channel 3
4.
The MR3 will run its set-up routine and the indicator above the key will
flash three times before the MR3 enters Standby mode. The RF
Channel is now reset.
Caution:
If the RF Channel is changed at the MR3, the X-pander remote
control must also be changed to the same channel number. Failure to do this
will mean that the handset will not be able to communicate with the MR3 main
unit.
Changing the
X-pander
RF
Channel setting
1.
Remove the battery compartment cover.
2.
Remove the batteries and wait two minutes for the internal memory to
discharge.
3.
Hold the handset by the edges and insert the supplied AAA batteries
into the battery compartment. Observe polarity markings on the
batteries and battery compartment.
4.
Replace the cover.
The first key pressed will now set the RF channel as follows-
Mute ...........................Select channel 0
Zone 1........................Select channel 1
Zone 2........................Select channel 2
Zone 3........................Select channel 3
The RF channel setting will now be stored by the remote control.
Handset Indications
The X-pander has two features to indicate normal functioning.
1.
When a handset button is pressed, the Indicator light
b
flashes to show
that a command has been sent.
2.
You will also hear a ‘beep’ from the speakers so that you know you are
in the correct Zone.
3.
When the MR3 receives a command from a remote Zone, the indicator
on the front panel above the relevant Zone key will flash.
Selecting or Changing a Zone
Press once on the required Zone key
h
,
i
,
p
If you are in the correct Zone you will hear a short beep.
If the system is in STANDBY, this operation will also bring the MR3
installation out of Standby mode.
Changing the Source
Press and hold down the appropriate Zone key
h
,
i
,
p
for about three
seconds. The source will change from CD to Tuner or vice versa.
You will hear a single beep followed by a double beep.
Volume Adjustment
Press the + key
c
to increase the volume level.
Press the - key
d
to reduce the volume level.
There is no beep with these operations.
Channel Balance Adjustment
1. Press the balance key
a
once .................................................Single Beep
2. Press the + key
c
to shift the balance to the right.
Press the - key
d
to shift the balance to the left.
3. Press the balance key
a
once .................................................Single Beep
The new balance setting is now stored.
NOTE:- The front panel display will change during balance setting (see Fig.9)
To reset the Channel Balance to ‘central’:
Press and hold the balance key
a
down for a few seconds
A single beep is followed by a double beep
Muting a Zone
Press the Mute key
g
......................................................................Single Beep
The sound in your Zone is now muted.
To unmute a Zone:
Press the Mute key again or............................................................ Single Beep
Press the + key
c
................................................................................. No Beep
The volume will restore at its original level prior to muting.
Setting the System to Standby
Press and hold the MUTE key
g
down.
A single beep is followed by a double beep.
Remote Operation of
Cyrus
Source Components
When the MR3 is connected to Cyrus source units in an MC BUS loop,
remote operation of those sources is possible (See Page 4).
Cyrus dAD3
,
dAD1
,
dAD7
and
Discmaster
•
Press the next key
e
to go to the next track.......................... Single Beep
•
Press the previous key
f
for the previous track....................Single Beep
Pressing either key will start a dAD3 or dAD1 if it is not playing.
Cyrus FM7
•
Press the next key
e
for the next station............................... Single Beep
•
Press the previous key
f
for the previous station ................. Single Beep
Current FM7s are fully compatible. Earlier FM7s can be updated to use this
feature. (See Page 5 for details).
Note:
Pressing the next or previous keys in LOCK mode will produce no
response, however you will hear a low beep.
 Loading...