6 7
The Setup Wizard (continued)
The Setup Wizard
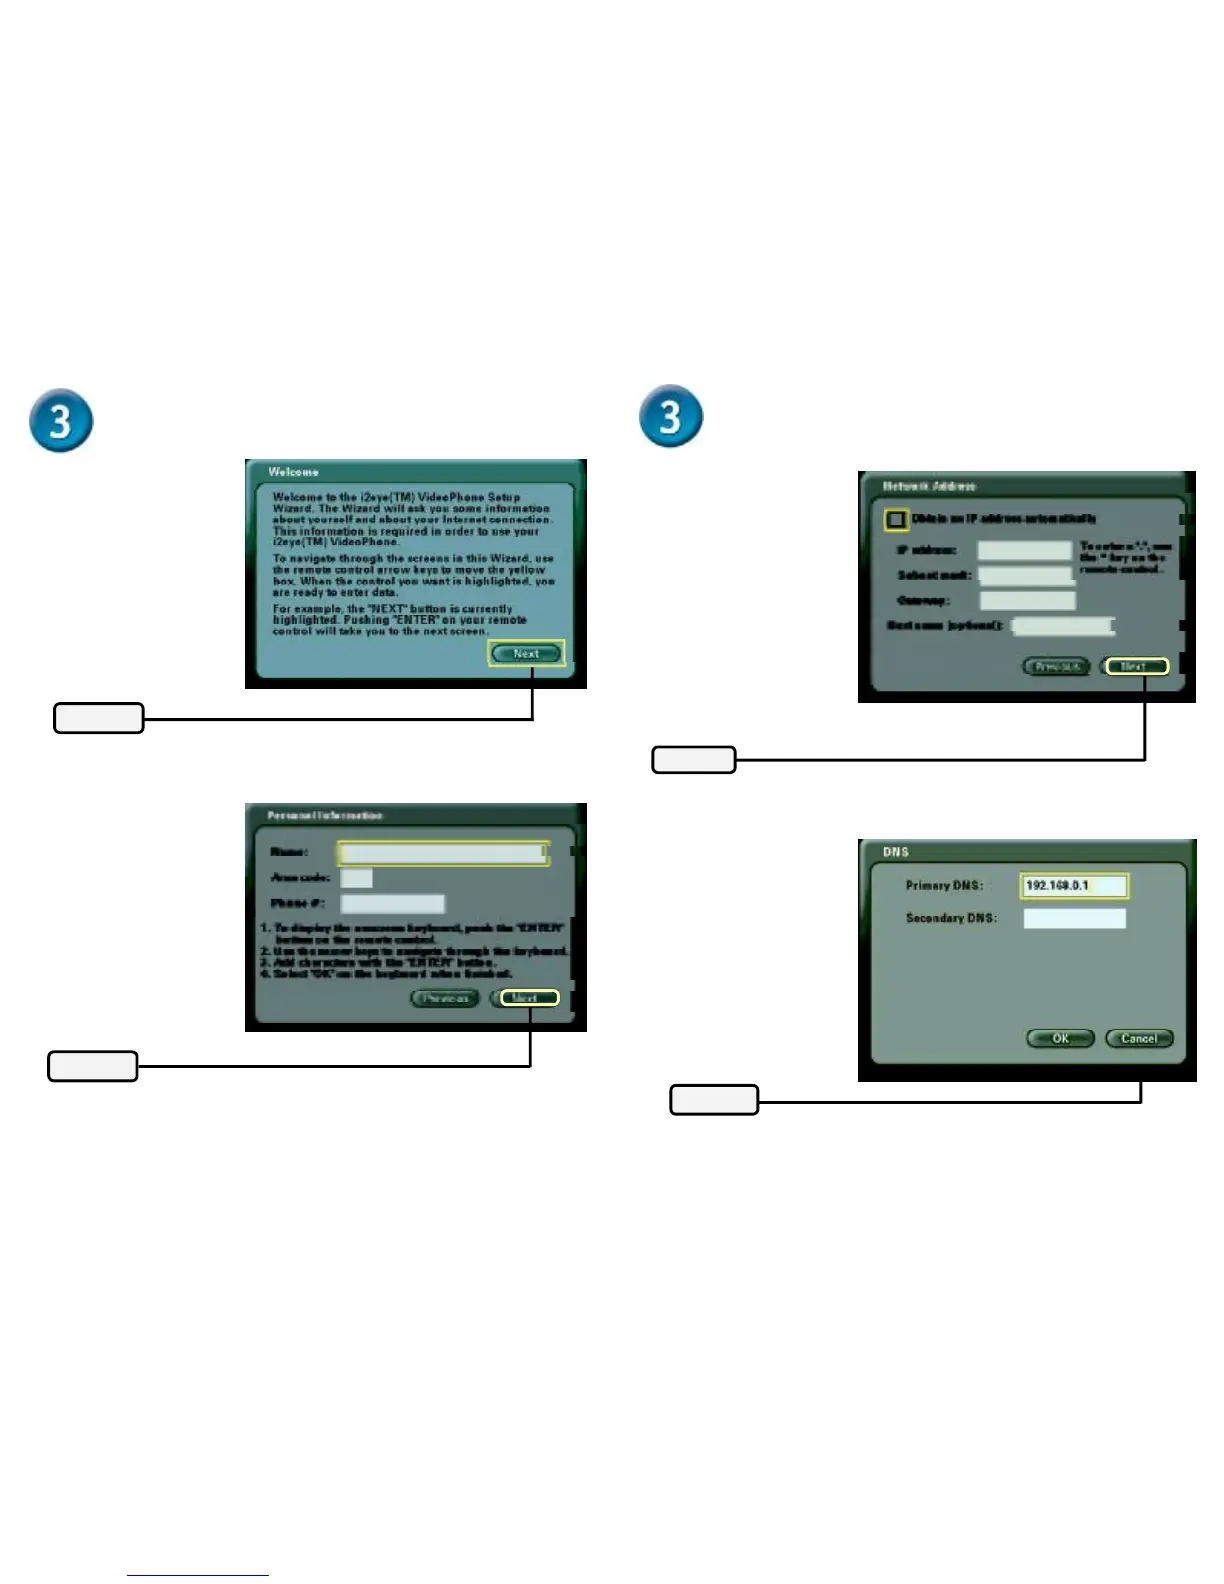
Welcome Screen
Personal Information Screen
Enter your name and phone
number.
The phone number you enter is
one you create for family, friends
and others to call you. You can
use your regular phone number
or make up a new one. The
Caller ID function displays this
name at the other end of the
connection. Your number willl
not be visible to anyone.
Click Next
Click Next
Network Address Screen
Leave the Obtain an IP
address automatically
checkbox checked to obtain
an IP address and other
Internet settings
automatically.
If you cannot automatically be
assigned an IP address
(through DHCP), then
uncheck the checkbox and
manually enter the IP
Address, Subnet mask and
Gateway. Host name is rarely
used and this field is not
required.
Click Next
D N S Screen
If you manually entered an IP
address in the Network
Address screen, you will see
the screen for setting DNS
server addresses. Only the
primary DNS is required,
although entering both a
primary and secondary DNS
is recommended.
Click Next
X
 Loading...