6D-Link DNS-343 Quick Install Guide
Hardware Installation
Hardware Installation
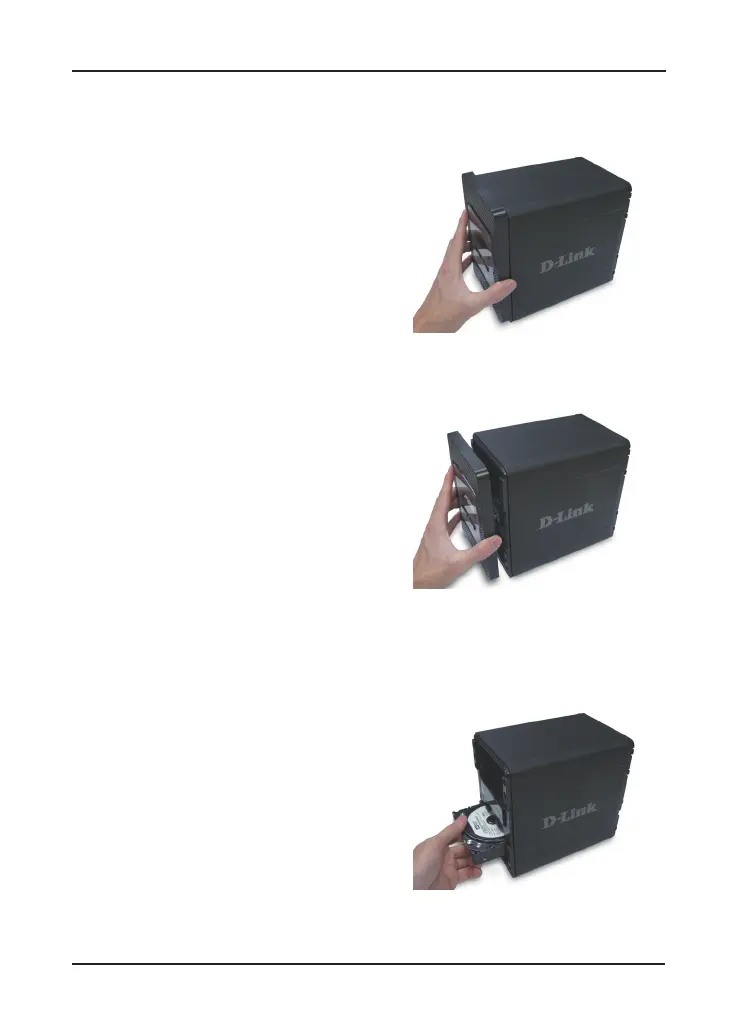
1. Access the drive bays by sliding
the faceplate up until it unlatches
from the device.
2. Once the faceplate is unlatched,
pull it off of the device, exposing
the drive bays.
3. Insert a 3.5” SATA hard drive
into each available drive bay.
Make sure to align the drive
connectors to the endpoints in
the DNS-343. Gently push the
drive in until it connects.
 Loading...