ENGLISH
29
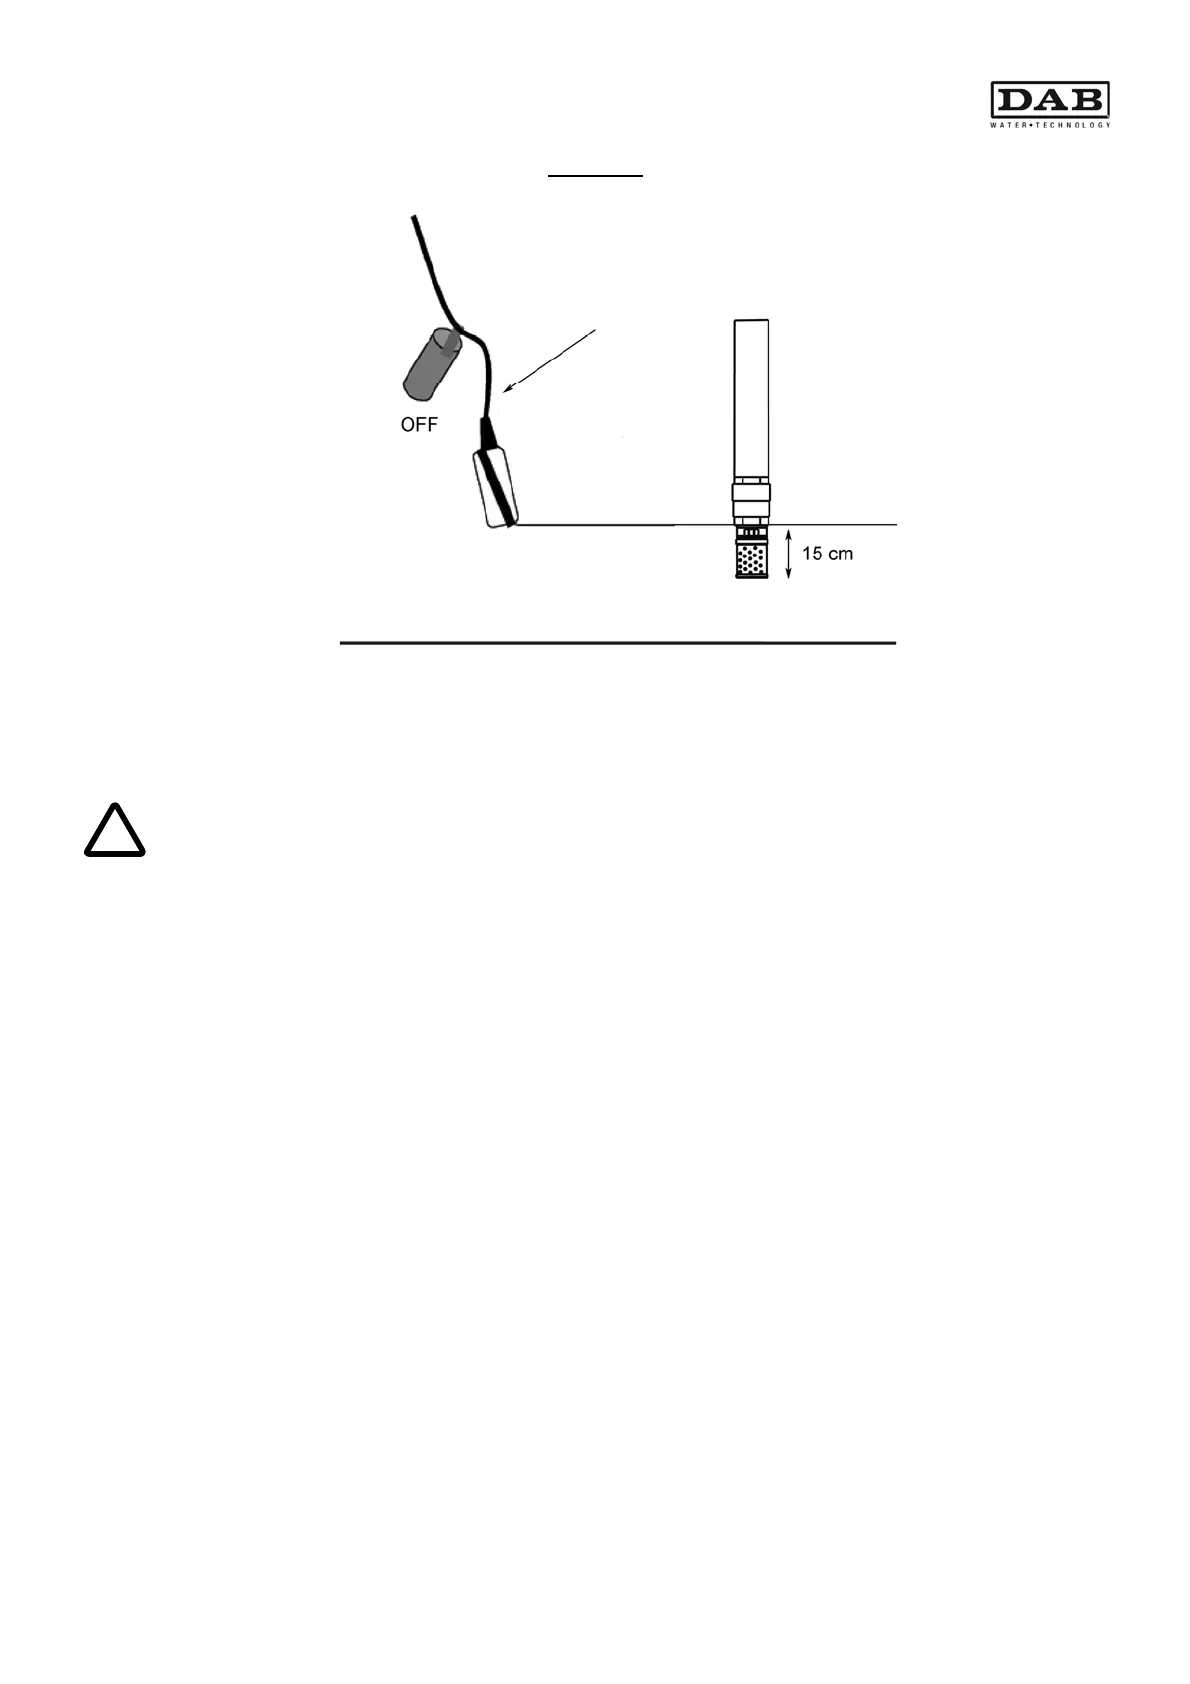
Figure 04
3. After having fitted the float make sure that the cable is protected and made safe along its entire
length.
4. The float switch must change the contact at least 15 cm before the foot valve (pump suction
valve) takes in air.
!
WARNING
MAKE SURE THAT THE SYSTEM IS CORRECTLY SECURED TO THE WALL
5. Start-up
Check the following points before start-up:
Check that the system is securely fixed and that the safety screws have been fastened.
Make sure that the power supply is disconnected.
All hydraulic connections must be tight.
All electrical connections must be checked.
See also section 6 for the pump’s control panel use instructions.
Proceed as follows:
Start-up with mains water
1. Open the mains water pipe on-off valve, the tank starts to fill.
2. Remove the pump filler plug and fill it with water, replacing the plug once full.
3. Open the delivery on-off valve.
4. Make sure that there are no leaks in the hydraulic system.
5. Connect the power supply using a socket that is protected by a circuit breaker.
The pump starts and the green led for power lights.
6. The pump automatically turns off after 15-20 seconds if all the taps on the system are closed.
Start-up with water from the collection tank
Start-up with water from the collection tank is only possible if the float switch inside the collection tank
is in the up position.
Suction pipe
Float switch
Bottom of the tank