Manufactured under license of Daewoo International Corporation, Korea
www.daewoopowerproducts.com
USER'S MANUAL
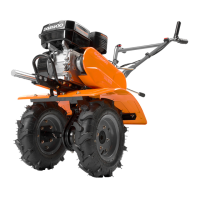
DAT5055R
Gasoline Tiller
PLEASE READ THIS MANUAL BEFORE OPERATION
The manual contains these parts: assembly, operation, maintenance and service.
1. MAIN SPECIFICATION
2. PRODUCT PICTURE
3. PACKING LIST
Please check them before installing(refer to Figure 2).
1.Tiller………………………………………………………………………………………..........................… 1 PCS.
2.Girder……………………………………………………………………………………............................... 1 PCS.
3.Wheel assy……………………………………………………………………………..........................…… 1 PCS.
4.Right blade cover…..……………………………………………………………………........................... 1 PCS.
5.Blade disc………………………………………………………………………………….......................... 2 PCS.
6.Resistance rod……………………………………………………………………………......................... 1 PCS.
7.Safety plate….……………………………………………………………………………........................... 1 PCS.
8.Right blade assy….…………………………………………………………………….......................….. 1 PCS.
9.Left blade assy….……………………………………………………………………….......................…. 1 PCS.
10. Hex locknut M8……………………………………………………………………….......................….. 3 PCS.
11. Flat washer D8…………………………………………………………………………........................... 7 PCS.
12. Bolt M 8*70………………………………………………………………………….....................……… 3 PCS.
13. Handle lock lever……………………………………………………………......................…………… 1 PCS.
14. Cotter pin………………………………………………………………………......................………….. 6 PCS.
15. Pin(short)…………………………………………………………………………......................……….. 2 PCS.
16. Pin(long)……………………………………………………………………………......................……… 2 PCS.
17. Pin(middle)…………………………………………………………………………......................……… 1 PCS.
18. Bolt M 8*50………………………………………………………………………….....................……… 1 PCS.
19. Hex flange face locknut M8…………………………………………………….....................………. 3 PCS.
20. Extension spring…………………………………………………………………......................……… 1 PCS.
21. Hex locknut M6…………………………………………………………………......................……….. 2 PCS.
22. Flat washer D6………………………………………………………………….....................……….... 2 PCS.
23. Bolt M 6*35………………………………………………………………………....................………… 2 PCS.
24. Bolt M 8*16…………………………………………………………………………....................……… 2 PCS.
25. Cable bandage……………………………………………………………………….....................…… 1 PCS.
Caution
Please read this manual before operation
It is dangerous to touch the rotating blades.
Other people should keep safety distance away from the machine when it is working.
Prohibit standing in the front of the machine to avoid accident when it is working.
The spark plug must be pulled out when it is in the process of maintenance or repair
Do not touch the muffler to avoid scalding or injury, when it is working or it is still hot.
Children should not be allowed to operate this tiller; People with reading the manual should not
Operate the tiller neither.
When the tiller is working, Keep away other people, if there are children or pets in the work area,
switch off the tiller.
4. INSTALLATION INSTRUCTION
1. Refer to Figure 3 to install the Right
blade assy and Left blade assy
2. Refer to Figure 4 to install the Resistance rod
3. Refer to figure 5 to install the Blade cover.
4. Refer to Figure 6 to install the Blade disc
5. Refer to figure 7 to install the Wheel.
6. Refer to figure 8 to install the Girder.
7. Refer to figure 9 to install the Handle
8. Refer to figure 10 to install the Safety plate.
5. CHECKING BEFORE OPERATION
In order to keep a safe tiller, do daily checking.
Engine Oil Checking
1) Keep the engine in a horizontal position.
2) Unscrew the oil bolt and clean it.
3) Reinsert the oil indicator into the oil filling hole without screwing it, and then pull it out to check
the oil level.
4) If the oil does not touch the oil indicator, that means the oil is not enough, please add the engine
oil through the filling hole, but it should not beyond the top level.
5) Engine Oil: SAEIOW 30, which is general lubricant for engine.
Warning:
If the level is too low, it may cause serious damage to the engine when the engine is working
Please use clean and good quality 4-stroke engine oil. Run with other engine oil or dirty oil may
shorten the lifetime of the engine severely.
Air Filter Checking
Warning:
never run the engine without an air cleaner, or severe wear of the engine may be resulted in.
Refer to the Figure 11 to dismantle the air cleaner to check and clean the dirty part inside.
Fuel checking
The engine must apply unleaded gasoline or low-leaded gasoline. Using unleaded gasoline will
decrease the possibility of producing carbon deposit and prolong the engine’s service life.
Never use an oil gasoline mixture or dirty gasoline. Avoid getting dirty, dust or water in the fuel tank.
Fuel tank: 1.6 liters.
Warning:
Gasoline is extremely flammable and is explosive under certain conditions.
Refueling in a well-ventilated area with the engine stopped. Do not smoke and allow flames or
sparks in the area where gasoline is stored or where the fuel tank is refueled.
Do not overfill the tank. After refueling, make sure the fuel tank cap is set back securely.
Do not spill fuel when refueling.
6. OPERATION INSTRUCTION
How to start the tiller
1) Open the fuel switch. (Figure 13)
2) Push the choke lever to the CLOSE position (Figure 14)
Note: It is not necessary to push to the CLOSE position when the engine is warm or the
air temperature is high.
3) Push below switches to the “ON” position.(Refer to figure 15)
4) Pull the starting handle slowly until you feel the resistance, and then pull out it suddenly and
quickly. (refer to figure 16)
[Attention]
Send back the starting handle slowly. Or it may cause the damage of the starting equipment and the
spare parts
Please don’t pull out the starting handle when running, because it will affect the engine.
If the choke lever is on the “CLOSE” position, please turn the choke lever to the “OPEN” position
after engine runs 2 minutes. (Figure 14)
How to stop the engine
turn the engine switch to OFF position . (Figure 15)
How to adjust the clutch
If the main clutch cable is not adjusted well (too tight or loose), the clutch may not work well.
1) Starting the engine.
2) Take the clutch control rod to the middle position. ( refer to figure 17)
3) Turn the adjusting nut in figure 18 in a clockwise direction to tighten the wheel clutch; or in a
anticlockwise direction to loosen it.
How to use the rear resistance rod or adjust the tilling depth
Adjust the depth of rear resistance rod by changing the hole.(refer to figure 19)
How to adjust the height of the handle
Loosen the nut and then adjust the height by moving the nut right or left. (refer to figure 20)
7. MAINTENANCE
Proper routine maintenance will prolong the lifetime of engine and tiller.
Warning
Stop the engine at the flat ground, and do not touch the hot part or moving parts to avoid injury. If
the maintenance is required with the engine running, be sure to keep good ventilation in the area.
The exhaust emissions from the engine contain toxic carbon monoxide, breathing it may result injury
and even death.
Maintenance schedule
Notice:
When it works in heavy dusty area, the air cleaner should be cleaned after 10 hours or once a day.
Please check the machine periodically upon the schedule or the working time, which expires first.
8. CHANGE ENGINE OIL
When the engine is hot, it is easy to drain out the oil completely.
- Keep the engine in a horizontal position.
- Unscrew the oil filler (bolt). (refer to figure 21)
- Place a cup under the drain plug and then screw off the drain plug to drain the oil completely.
- After draining the oil thoroughly, re- install the drain plug.
- Fill engine oil up to the mark of top limit.
- Re-install the oil filler.
Engine Oil: SAEIOW 30, which is general lubricant for engine.
Clean the air filter
If the air cleaner is jam, it will output less enough air and cause fuel consumption increase. Check
and clean it periodically.
Cleaning Period: Once 50 hours’ working.
If work in hervy dust area, check it every day or once 10 hours.
Replace: each year or 300 hours’ running
1) Remove the air cleaner housing.
2) Remove paper element,paying attention to prevent dust and foreign matter
Entering into air cleaner.
3) check,clean or replace damaged air cleaner parts.
4) Restall the air cleaner parts back.
Clean the sediment cup
First check fuel tank for fuel,if having,drain the fuel in the fuel tank completely.
1) Remove the fuel sediment cup and o-ring.
2) Wash the sediment cup and o-ring in nonflammable solvent,and dry them thoroughly.
3) Place the 0-ring in the fuel valve,and install the sediment cup.tighten the sediment cup securely.
4) Move the fuel valve to the ON position,and check for leaks.replace the 0-ring if there is any leaka-
ge.
Clear Spark Plug
In order to ensure the engine normal running, the gap of the spark plug must be correct and no
deposit around the spark plug.
5) Remove the spark cap
6) Clear away dirt around the spark plug base.
7) Dismantle the spark plug with a spark plug wrench.
8) Visually check the spark plug. Clean with a steel brush. If the insulator is damaged, replace the
spark plug .
9) Measure the spark plug clearance with a thickness feeler. The clearance should be 0.6~0.7mm. If
adjustment is necessary, bend the side electrode carefully.
10) Check if the spark plug gasket is in good condition.
11) Screw the spark plug to the bottom first by hand and then screw up with a spark plug wrench
and compress the gasket.
MAINTENANCE FOR LONG TERM IDLING
If the tiller need store for a long time, do the following steps.
1) Make sure the storage area is dry and free of dust.
2) Turn the fuel valve lever to “OFF” position, set a proper container under the carburetor.
3) Unscrew the DRAIN bolt and SEDIMENT cup.
4) Turn the fuel valve lever to “ON” position to completely drain gasoline out of the fuel tank.
5) Reinstall the DRAIN Bolt back and SEDIMENT cup and tighten them.
6) Cover the machine to protect dust from entering.
7) Store the machine on a flat ground.
8) When the belt is damaged, it must be replaced with the same model.
9) Belt Spec:V Z950