www.daewoopower.bg
47
2. Гъбест елемент при сух въздушен филтър: почистете в топла сапунена вода, изтръскайте и оставете да изсъхне.
Или почистете с неагресивен препарат и оставете да изсъхне. При маслено сух въздушен филтър, потопете гъбес-
тия елемент в чисто моторно масло и го изстискайте добре. Двигателят може да пуши при стартиране, ако е оста-
нало прекалено много масло по гъбата.
3. Хартиен елемент: изтупайте елемента леко няколко пъти на твърда повърхност, за да отстраните полепналия
прах или издухайте с компресиран въздух през филтъра отвътре навън. Никога не се опитвайте да избършете
полепналата маса по хартиения елемент. Избърсването ще вкара полепналата маса във филтъра и ще запуши ми-
кропорите.
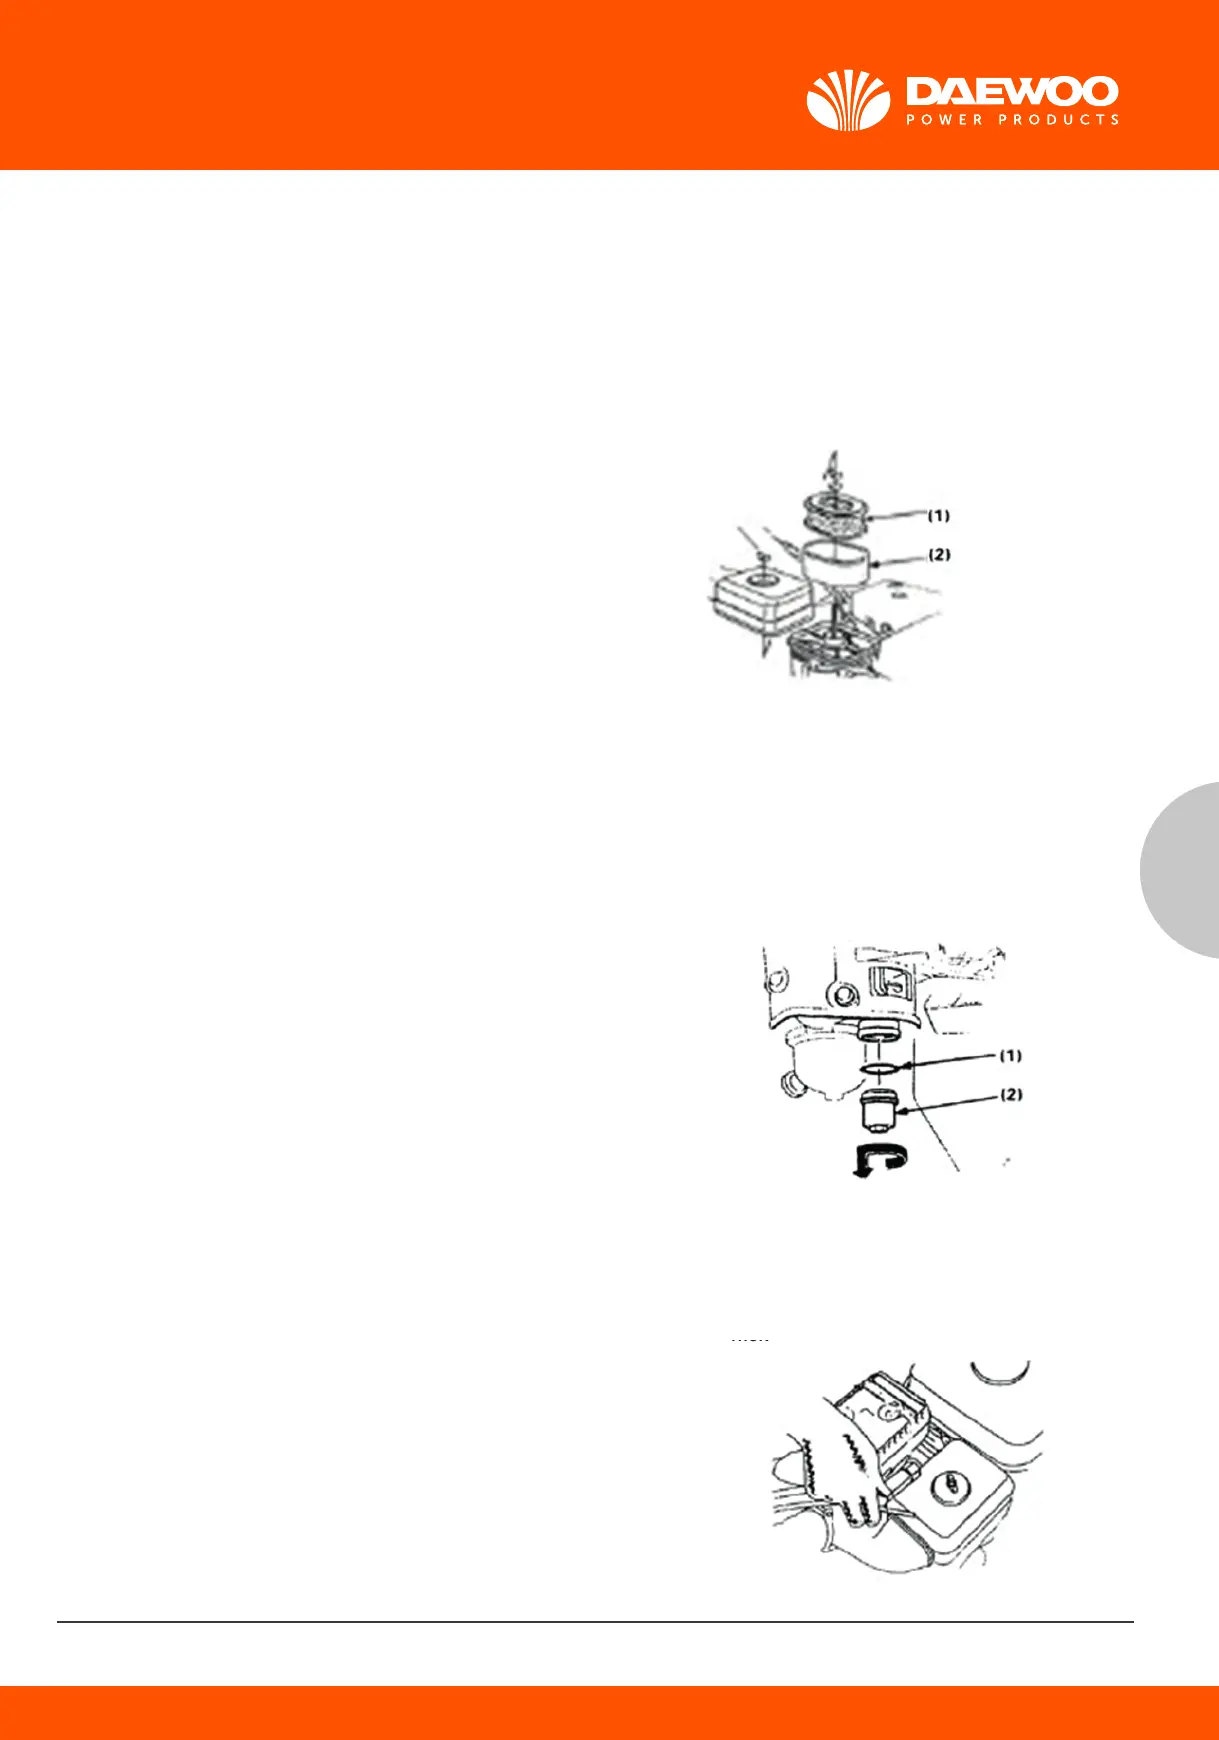
(1) Хартиен елемент
(2) Гъбест елемент
3. Почистване на поплавковата камера (да се извършва от оторизиран и компетентен сервизен център)
Внимание! Бензинът е силно запалим и екзплозивен при определени обстоятелства. Не пушете и не палете огън в
зоната на работа.
Поставете крана на горивото в изключено положение OFF и развийте капачката с цедката, отстранете уплътните-
ля. Измийте ги с неагресивен разтворител, подсушете старателно и поставете внимателно по обратния ред. За-
въртете горивната клапа в положение ON и проверете за течове.
(1) Уплътнител/ О-пръстен
(2) Горивна цедка
4. Обслужване на запалителната свещ
Препоръчителна запалителна свещ: BPR5ES (NGK) или W16EPR-U (NIPPONDENSO).
За да подсигурите работата на двигателя, свещта трябва да е правилно поставена.
Свалете лулата на свещта.
Развийте запалителната свещ.
Внимание! Ако двигателят е работил, ауспухът и
запалителната свещ ще са много горещи. Внимавайте да не
докоснете ауспуха. Изчакайте двигателят да се охлади.
18
3. Fuel Strainer Cup Cleaning
WARNING: Gasoline is highly flammable and explosive under certain conditions. Do not smoke or
allow flames of sparks in the area.
Turn the fuel valve to the OFF position and remove the fuel strainer cup and the O-ring. Wash the
removed parts in solvent, dry them thoroughly and reinstall them securely. Turn the fuel valve ON
and check for leaks.
(1) O-RING
(2) FUEL STRAINER CUP
4. Spark plug service
Recommended spark plug: BPR5ES (NGK)
W16EPR-U (NIPPONDENSO)
To ensure proper engine operation, the spark plug must be properly gapped and free of deposits.
• Remove the spark plug cap.
WARNING: If the engine has been running the muffler will be very hot.
Be careful not to touch the muffler.
• Visually inspect the spark plug. Discard it if the insulator is cracked or chipped.
• Measure the plug gap with a feeler gauge. The gap should be 0.7-0.8 mm (0.028-0.031 in), Correct
as necessary by bending the side electrode.
17
NOTE: (1) Service more frequently when used in dusty areas.
(2)These items should be serviced by an authorized dealer, unless the owner has the proper tools
and is mechanically proficient. See the shop
Manual.
1. Changing oil
Drain the oil while the engine is still warm to assure rapid and complete draining
• Remove the oil filler cap and drain the oil.
• Refill with the recommended oil and check the level.
Oil capacity: 0.6 L
(1) DRAIN PLUG
(2) OIL FILLER CAP
(3) UPPER LEVER
Wash your hands with soap and water after handling used oil.
NOTE: Please dispose of used motor oil in a manner that is compatible with the environment. We
suggest you take it in a sealed container to your local service for reclamation. Do not throw it in the
trash or pour it on the ground.
2. Air Cleaner Service
A dirty air cleaner will restrict air flow to the carburetor. To prevent carburetor malfunction, service
the air cleaner regularly. Service more frequently when operating the engine in extremely dusty
areas.
WARNING: Never use gasoline or low flash point solvents for cleaning the air cleaner element. A fire
or explosion could result in.
CAUTION: Never run the engine without the air cleaner. Rapid engine wear will be the result.
• Remove the wing nut and the air cleaner cover. Remove the elements and separate them. Carefully
check both elements for holes or tears and replace if damaged.
• Foam element: clean in warm soapy water, risen and allow to dry thoroughly or clean in high
flash-point solvent and allow to dry. Dip the element in clean engine oil and squeeze out all the
excess. The engine will smoke during initial start –up if too much oil is left in the foam.
• Paper element: Tap the element lightly several times on a hard surface to remove excess dirt or
blow compressed air through the filter from the inside out. Never try to brush the dirt off. Brush will
force dirt into the fibers.
(1) PAPER ELEMENT
(2) FOAM ELEMENT
BG
18
3. Fuel Strainer Cup Cleaning
WARNING: Gasoline is highly flammable and explosive under certain conditions. Do not smoke or
allow flames of sparks in the area.
Turn the fuel valve to the OFF position and remove the fuel strainer cup and the O-ring. Wash the
removed parts in solvent, dry them thoroughly and reinstall them securely. Turn the fuel valve ON
and check for leaks.
(1) O-RING
(2) FUEL STRAINER CUP
4. Spark plug service
Recommended spark plug: BPR5ES (NGK)
W16EPR-U (NIPPONDENSO)
To ensure proper engine operation, the spark plug must be properly gapped and free of deposits.
• Remove the spark plug cap.
WARNING: If the engine has been running the muffler will be very hot.
Be careful not to touch the muffler.
• Visually inspect the spark plug. Discard it if the insulator is cracked or chipped.
• Measure the plug gap with a feeler gauge. The gap should be 0.7-0.8 mm (0.028-0.031 in), Correct
as necessary by bending the side electrode.
 Loading...