66
1
INDOOR UNIT
PROCEDURES PHOTOS
1. Stop the Air conditioner and disconnect the power cord from the wall
outlet.
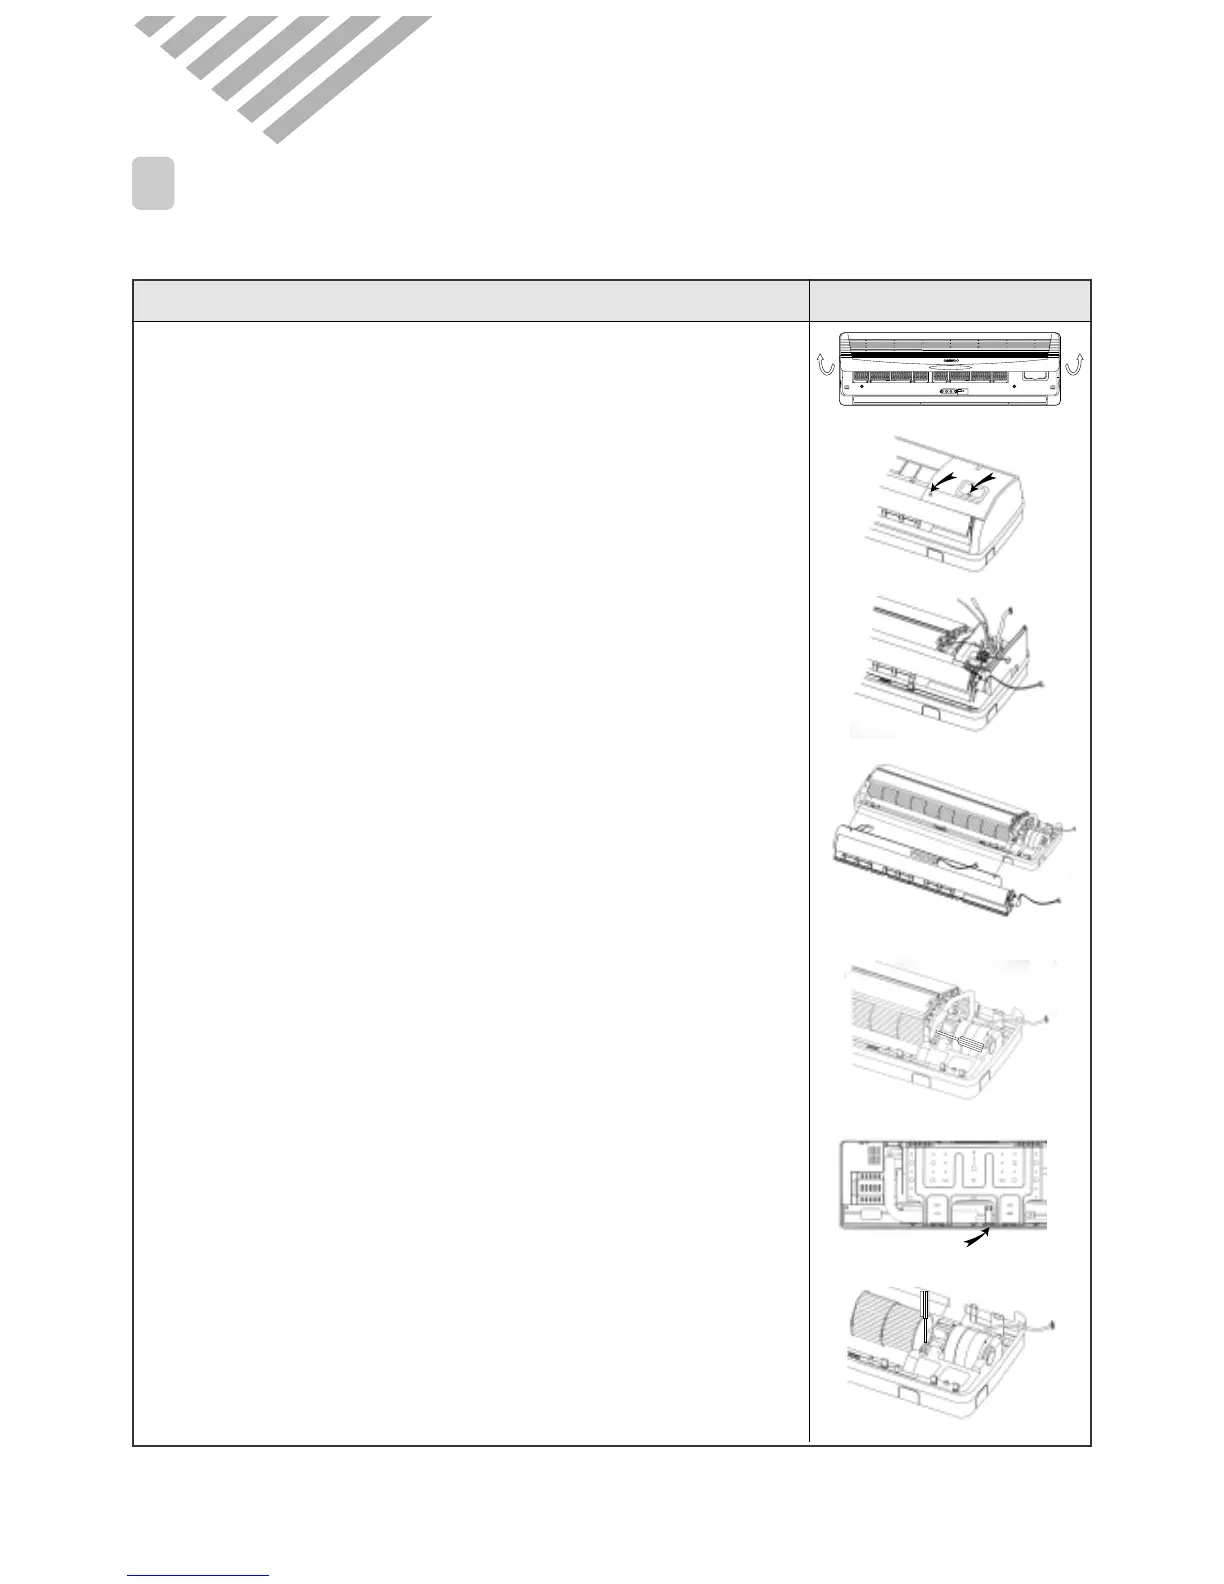
2. Removing the Insert Grille and Frame Grille. (Fig 1~2)
1 Draw up the Insert Grille and remove it.
2 Loosen one screw for fixing the Cover Ter-Block.
3 Loosen two screw at the Frame Grille.
4 Remove the Frame Grille.
3. Removing the Control Box. (Fig 3)
1 Remove room and coil thermistors.
2 Disconnect the fan motor lead wire from connection at the
Control PCB.
3 Disconnect the stepping motor lead wire from connection at the
Control PCB.
4 Remove the select switch from connection at the Control PCB.
5 Loosen a screw for fixing ground wire.
6 Remove the Control Box
4. Removing the Drain Pan. (Fig 4)
1 Disconnect the Body drain hole. (left and right Body)
2 Disconnect three hook and remove the Drain Pan.
5. Removing the Indoor Evaporator. (Fig 5~6)
1 Remove one screw for fixing indoor Evaporator at the Body.
2 Remove the hook for fixing Bracket Pipe at the back of Body.
3 Remove Indoor Evaporator.
6. Removing the Cross Flow Fan. (Fig 7)
1 Remove set screw for fixing Motor shaft.
2 Remove Cross Flow Fan.
7. Remove Motor IDU and Bearing Plastic.
10. DISASSEMBLY INSTRUCTIONS
Fig 1
Fig 3
Fig 4
Fig 5
Fig 6
◆DSA-095L, DSA-125L, 125P
Fig 2
Fig 7