23
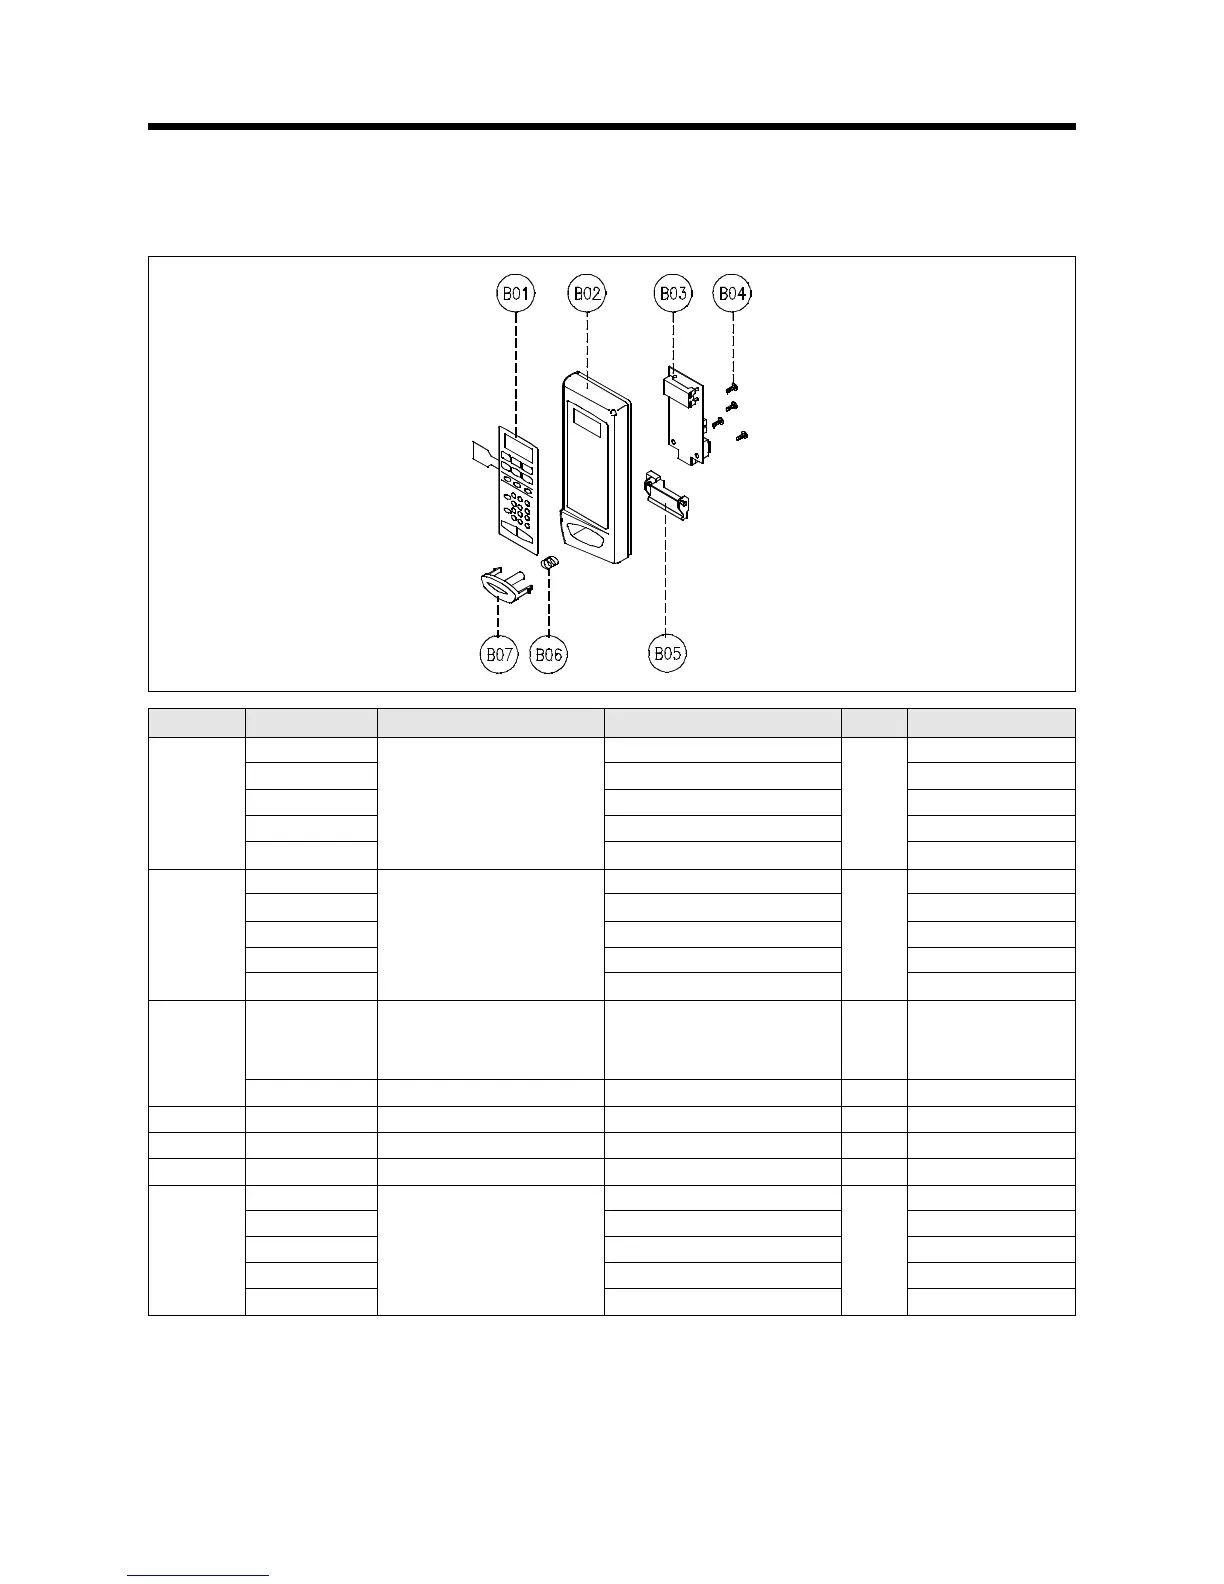
5. To remove control panel parts.
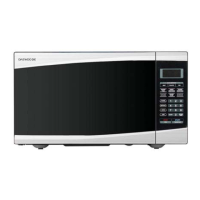
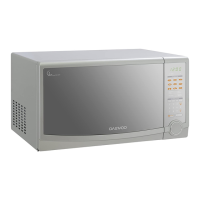
1)KOR-1A0A, 1A1G(H), 1A8Q, 1A9H
(1) Remove the screw which secure the control panel, push up two snap fits and draw forward the control panel assembly.
(2) Remove the door open lever from thee control panel.
(3) Remove four screws which secure the PCB assembly to control panel.
(4) Disconnect membrane tail from theconnector of the PCB assembly.
(5) Detach membrane from the control panel.
(6) Remove door open button and button spring from the control panel.
(7) Reverse the above steps for reassembly.
REF NO. PART CODE PART NAME DESCRIPTION Q’TY REMARK
3518522150 KOR-1A0A0A KOR-1A0A0A
3518522100 KOR-1A1G0A KOR-1A1G0A
B01 3518522110 SWITCH MEMBRANE KOR-1A1H0A 1 KOR-1A1H0A
3518570980 KOR-1A8Q0A KOR-1A8Q0A
3518523740 KOR-1A9H9A KOR-1A9H9A
3516722330 ABS AF-345 KOR-1A0A0A
3516722300 ABS AF-345 KOR-1A1G(H)0A
B02 3516724580 CONTROL-PANEL ABS AF-345 SPRAY 1
KOR-1A1H9A37 ONLY
3516722310 ABS AF-345 KOR-1A8Q0A
3516724540 ABS VT-0826 KOR-1A9H9A
KOR-1A0A0A,
PKMPMSXN00 PCB AS KOR-1A1G0A 1 1A1G(H)0A,
B03
1A9H9A
PKMPMSWA00 PCB AS KOR-818Q7,8A 1 KOR-1A8Q0A
B04 7122401211 SCREW TAPPING T2S TRS 4X12 4
B05 3513702800 LEVER DOOR OPEN PP 1
B06 441G430171 BUTTON SPRING SWP 1
3516907940 ABS SG-0760D KOR-1A0A0A
3516908800 ABS SG-0760D KOR-1A1G(H)0A
B07 3516908820 BUTTON DOOR OPEN ABS SG-0760D SPRAY 1
KOR-1A1H9A37 ONLY
3516907910 ABS SG-0760D KOR-1A8Q0A
3516907980 ABS SG-0760D KOR-1A9H9A