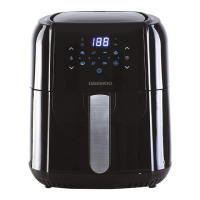
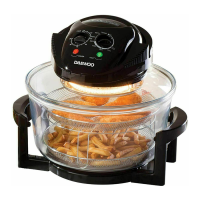
The Daewoo 12L Digital Rotisserie Air Fryer Oven is a versatile kitchen appliance designed for healthier cooking, offering a wide range of functions including baking, air frying, dehydrating, roasting, and more. This appliance utilizes rapid cycling airflow of hot air to cook food quickly and efficiently, often requiring very little or no cooking oil. For those who prefer a little extra browning, a moderate amount of spray-type cooking oil can be used. It is crucial to note that the air fryer should never be filled with cooking oil, as this poses a fire and scalding hazard.
Function Description
The core function of this appliance is air frying, which involves circulating hot air around food to create a crispy texture similar to deep-frying but with significantly less oil. Beyond air frying, the oven offers several other cooking modes:
- Baking: Suitable for various baked goods, providing an alternative to a conventional oven.
- Dehydrating: Allows for the drying of fruits, vegetables, and meats, preserving them for longer periods.
- Roasting: Ideal for cooking meats and vegetables, achieving tender interiors and browned exteriors.
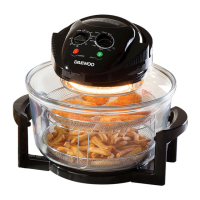
- Rotisserie: A key feature that allows for the even cooking and browning of larger items like whole chickens or roasts using the rotisserie skewer, or smaller items like chips and chicken nuggets using the rotisserie basket.
The appliance is equipped with a digital LED display that alternates between showing the current temperature and the remaining cooking time, providing clear feedback during operation.
Usage Features
The Daewoo Air Fryer Oven is designed for ease of use with a comprehensive control panel and various accessories to enhance the cooking experience.
Control Panel:
The control panel features several intuitive buttons and indicators:
- Power/Start/Stop (11): This button illuminates upon plugging in the appliance. Pressing it once powers up the control panel. A second press initiates cooking with default settings (185°C for 15 minutes) or starts cooking immediately after a preset or manual settings are chosen. Pressing it during cooking stops the appliance.
- Timer Controls (8): The timer can be set in 1-minute increments up to 90 minutes for most cooking modes. In dehydrating mode, it can be set in 30-minute increments from 2 to 24 hours. Plus and minus buttons allow for easy adjustment of cooking time.
- Temperature Controls (13): Temperature can be adjusted in 5°C increments from 80°C to 200°C using the plus and minus buttons.
- Cooking Presets (9): Ten pre-programmed cooking settings are available for common foods like chips, steak, fish, shrimp, pizza, chicken, baking, rotisserie, dehydrator, and reheat. Selecting a preset automatically sets the time and temperature, and cooking begins after a 5-second delay or immediately with a press of the Power/Start/Stop button. These presets can be overridden by manually adjusting time and temperature.
- Rotisserie Start/Stop (10): This button activates or deactivates the rotation of the rotisserie basket or skewer. The rotisserie icon flashes when in use.
- Internal Light On/Off (12): Activates an internal light to monitor cooking progress through the viewing window. The light indicator flashes when on and stays on after 2 minutes, even if the light itself turns off. Opening the door also activates the internal light and pauses cooking.
- Heat Indicator (14): This indicator flashes while the air fryer is heating up and remains steady once the set temperature is reached.
Accessories:
The appliance comes with several accessories to support its diverse functions:
- Mesh Trays (a) x3: These trays are ideal for cooking larger foods such as sausages, chops, potatoes, vegetables, falafel, chicken pieces, and battered or breaded fish. They slide into the air fryer, and a drip tray should be placed at the bottom to catch any drips.
- Rotisserie Basket (c): Designed for tumbling smaller foods like chips, chicken nuggets, and breaded items for even cooking. Food is placed inside the basket, which is then secured in the air fryer to rotate.
- Rotisserie Skewer (d): Used for cooking whole chickens, joints of meat, or other large items. The food is secured centrally on the skewer with forks, which are then tightened with screws. The skewer is inserted into the air fryer to rotate.
- Rotisserie Basket/Skewer Tongs (b): Provided for safe handling and removal of the hot rotisserie basket and skewer.
- Drip Tray (e): Placed at the bottom of the air fryer to collect any fats or liquids that drip during cooking, making cleanup easier.
Cooking Process:
- Preparation: Ensure the air fryer is placed on a stable, level, heat-resistant, and well-ventilated surface, away from obstructions and flammable materials. Insert the mains plug into an outlet.
- Accessory Placement: Depending on the food, place the drip tray at the bottom and then insert the mesh trays, rotisserie basket, or rotisserie skewer with the food.
- Power On: Press the Power/Start/Stop button once to activate the control panel.
- Setting Cooking Parameters:
- Presets: Select a desired cooking preset from the available options. The time and temperature will be automatically set.
- Manual: Adjust the time and temperature using the Timer and Temperature Controls.
- Start Cooking: Press the Power/Start/Stop button again to begin cooking. If using the rotisserie basket or skewer, press the Rotisserie Start/Stop button to initiate rotation.
- Monitoring: Use the Internal Light to check progress through the viewing window. The door can be opened at any point to turn or shake ingredients.
- Completion: Once cooking is finished, carefully remove the hot accessories using oven gloves and the provided tongs. The fan will continue running for 20 seconds to cool down the appliance.
Temperature Display Toggle:
The LED display can be switched between degrees Centigrade and Fahrenheit by pressing and holding the plus and minus Temperature Controls (13) and the minus Timer Control (8) buttons simultaneously for 5 seconds.
Maintenance Features
Proper cleaning and maintenance are essential for the longevity and safe operation of the Daewoo Air Fryer Oven.
- Unplugging: Always unplug the air fryer from the mains supply and allow it to cool completely before cleaning.
- Main Body: Never submerge the main body, mains cable, or plug in water or any other liquids. Wipe the main body and viewing window with a soft, damp cloth.
- Interior: Clean the inside of the appliance with hot water, a mild detergent, and a non-abrasive sponge.
- Accessories: The rotisserie basket, mesh trays, and other accessories are made of durable stainless steel and are dishwasher safe. For stubborn food, soak them in warm soapy water, then rinse and dry thoroughly.
- Abrasive Cleaners: Never use harsh or abrasive cleaners on any part of the air fryer.
- Drying: After cleaning, ensure all parts are thoroughly dry before re-use or storage.
Regular checks of the supply cord for any damage are recommended. If the cord is damaged, it must be replaced by a qualified person to avoid hazards. The appliance should be stored only after it has cooled down completely.