Do you have a question about the DAHAO BECS-285A and is the answer not in the manual?
Safety rules to avoid hazards like fire, electrical shock, and injuries during operation.
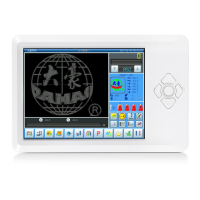
Highlights key functionalities like touch panel, memory capacity, and design handling.
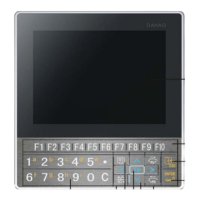
Details the control panel components (touching panel, buttons, ports) and their usage.
Explains the icons and status indicators on the main interface screen.
Outlines the fundamental steps involved in the embroidery process from input to start.
Details the process of transferring design files from disk to the machine's memory.
Explains how to transfer designs from the machine's memory to a disk.
Guides on how to delete files and inventories from the disk, with cautionary notes.
Covers setting common parameters like scales, rotation, and repetition for design results.
Details how to adjust design scaling percentages for X and Y directions.
Details how to set the sequence of needle colors for automatic color changes.
Provides step-by-step instructions for inputting and verifying the color-changing order.
Outlines the general procedure for setting various machine and design parameters.
Details the steps to select a specific design from memory for embroidery.
Covers methods for adding appliqué designs, including manual and automatic frame-out.
Provides instructions for deleting one or more designs from the machine's memory.
Details the process for clearing all designs from the machine's memory, with a caution.
Covers general information and operations for editing individual stitches within a design.
Details inputting text strings and setting basic parameters like font and arrangement for letter designs.
Explains how to adjust individual letters and overall text parameters for precise appearance.
Explains how to save the current frame position as the starting point for a design.
Guides on locating the frame to a previously saved starting point for a design.
Describes how to move the frame to position the design's center within the frame.
Explains how to set an offset point for frame movement before and after embroidery.
Explains setting the frame origin and protecting against sudden power loss for safe operation.
Guides on restoring the frame position after power loss or machine movement.
Details setting software-based limits to define the embroidery area and prevent damage.
Manages user roles and permissions, controlling access to machine parameters and functions.
Covers procedures for disabling or changing the administrator password for system security.
Explains how to unlock the machine parameters after modification by an administrator.
Guides on saving and restoring administrator-specific optimal machine parameters.
Details changing the factory password to manage machine settings and security.
Explains the process of unlocking the machine using factory credentials.
Covers saving and recovering factory-set optimal machine parameters.
Resets machine parameters to default values, including factory or system defaults.
Guides on calibrating the touch panel for accurate operation if it becomes inaccurate.
Outlines the step-by-step procedure for performing sequin embroidery.
Explains how to edit sequin designs within the system, saving them as special multi-sequin designs.
Details adjusting parameters specific to the sequin device and multi-sequin embroidery.
Covers setting color-changing order and sequin modes for multi-sequin designs.
Outlines the procedure for performing zigzag embroidery from design input to starting.
Guides on updating the main software for the upper machine via USB or network.
Explains how to update the display interface (power on screen) using USB.
Guides on updating LCD parameters, including checking supported LCD types.
Guides on setting frame origins and limits for cloth embroidery frames.
Details using "Auto Frame Origin" to automatically find and confirm the frame's origin point.
Explains setting frame center coordinates and dimensions for accurate embroidery ranges.
Details setting frame origins and limits specifically for cap embroidery frames.
Provides a quick overview of essential embroidery operations like design input and start.
| Category | Sewing Machine |
|---|---|
| Model | BECS-285A |
| Built-in Stitches | 285 |
| Automatic Needle Threader | Yes |
| Drop Feed | Yes |
| Free Arm | Yes |
| Speed Control | Yes |
| LED Light | Yes |
| Stitch Length | 5 mm |
| Stitch Width | 7 mm |