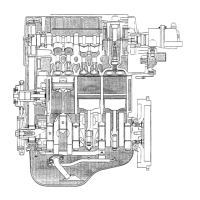
ENGINE MECHANICALS
'.
Remove the cylinder block from the
SST
INSPECTION
1.
Checking of cylinder block
(1) Check the cylinder block for damage or cracks.
(2)
Check the cylinder head gasket surface for distortion.
NOTE:
Perform the measurement
in
six directions.
Maximum distortion limit:
0.1
mm
(0.0039
inch)
[CB-23
engine only]
If the distortion exceeds the maximum distortion limit,
recondition the surface. However, this reconditioning
should not be performed beyond the grinding limit of
0.3 mm (0.01
2
inch).
Furthermore, make sure that the width between the
cylinder head gasket contact surface and the oil pan
attaching surface is at least 200.55 mm (7.896 inches).
(3)
Measure the cylinder bore diameters.
Measure the bore diameter of each cylinder. The
measilrement should be made at six points.
@)
Ensure that the difference between the maximum and
minimum bore diameters of each cylinder is within
0.1 mm (0.039 inch).
NOTE:
The measurement results should be recorded.
@ If the difference between the maximum and minimum
values exceeds the specified value (0.1 mm or 0.039
inch), perform boring and honing for the cylinder.
Specified cylinder bore diameter after honing
When repaire standard pis-
76.00
-
76.03
mm
ton is used:
(2.992
-
2.993 inch)
When
01s
0.25 piston is 76.25
-
76.28
mm
useu: (3.002
-
3.003 inches)
I
76.50
-
76.53
mm
When
OiS
0.50 piston is
1
used:
1
(3.012
-
3.013 inches)
Measured in six
directions
I
I
Fig.
5-244
WM-05285
I
I
Fig. 5-245
WM-05286
A@
10
mm
(0
39
~nch)
Center
1%
,I0
mm
(0.39
~nch)
Fig. 5-246
'~~-0528i
Honing
an~le
35"
F
5"
Surface coarse degree
1.5
-
42
I
I
Fig. 5-247
WM-05288

 Loading...