6 | Unit installation
Installer reference guide
31
2MXM-A9, 3MXM-A9, 4MXM-A9, 5MXM-A9
R32 Split series
4P600463-7G – 2022.09
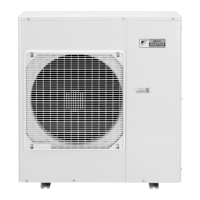
To close the drain holes and attach the drain socket
1 Install drain caps (accessory f) and (accessory g). Make sure the edges of the
drain caps close off the holes completely.
2 Install the drain socket.
a Drain hole. Install a drain cap (large).
b Drain hole. Install a drain cap (small).
c Drain hole for drain socket
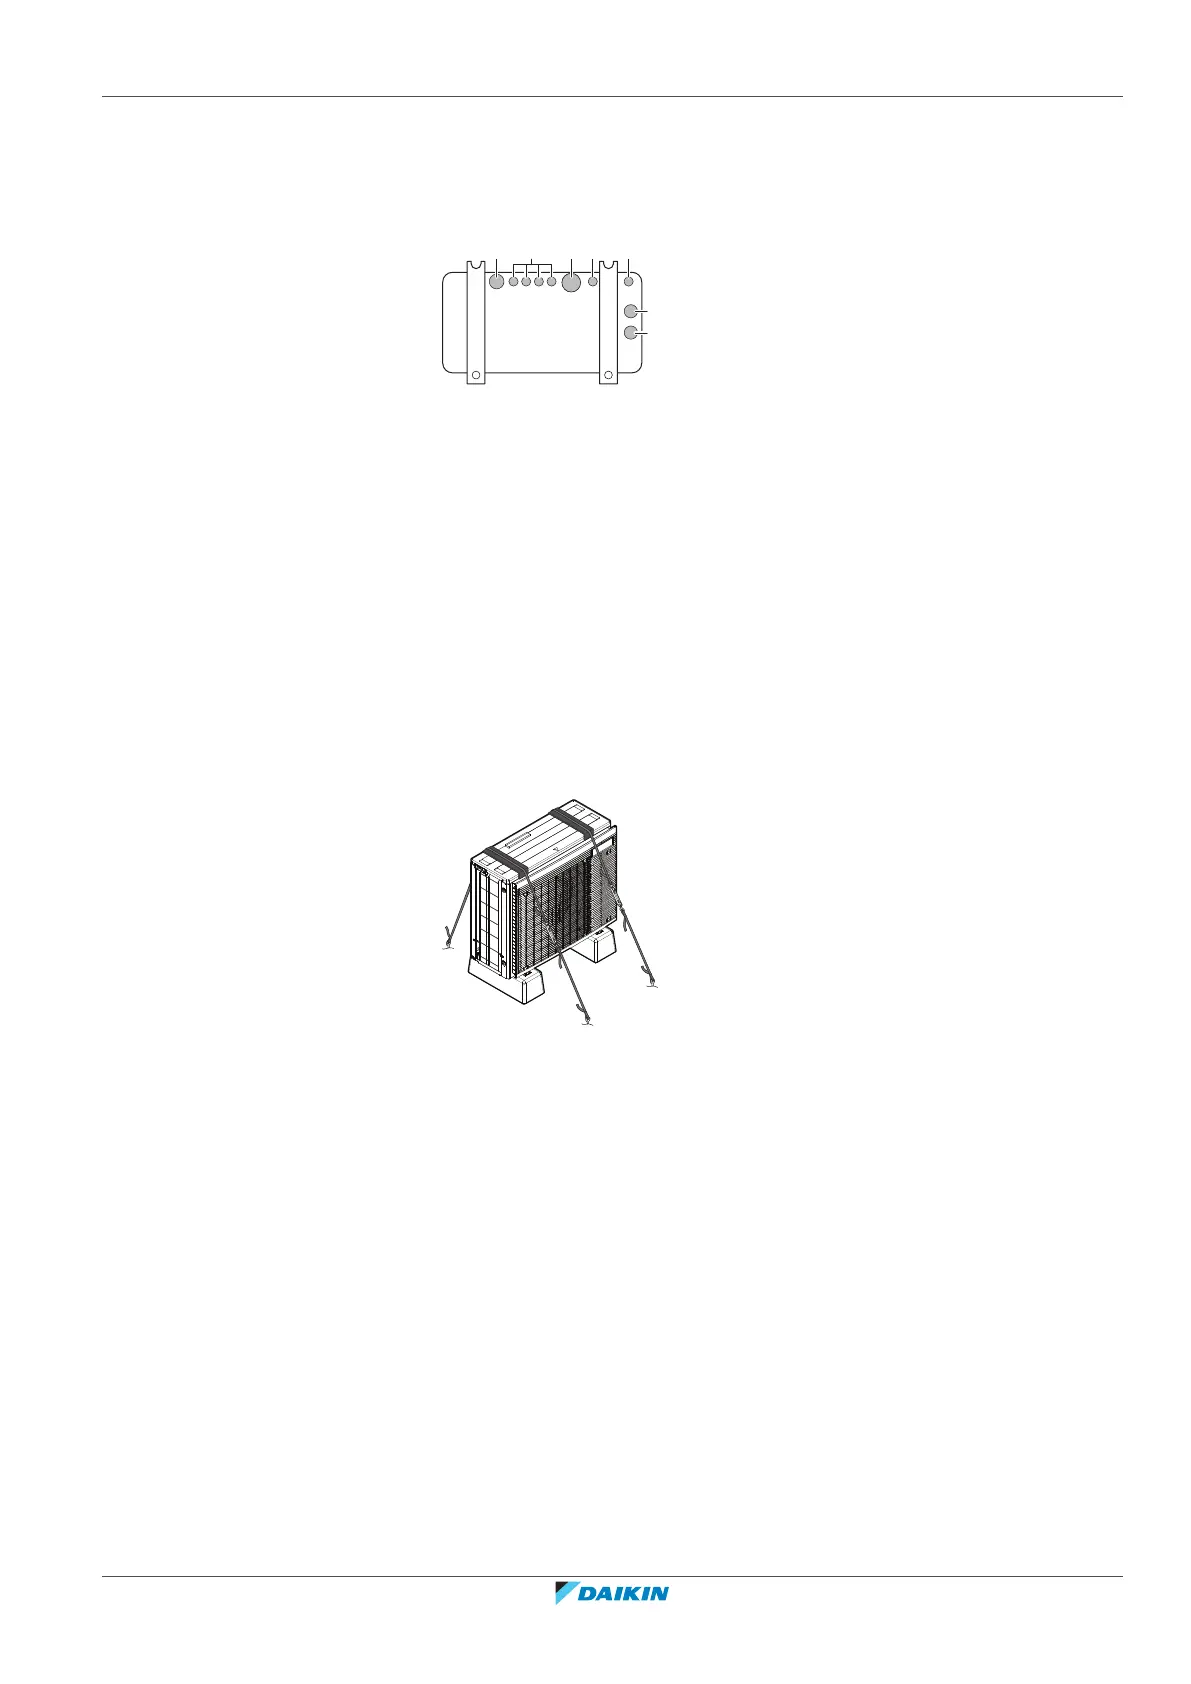
6.3.6 To prevent the outdoor unit from falling over
In case the unit is installed in places where strong wind can tilt the unit, take
following measure:
1 Prepare 2 cables as indicated in the following illustration (field supply).
2 Place the 2 cables over the outdoor unit.
3 Insert a rubber sheet between the cables and the outdoor unit to prevent the
cables from scratching the paint (field supply).
4 Attach the ends of the cables.
5 Tighten the cables.