EasyManua.ls Logo

Daikin Air Conditioner - User Manual

Daikin Air Conditioner
16 pages
Print Icon
To Next Page IconTo Next Page
Loading...
• Read these Safety Precautions carefully to ensure correct installation.
• This manual classifies the precautions into DANGER, WARNING and CAUTION. Be sure to follow all the
precautions below: they are all important for ensuring safety.
• After completing installation, test the unit to check for installation errors. Give the user adequate instructions
concerning the use and cleaning of the unit according to the Operation Manual.
• Refrigerant gas is heavier than air and replaces oxygen. A massive leak could lead to oxygen depletion, especially in
basements, and an asphyxiation hazard could occur leading to serious injury or death.
• Do not install unit in an area where flammable materials are present due to risk of explosion resulting in serious
injury or death.
• If the refrigerant gas leaks during installation, ventilate the area immediately.
Refrigerant gas may produce a toxic gas if it comes in contact with fire such as from a fan heater, stove or cooking device.
Exposure to this gas could cause severe injury or death.
• After completing the installation work, check that the refrigerant gas does not leak.
Refrigerant gas may produce a toxic gas if it comes in contact with fire such as from a fan heater, stove or cooking device.
Exposure to this gas could cause severe injury or death.
• Do not ground units to water pipes, telephone wires or lightning rods because incomplete grounding could cause a
severe shock hazard resulting in severe injury or death, and to gas pipes because a gas leak could result in an
explosion which could lead to severe injury or death.
• Do not ground units to telephone wires or lightning rods because lightning strikes could cause a severe shock hazard
resulting in severe injury or death, and to gas pipes because a gas leak could result in an explosion which could lead
to severe injury or death.
• Safely dispose of the packing materials.
Packing materials, such as nails and other metal or wooden parts, may cause stabs or other injuries.
Tear apart and throw away plastic packaging bags so that children will not play with them.
Children playing with plastic bags face the danger of death by suffocation.
• The following safety symbols are used throughout this manual:
Be sure to observe this instruction.
Be sure to establish a ground connection.
Never attempt.
Indicates an imminently hazardous situation which, if not avoided, will result in death or serious injury.
Failure to follow any of WARNING is likely to result in such grave consequences as death or serious injury.
Failure to follow any of CAUTION may in some cases result in grave consequences.
3P207257-3D M07B061D
Safety Precautions (1)
DAIKIN AIR CONDITIONER
Two-dimensional bar code
is a code for manufacturing.
DANGER
WARNING
CAUTION
DANGER
Question and Answer IconNeed help?

Do you have a question about the Daikin Air Conditioner and is the answer not in the manual?

Summary

Safety Precautions (1)

Safety Precautions (2)

Accessories

Precautions for Selecting the Location

Indoor;Outdoor Unit Installation Drawings

Connections (connection port)

Precautions on Installation

Outdoor Unit Installation Guidelines

Selecting a Location for Installation of the Indoor Units

Refrigerant Piping Work (1)

Drain Work

Procedures for connecting drain sockets and caps for proper drainage.

Refrigerant Piping

Guidelines for using flare nuts, refrigeration oil, and torque wrenches for piping.

Refrigerant Piping Work (2)

Purging Air and Checking Gas Leakage

Steps for purging air and checking for refrigerant gas leaks using a vacuum pump.

Refrigerant Piping Work (3)

Charging with Refrigerant

Guidelines for additional refrigerant charging based on piping length.

Refrigerant Piping Work

Cautions on pipe handling, material selection, and bend radius for refrigerant piping.

Flaring the Pipe End

Detailed steps for cutting, flaring, and checking pipe ends for refrigerant connections.

How to Use Reducers

Pump Down Operation

Forced Operation

Wiring (1)

Wiring procedure

Steps for connecting wires between indoor and outdoor units securely.

Method of Mounting Conduit

How to properly mount conduits and protect wiring.

Wiring (2)

Wiring procedure

Connecting wires, securing them, and matching symbols for wiring and piping.

Ground terminal installation

Methods for installing single core wires and round crimp-style terminals for grounding.

Priority Room Setting

About the Priority Room Setting function

Explains the functions of priority room setting for operation modes and power.

Setting procedure

Steps to slide the switch to set the priority room and reset the power.

Night Quiet Mode setting

About Night Quiet Mode

Describes the function of reducing outdoor unit noise at night.

Setting procedure

Steps to remove the jumper switch and reset the power for Night Quiet Mode.

COOL;HEAT mode lock <S15>

Test Run and Final Check (1)

Wiring Error Check

How to perform and interpret the wiring error check using the service PC-board.

Test Run and Final Check (2)

Test Run and Final Check

Procedures for testing cooling/heating, measuring temperatures, and checking operations.

Items to Check

A checklist of items to verify after installation, including consequences of trouble.

Overview

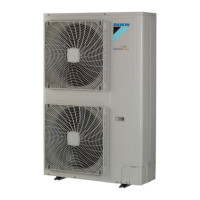
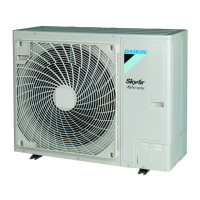
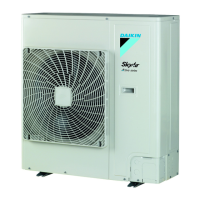
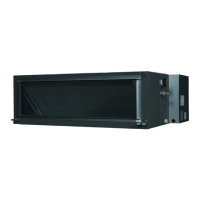
This document is an installation manual for a Daikin Air Conditioner, specifically models 3MXS24* and 4MXS32*. It provides comprehensive instructions for safe and correct installation, covering safety precautions, accessory identification, location selection, installation drawings, connection procedures, refrigerant piping, air purging, refrigerant charging, reducer usage, pump-down operation, forced operation, wiring, and final checks.

Function Description:

The Daikin Air Conditioner is designed for multi-room applications, allowing connection of multiple indoor units to a single outdoor unit. It offers both cooling and heating functionalities. Key features include:

  • Multi-Room Connectivity: Supports connecting up to four indoor units (Room A, B, C, D) to a single outdoor unit.
  • Refrigerant System: Utilizes R410A refrigerant.
  • Priority Room Setting: Allows setting one indoor unit as a priority, influencing operation mode, powerful operation, and quiet operation across the system.
  • Night Quiet Mode: Reduces outdoor unit operating noise at nighttime, beneficial for residential areas.
  • COOL/HEAT Mode Lock: Enables locking the unit to operate in only cooling or only heating mode.
  • Wiring Error Check: Features an automatic correction function for wiring errors, simplifying installation and troubleshooting.

Important Technical Specifications:

  • Outdoor Unit Capacity Class:
    • 3MXS24*: Up to 39000 Btu
    • 4MXS32*: Up to 45000 Btu
  • Refrigerant: R410A
  • Maximum Allowable Piping Lengths:
    • Piping to each indoor unit: 82ft max.
    • Total length of piping between all units: 230ft max.
    • Shortest allowable length per room: 9.8ft.
  • Maximum Allowable Height Difference (Outdoor Unit Higher):
    • Outdoor unit to highest indoor unit: 49.2ft max.
    • Outdoor unit to lowest indoor unit: 24.6ft max.
  • Maximum Allowable Height Difference (Outdoor Unit Lower):
    • Outdoor unit to highest indoor unit: 49.2ft max.
    • Outdoor unit to lowest indoor unit: 24.6ft max.
  • Additional Refrigerant Charge: 0.22oz of R410A for each additional foot of piping beyond 131.2ft total length.
  • Recommended Electrical Wiring: AWG 16 or AWG 14 for power supply and interconnecting wires. If connection wire length is 33ft or more, use AWG 14 wire.
  • Flare Nut Tightening Torques:
    • Ø1/4": 10.5-12.7 ft-lbf
    • Ø3/8": 24.1-29.4 ft-lbf
    • Ø1/2": 36.5-44.5 ft-lbf
    • Ø5/8": 45.6-55.6 ft-lbf
  • Valve Cap Tightening Torques:
    • Liquid pipe: 19.5-23.8 ft-lbf
    • Gas pipe: 35.5-44.0 ft-lbf
  • Service Port Cap Tightening Torque: 7.9-10.8 ft-lbf
  • Insulation Material: Polyethylene foam with a heat transfer rate of 0.041 to 0.052W/mK. Must withstand refrigerant gas pipe surface temperatures up to 230°F.
  • Copper Pipe Dimensions (O.D. / Thickness):
    • Gas pipe: 3/8", 1/2" / 0.031"; 5/8" / 0.039"
    • Liquid pipe: 1/4" / 0.031"
  • Minimum Bend Radius: 3/8", 1/4" / 1-3/16" or more; 1/2" / 1-9/16" or more; 5/8" / 1-15/16" or more.
  • Drainage: Requires a drain socket assembly (B) and reducer assembly (C) for proper drainage. Outdoor unit should be placed on a base at least 3-15/16 inches high if drain port is covered.
  • Foundation Bolts: Four sets of M12 foundation bolts, nuts, and washers (field supply) are required. Bolts should be screwed in until their length is 3/4" from the foundation surface.
  • Vacuum Pumping: Recommended for at least 1 hour, reaching -29.9in Hg.

Usage Features:

  • Safety Precautions: Emphasizes DANGER, WARNING, and CAUTION classifications, covering risks like refrigerant leaks (asphyxiation, toxic gas from fire contact), electrical shock, fire, equipment damage, and personal injury. Strict adherence to grounding, proper ventilation, and use of specified parts is mandated.
  • Location Selection: Provides detailed guidelines for outdoor unit placement, considering vibration, noise nuisance to neighbors, air passage, flammable gas leakage, distance from TVs/radios, corrosive atmospheres, and drainage. Special instructions for low outdoor ambient temperatures and heavy snowfall areas are included.
  • Installation: Requires installation on a solid, level base capable of supporting the unit's weight. Vibration-proof rubber isolators are recommended if vibration transmission to the building is a concern.
  • Refrigerant Piping: Instructions for flaring pipe ends, applying refrigeration oil (for R410A only) to the inner surface of the flare, and using torque wrenches for tightening flare nuts to prevent gas leakage. Separate thermal insulation pipes for gas and liquid refrigerant are required.
  • Air Purging: Detailed steps for purging air from the refrigerant circuit using a vacuum pump, ensuring no foreign substances are present.
  • Refrigerant Charging: Specific instructions for adding R410A in liquid form from a cylinder, noting the importance of using R410A-specific tools.
  • Pump Down Operation: Procedure for safely recovering refrigerant when relocating or disposing of the unit, involving forced cooling and sequential closing of liquid and gas stop valves.
  • Forced Operation: Method to initiate forced cooling for testing or specific operational needs via switches on the service PC-board.
  • Wiring: Comprehensive instructions for electrical work, including using dedicated power circuits, specified wire types (AWG 16 or 14), proper clamping, and securing cables. Emphasizes the need for a ground fault circuit interrupter breaker and proper grounding. Provides methods for mounting conduit and connecting wires to terminals, including curling for single core wires.
  • Test Run and Final Check: Procedures for verifying correct installation and operation, including measuring voltage, checking all stop valves are open, matching piping and wiring, and performing a wiring error check. It also outlines temperature difference checks for cooling (approx. 14°F) and heating (approx. 36°F) between inlet and outlet.

Maintenance Features:

  • Regular Checks: The manual implicitly suggests regular checks for gas leakage, thermal insulation integrity, drainage security, ground wire connections, electrical wiring correctness, and obstructions around inlets/outlets as part of the final installation check.
  • User Instructions: Installers are instructed to provide adequate instructions to the user regarding the use and cleaning of the unit according to the Operation Manual, particularly for air filter cleaning and temperature adjustment.
  • Energy Saving: Advises turning off the safety breaker if the unit will not be used for a long time to avoid wasting electricity.
  • Troubleshooting: The wiring error check function helps identify and correct wiring issues. In case of abnormal stop during the test run, users are directed to product diagnosis procedures on the back of the right side plate.

Daikin Air Conditioner Specifications

General IconGeneral
BrandDaikin
ModelAir Conditioner
CategoryAir Conditioner
LanguageEnglish

Videos

How To Reset Daikin Air Conditioner

How To Turn On Daikin Air Conditioner

How To Set Timer On Daikin Air Conditioner Remote

How To Turn Off Timer On Daikin Air Conditioner Remote

How To Fix Daikin Air Conditioner Heat Mode Not Working

How To Clean Air Conditioner Filters Daikin Perfera

Related product manuals