4 Installation
Installation manual
9
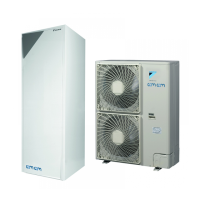
EABH/X16DA+9W
Daikin Altherma – Low temperature split
4P556066-1 – 2018.10
When no glycol is added to the water, you can use freeze protection
valves to drain the water from the system before it can freeze.
▪ Install freeze protection valves (field supply) at all lowest points of
the field piping.
▪ Normally closed valves (located indoors near the piping entry/exit
points) can prevent that all water from indoor piping is drained
when the freeze protection valves open.
NOTICE
When freeze protection valves are installed, do NOT select
a minimum cooling setpoint lower than 8°C (8°C=default).
If lower, freeze protection valves can open during cooling
operation.
Consult the installer reference guide of the unit for more detailed
information.
Heater tape (field supply)
1 Install heater tape to the outdoor field piping.
2 Provide external power supply for the heater tape.
NOTICE
▪ For the internal heater tape to operate, the power to the
unit MUST be ON. For this reason, during cold periods,
never disconnect the power, nor turn off the main
switch.
▪ In case of a power failure, power to the heater tape
(both internal and external) will be aborted and the
water circuit will NOT be protected. To guarantee a full
protection, it is always possible to add glycol to the
water circuit or to use freeze protection valves, even
when installing heater tape to the outdoor field piping.
4.3.4 To fill the domestic hot water tank
For installation instructions, see the installation manual of the
domestic hot water tank.
4.3.5 To insulate the water piping
The piping in the complete water circuit MUST be insulated to
prevent condensation during cooling operation and reduction of the
heating and cooling capacity.
For the outdoor piping insulation, refer to the installer reference
guide or the installation manual of the outdoor unit.
4.4 Connecting the electrical wiring
DANGER: RISK OF ELECTROCUTION
WARNING
ALWAYS use multicore cable for power supply cables.
4.4.1 About electrical compliance
Only for the backup heater of the indoor unit
See "4.4.4 To connect the backup heater power supply" on
page10.
4.4.2 To connect the electrical wiring on the
indoor unit
1 Open the switch box so that you can access the back of the
switch box. See "4.1.1To open the indoor unit"on page5.
2 Route the wiring as follows:
▪ Enter the unit from the bottom.
▪ Route the wiring via the back of the switch box.
▪ Fix the cables with cable ties to the cable tie mountings at
the back of the switch box.
a, b, c Field wiring (see table below)
d Factory-mounted cable for power supply of backup heater
INFORMATION
When installing field supply or option cables, foresee
sufficient cable length. This will make it possible to open
the switch box and gain access to other components
during service.
Routing Possible cables (depending on unit type
and installed options)
a
Low voltage
▪ Preferential power supply contact
▪ User interface (option)
▪ Power consumption digital inputs (field
supply)
▪ Outdoor ambient temperature sensor
(option)
▪ Indoor ambient temperature sensor
(option)
▪ Electrical meters (field supply)
▪ Safety thermostat (field supply)
b
High voltage power
supply
▪ Interconnection cable
▪ Normal kWh rate power supply
▪ Preferential kWh rate power supply
c
High voltage control
signal
▪ Heat pump convector (option)
▪ Room thermostat (option)
▪ Shut-off valve (field supply)
▪ Domestic hot water pump (field supply)
▪ Alarm output
▪ Changeover to external heat source
control
▪ Space cool/heat operation control
d
High voltage power
supply (factory-
mounted cable)
▪ Power supply for backup heater
CAUTION
Do NOT push or place redundant cable length in the unit.
4.4.3 To connect the main power supply
1 Connect the main power supply.
In case of normal kWh rate power supply

 Loading...