Outdoor Unit (50 / 52 / 58 / 68 / 75 Class) Si12-411A
244 Removal Procedure
3
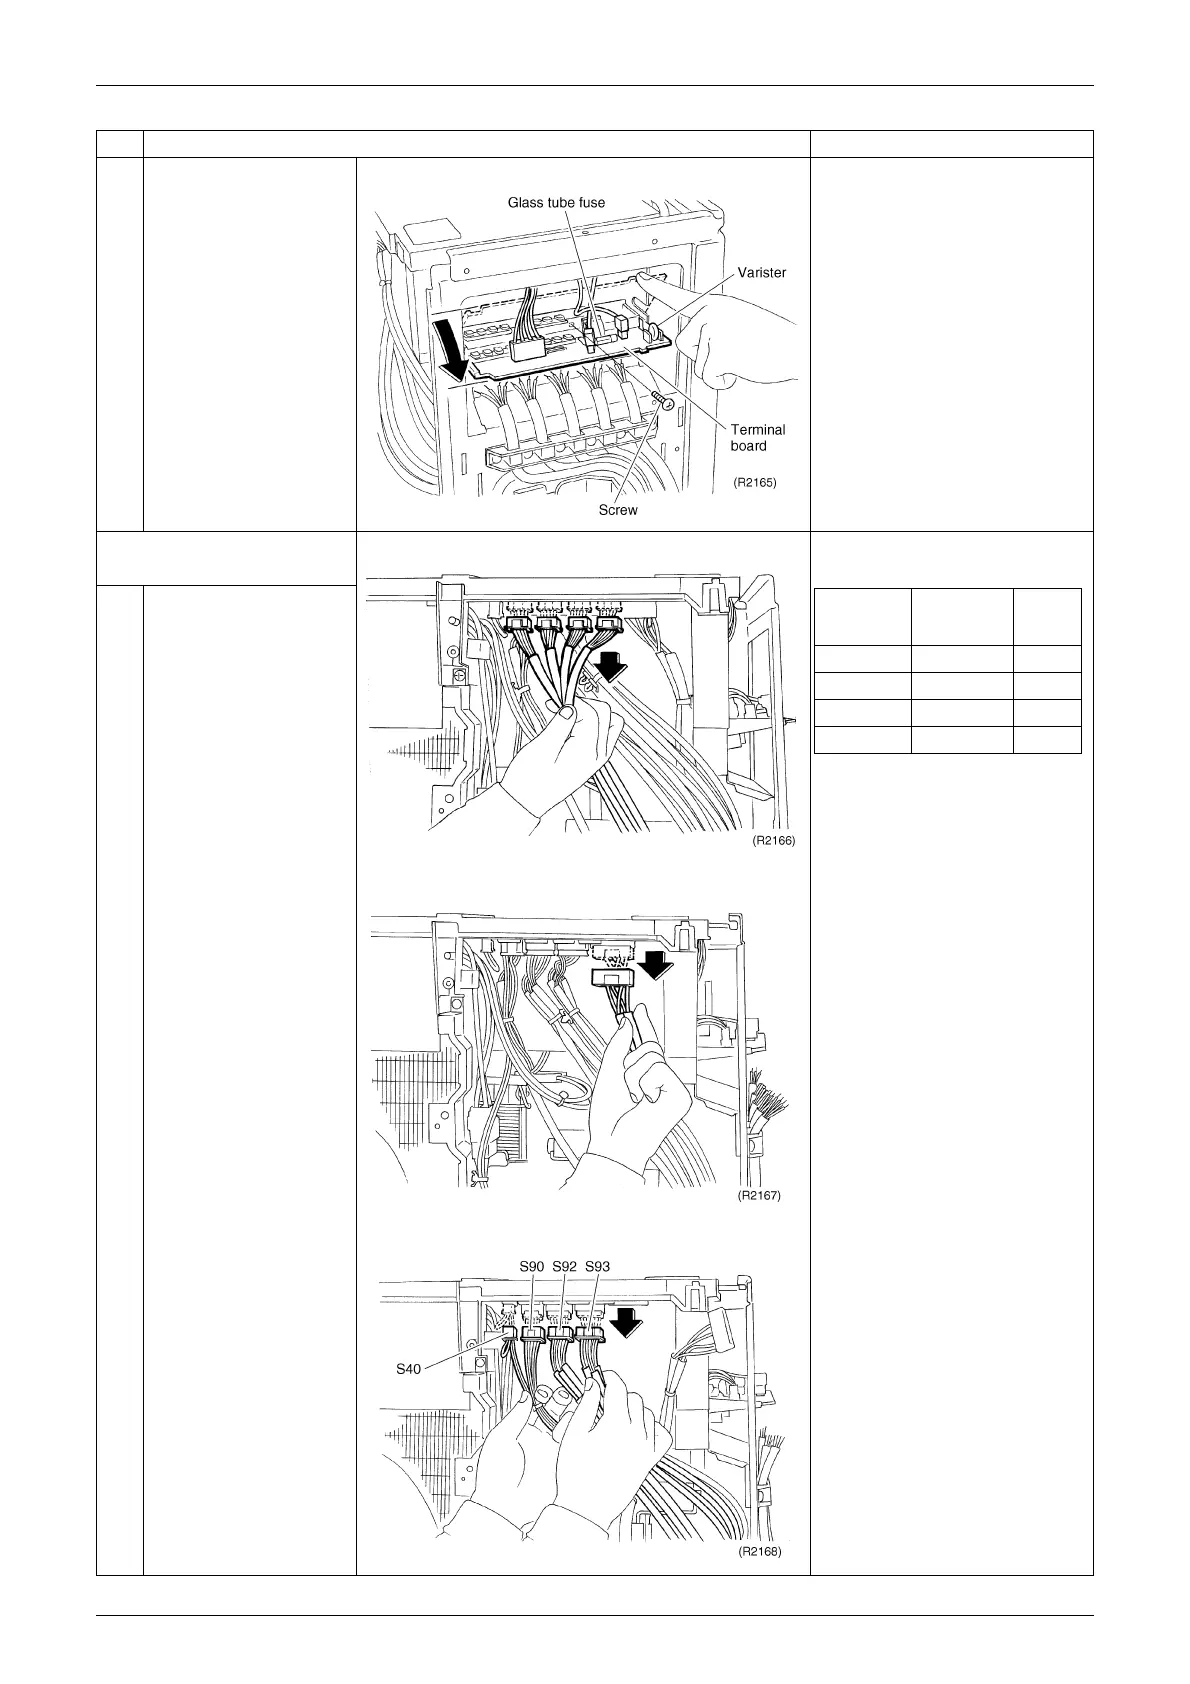
Pull out the terminal
board to open.
Glass tube fuse and varistor
cannot be replaced
individually because lead-
free soldering is provided.
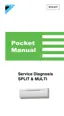
2. Remove each wire
harness
When reconnecting, make
sure to match the wire to the
correct connector.
1
Disconnect 4
connectors of the
electronic expansion
valve lead wires.
2
Remove the four way
valve connector S80.
3
Disconnect the
thermistor connector
and the overload relay
connector.
S40:Overload relay
S90:Thermistor
(Outdoor air, heat
exchanger, discharge pipe)
S92:Gas pipe thermistor
S93:Liquid pipe thermistor
Step
Procedure Points
Connector
Electronic
expansion
valve No.
Harness
length
S20 (White)
EVA 630
S21 (Red)
EVB 730
S22 (Blue)
EVC 825
S23 (Yellow)
EVD 940