English 11
Table 2
• Refer to “Table 2” to determine the proper tightening torque.
• Overtightening may damage the flare and cause a refrigerant leakage.
When you do not have a torque wrench, use Table 2 as a rule of thumb
When you keep on tightening the flare nut with a spanner, there is a point where the tightening torque sud-
denly increases.
From that point, further tighten and turn the flare nut the angle shown below. (Refer to Table 3)
After the work is finished, make sure to check that there is no leak.
Unless you tighten as instructed, (if it is loosely tightened), it may lead to the refrigerant leakage (slow
leak) and cause malfunction of the device (such as insufficient cooling or heating).
Table 3
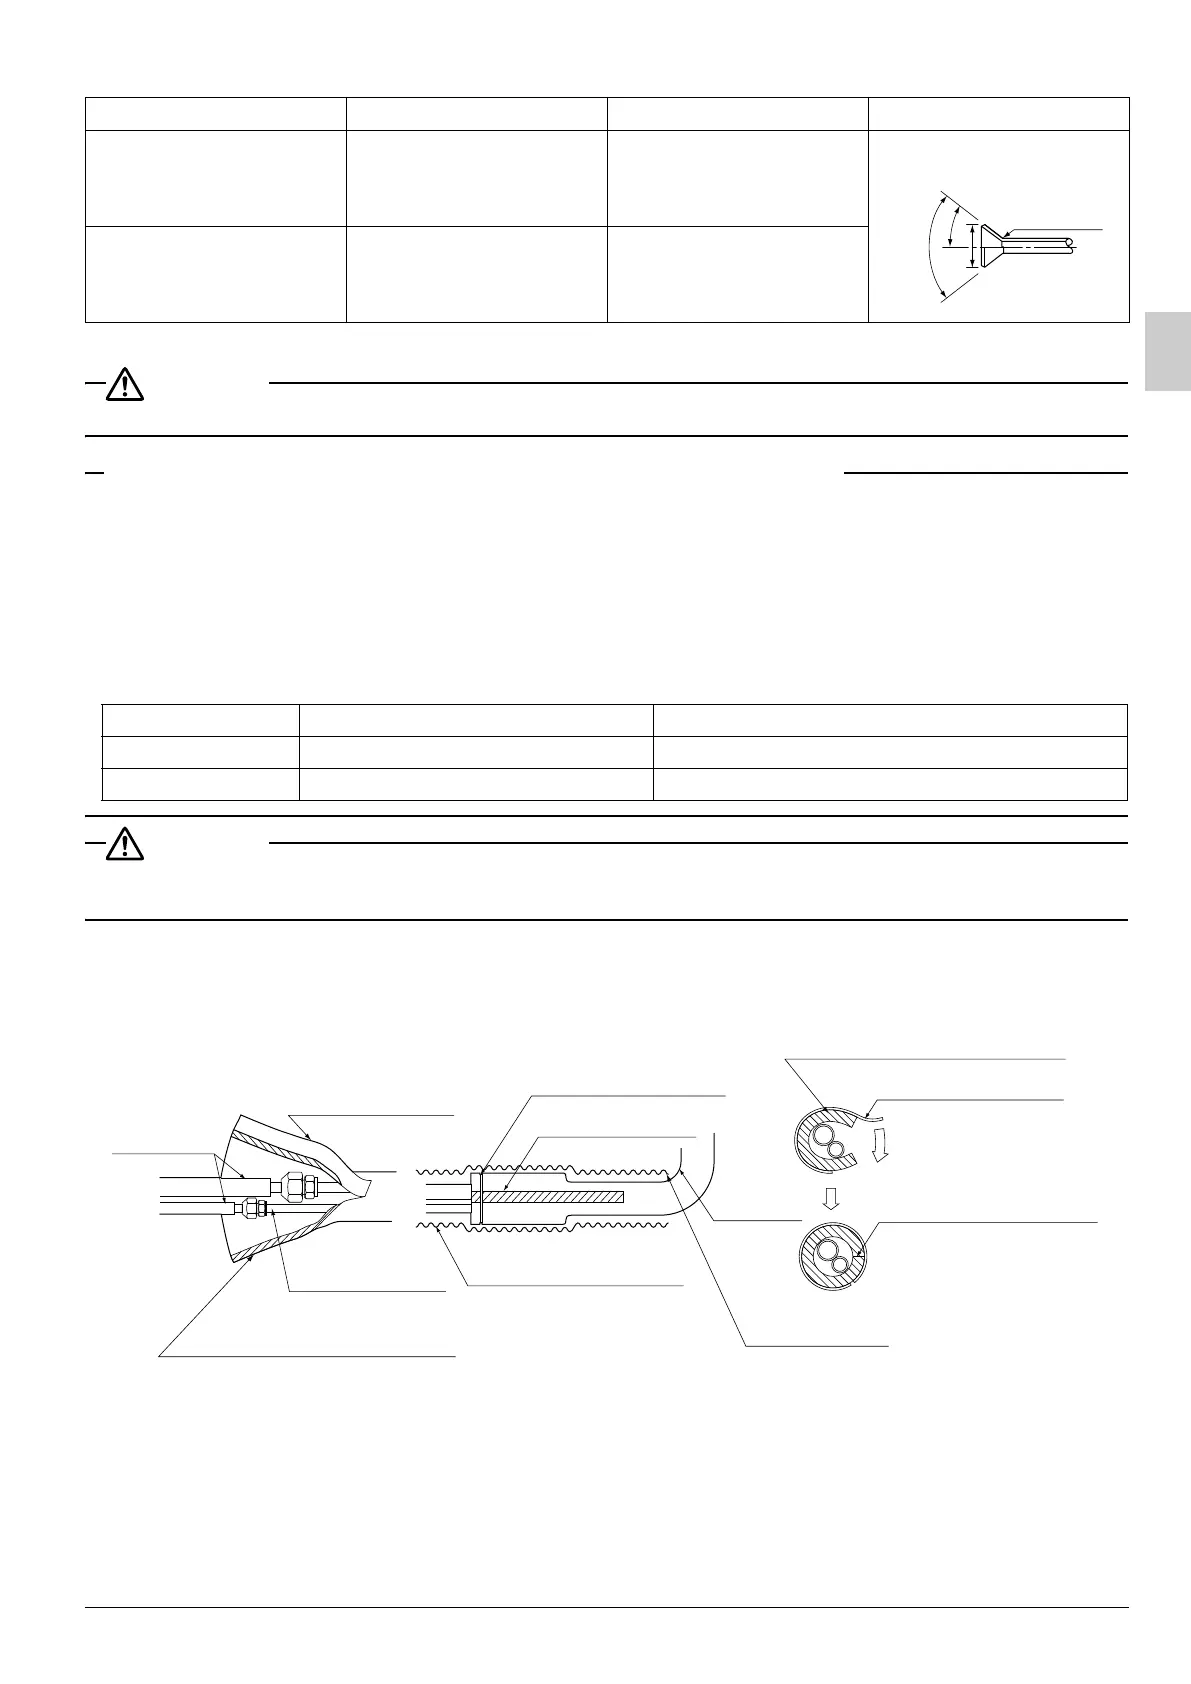
Be sure to insulate any field piping all the way to the piping connection inside the unit.
Any exposed piping may cause condensation or burns if touched.
• After leakage check of piping connection is finished, carry out thermal insulation with the supplementary
piping insulation tubing and insulating tape (3). The insulating tape (3) should be wrapped from the L-
shaped bend all the way to the end inside the unit. (Refer to Fig. 15)
• When brazing the refrigerant piping, only begin brazing after having carried out nitrogen substitution
(NOTE 1) or while inserting nitrogen into the refrigerant piping (NOTE 2). Once this is completed, connect
the indoor unit with flares.
Pipe size Tightening torque (N·m) Flare dimensions A (mm) Flare
φ 9.5 (3/8”) 32.7-39.9 12.8 – 13.2
φ15.9 (5/8”) 61.8-75.4 19.3 – 19.7
Pipe size Further tightening angle Recommended arm length of tool
φ 9.5 (3/8”) 60 to 90 degrees Approx. 200mm
φ15.9 (5/8”) 30 to 60 degrees Approx. 300mm
Insulating tubing tape
Insulating tubing tape
Local piping
Indoor unit piping
Indoor unit piping insulation tubing
Insulating tape (accessory) (3)
L-shaped
bend
Start wrapping
Refer to “ 5.INDOOR UNIT
INSTALLATION ”
Indoor unit piping insulation tubing
Insulating tubing tape
Insulation tubing seam
Attach the insulation tubing
tape so that there are no gaps
in the insulation tubing seam.
Fig. 15
Clamp large (accessory) (4)
3P184443-9J_FM6.book Page 11 Wednesday, December 14, 2011 10:29 AM
 Loading...