CARE TROUBLESHOOTING
Care and Cleaning
NOTE
• Operation with dirty lters:
1) cannot deodorize the air. 2) cannot clean the air.
3) results in poor cooling. 4) may cause odour.
• Dispose of old lters as non-ammable waste.
• To purchase the lters (Table 1) or to purchase the another type, contact the dealer where you
bought the air conditioner.
• The method of cleaning and replacement of the lters may differ depending on the model.
Refer to the label attached to the separately sold lters themselves.
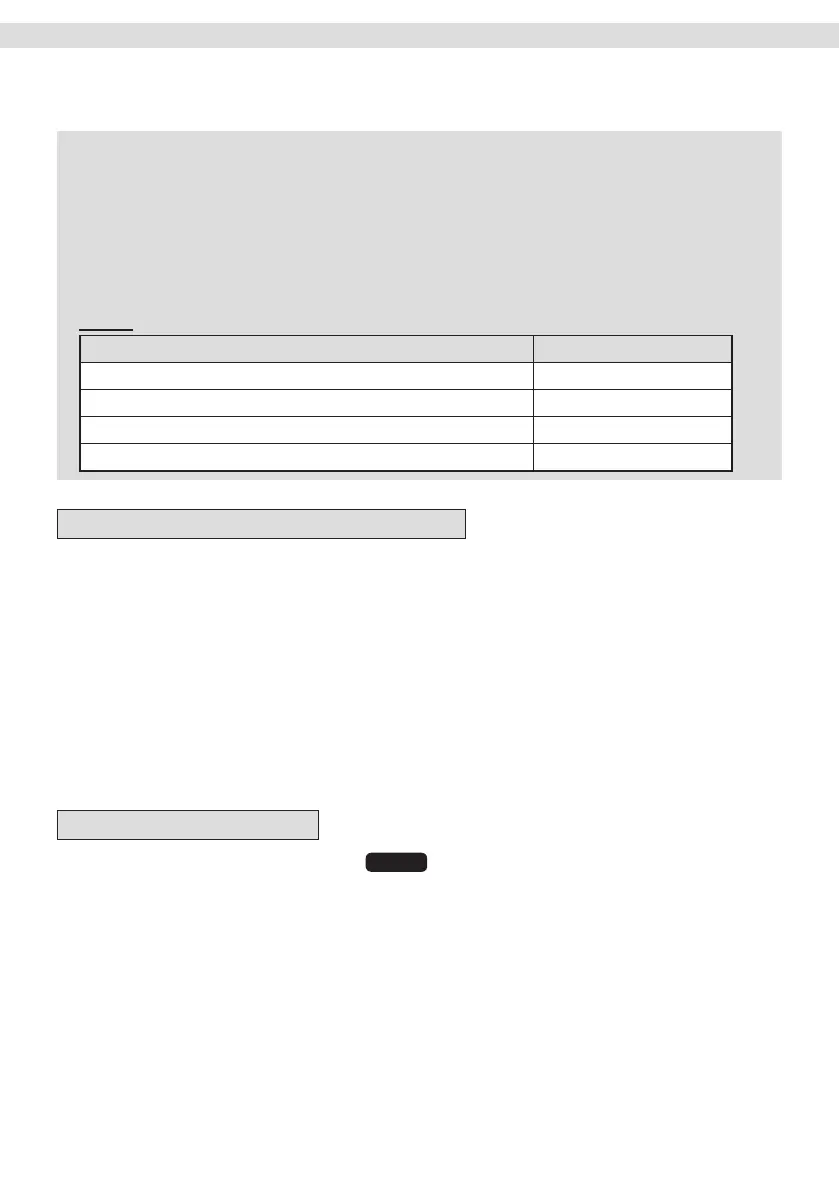
Table 1
Item Part No.
Air quality lter (enzyme blue with PM2.5) - without frame (set of 2) BAFP094A43
Deodorizing lter (enzyme blue) - without frame (set of 2) BAFP094A41
Dust collection lter (PM2.5) - without frame (set of 2) BAFP046A41
Titanium apatite deodorizing lter - without frame (set of 2) KAF970A46
We recommend periodical maintenance.
In certain operating conditions, the inside of the air conditioner may get foul after several seasons of
use, resulting in poor performance. It is recommended to have periodical maintenance by a specialist
aside from regular cleaning by the user. For specialist maintenance, contact the service shop where
you bought the air conditioner.
The maintenance cost must be borne by the user.
Check
Check that the base, stand and other ttings of the outdoor unit are not decayed or corroded.
Check that nothing blocks the air inlets and the outlets of the indoor unit and the outdoor unit.
Check that the drain comes smoothly out of the drain hose during COOL or DRY operation.
• If no drain water is seen, water may be leaking from the indoor unit. Stop operation and consult
the service shop if this is the case.
Before a long idle period
1. Operate the “MOLD PROOF”.
2. After operation stops, turn off the breaker for the room air conditioner.
3. Clean the air lters and set them again.
4. Take out the batteries from the remote controller.
26
01_EN_3P658678-6A.indd 26 12/10/2564 15:01:54