5 Installation
Installation manual
8
(A)(F)TXP20~71L2V1B + FTXF20~71A2V1B
Daikin room air conditioner
3P512025-1C – 2018.01
4.2 Preparing refrigerant piping
4.2.1 Refrigerant piping requirements
Refrigerant piping diameter
Use the same diameters as the connections on the outdoor units:
Class L1 liquid piping L1 gas piping
20~35 Ø6.4 Ø9.5
50~71 Ø6.4 Ø12.7
Refrigerant piping material
▪ Piping material: Phosphoric acid deoxidised seamless copper.
▪ Flare connections: Only use annealed material.
▪ Piping temper grade and thickness:
Outer diameter
(Ø)
Temper grade Thickness (t)
(a)
6.4mm (1/4") Annealed (O) ≥0.8mm
9.5mm (3/8")
12.7mm (1/2")
(a) Depending on the applicable legislation and the unit's
maximum working pressure (see "PS High" on the unit
name plate), larger piping thickness might be required.
4.2.2 Refrigerant piping insulation
Pipe outer diameter
(Ø
p
)
Insulation inner
diameter (Ø
i
)
Insulation thickness
(t)
6.4mm (1/4") 8~10mm ≥10mm
9.5mm (3/8") 12~15mm
12.7mm (1/2") 14~16mm
If the temperature is higher than 30°C and the humidity is higher
than RH80%, the thickness of the insulation materials should be at
least 20 mm to prevent condensation on the surface of the
insulation.
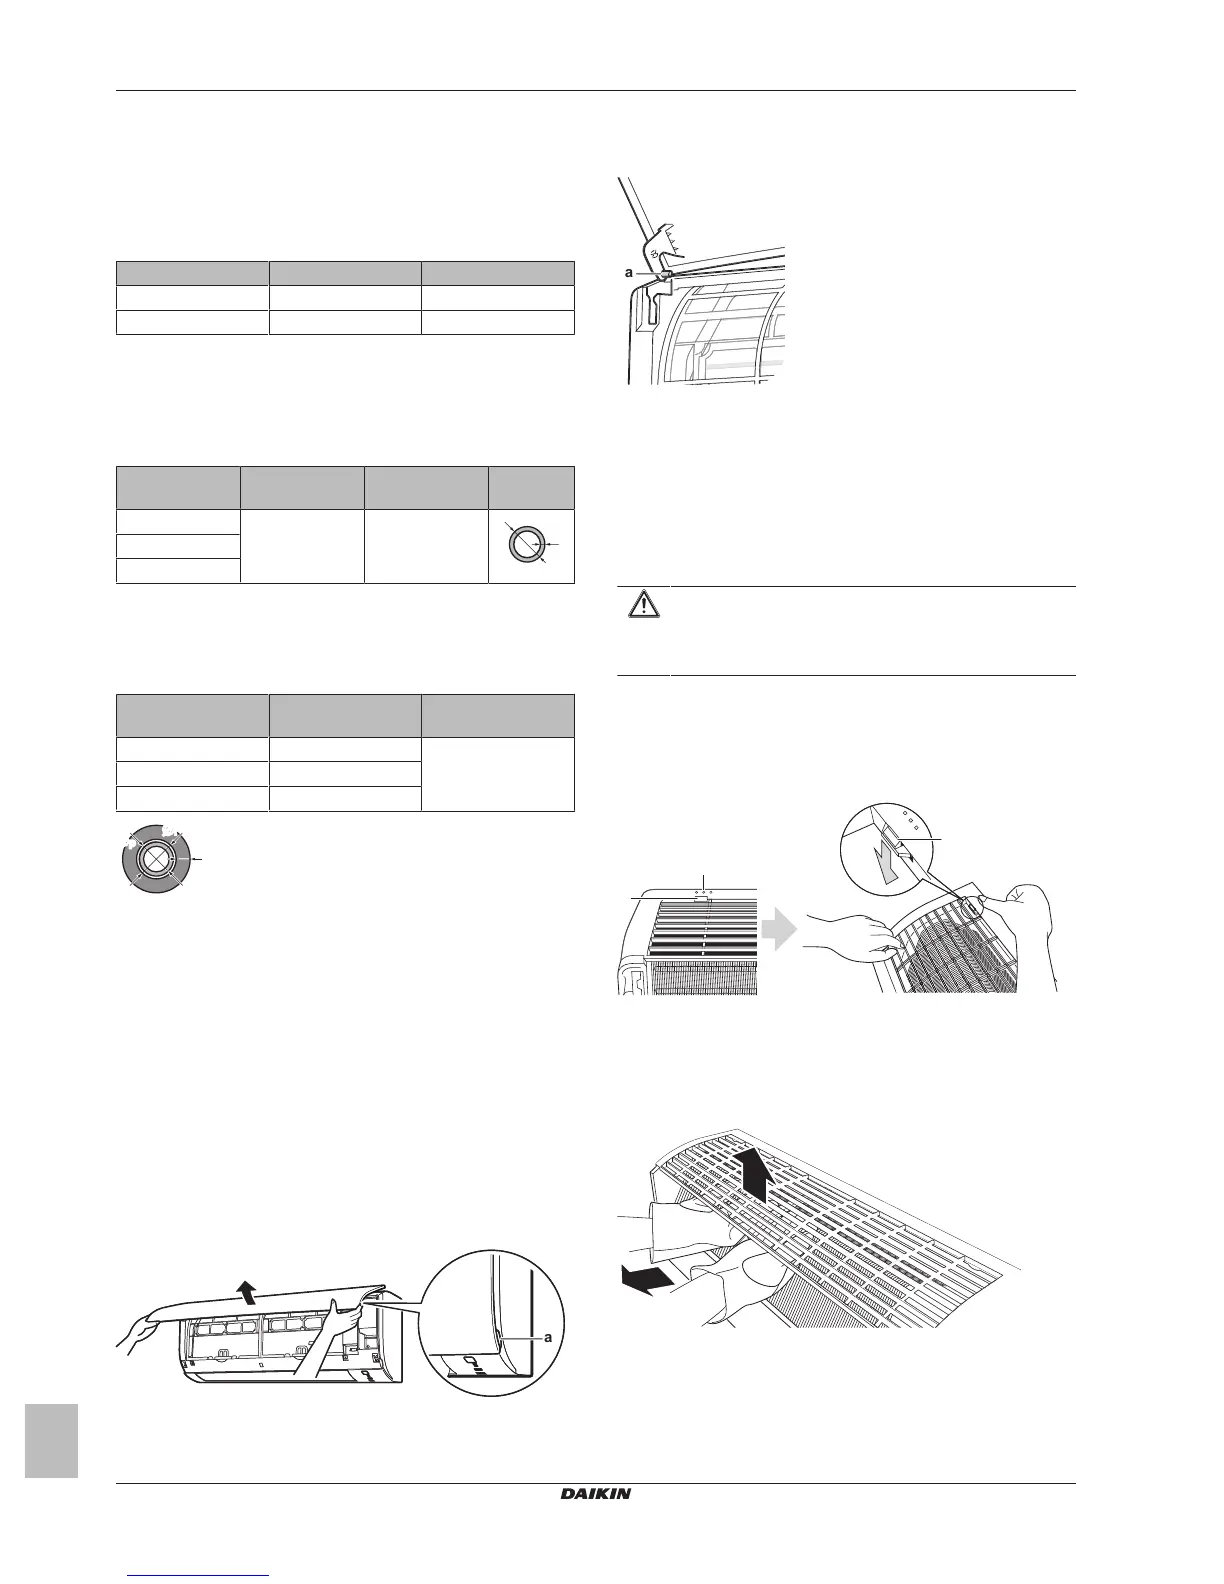
5 Installation
5.1 Opening the units
5.1.1 To open the indoor unit
To remove the front panel
1 Hold the front panel by the panel tabs on both sides and open
it.
a Indentation on the unit
2 Remove the front panel by sliding it to the left or the right and
pulling it toward you.
Result: The front panel shaft on 1 side will be disconnected.
3 Disconnect the front panel shaft on the other side in the same
manner.
a Front panel shaft
To re-install the front panel
1 Attach the front panel. Align the shafts with the slots and push
them all the way in.
2 Close the front panel slowly and press on both sides at the
centre.
To remove the front grille
CAUTION
Wear adequate personal protective equipment (protective
gloves, safety glasses,…) when installing, maintaining or
servicing the system.
1 Remove the front panel to remove the air filter.
2 Remove 2 screws (class 20~35) or 3 screws (class 50~71) from
the front grille.
3 Push down the 3 upper hooks marked with a symbol with 3
circles.
a Upper hook
b Symbol with 3 circles
4 We recommend opening the flap before removing the front
grille.
5 Place both hands under the centre of the front grille, push it up
and then toward you.
To re-install the front grille
1 Install the front grille and firmly engage the 3 upper hooks.
2 Install 2 screws (class 20~35) or 3 screws (class 50~71) back
on the front grille.
3 Install the air filter and then mount the front panel.
 Loading...