■English 8
4.
Laying piping, hoses, and wiring.
• Connect the humidifying hose to the indoor unit duct.
See 5. Humidifying hose installation work for details.
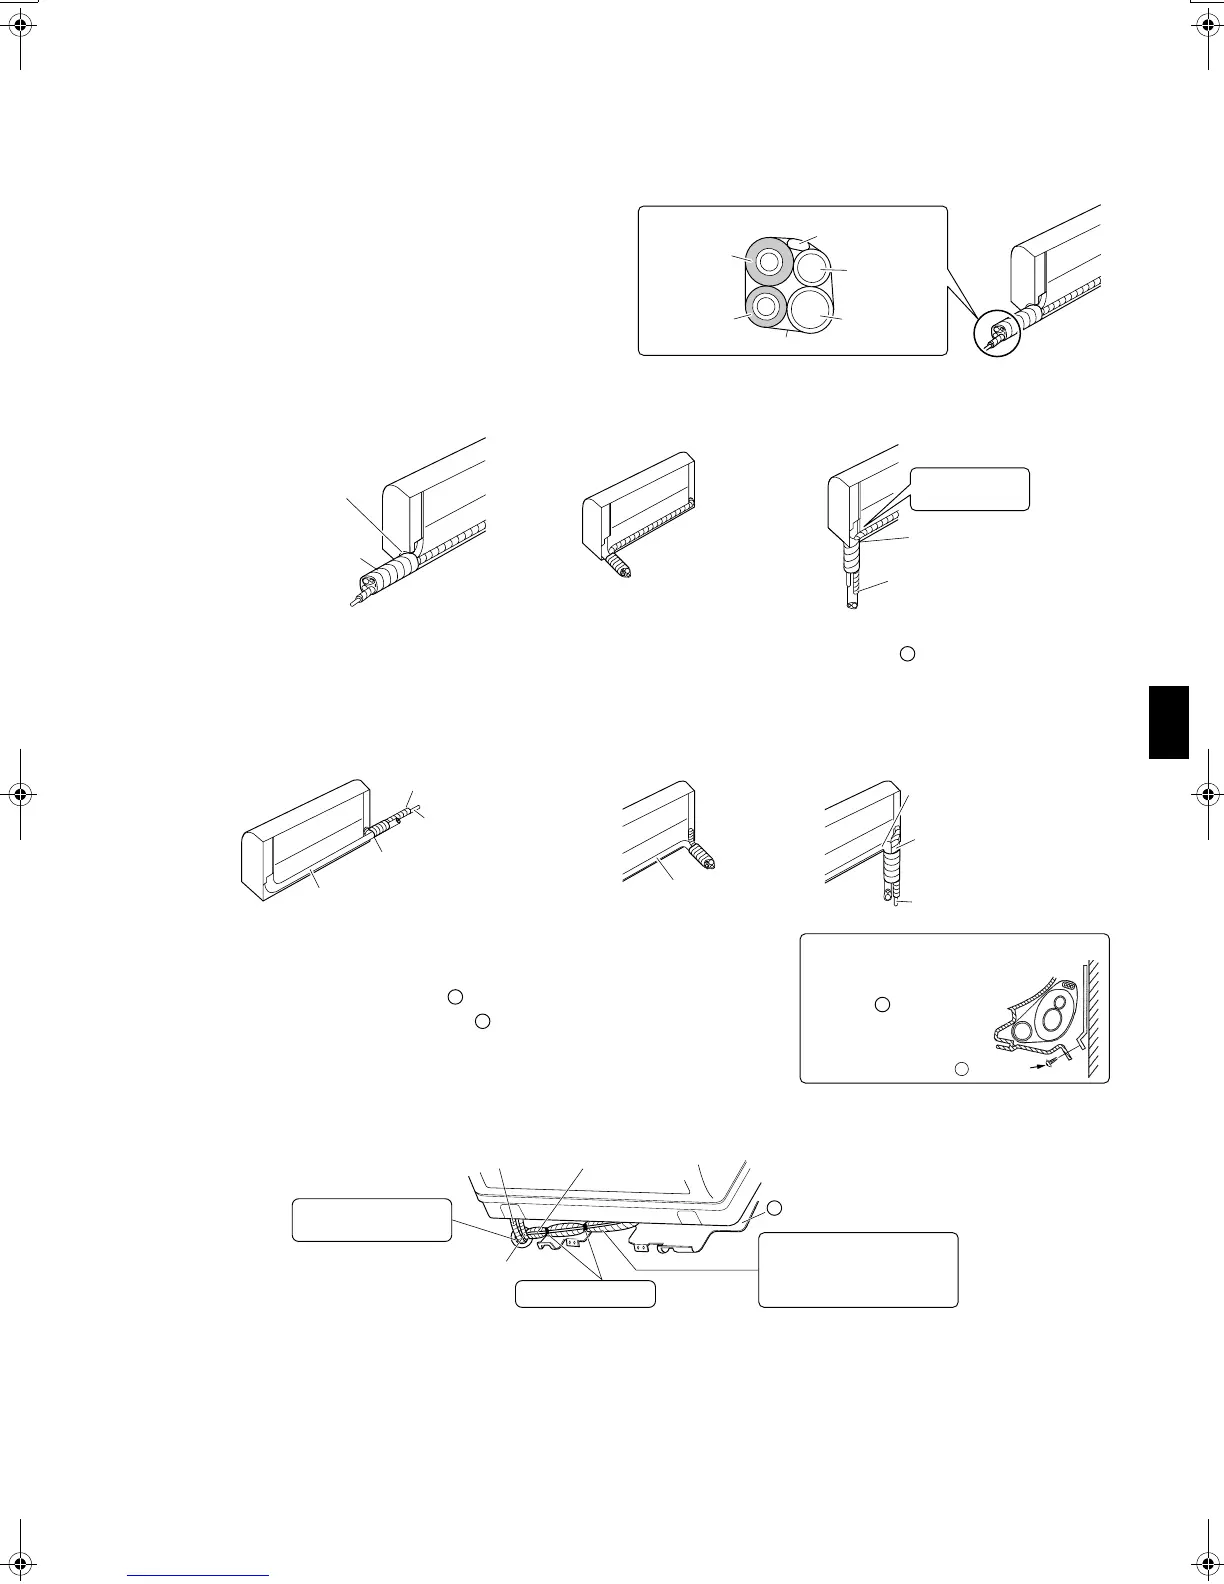
• Lay the piping, drain hose and humidifying hose
according to the orientation of the piping coming out of
the unit, as shown below.
• Make sure the drain hose is sloped downward.
• Wrap the piping, drain hose and humidifying hose
together using insulation tape.
4-1.
Right-side, right-back, or right-bottom piping
.
1) Wrap the piping, hose and inter-unit wiring using insulation tape as shown in the piping bundle diagram.
2) Put all the pipes through the through-hole in the wall and hook the indoor unit onto the mounting plate.
3) Connect the pipes.
4-2. Left-side, left-back, or left-bottom piping.
1) Replace the drain plug and drain hose. (How to replace the drain plug
and drain hose.)
2) Pull in the refrigerant piping and lay it so that it matches the liquid and
gas piping marked on the mounting plate.
3) Hook the indoor unit onto the mounting plate.
4) Connect the pipes. If it is difficult to do, remove the front panel first.
5) Wrap the insulation on the piping with insulation tape. If you are not
replacing the drain hose, store it in the location shown below.
4-3. Left-back piping.
Drain hose
Gas pipe
Liquid pipe
Inter-unit wiring
Humidifying
hose
Insulation tape
Piping bundle diagram
Cut out the
piping-through hole.
Install with a
downward slope.
Cut out the
piping-through hole.
• Right-back piping • Right-bottom piping• Right-side piping
Humidifying hose
It is recommended
to use the elbow.
A
• Left-back piping • Left-bottom piping• Left-side piping
Cut out the
piping-through hole.
Refrigerant pipe
Drain hose
Humidifying hose
Refrigerant pipe
Cut out the
piping-through hole.
Humidifying hose
Refrigerant pipe
F
M4 × 12L
1) Remove the front grille.
2) Secure the indoor unit
with the indoor unit
fixing screws.
3) Install the front grille.
When securing the indoor unit with screws
F
A
A
Inter-unit wiring
Humidifying hose
Drain hose
Caulk this hole with putty
or caulking material.
Bind with plastic tape.
Wrap insulation tape around the
bent portion of refrigerant pipe.
Overlap at least half the width of
the tape with each turn.
Mounting plate
A
01_EN_3P177302-1.fm Page 8 Tuesday, May 30, 2006 9:36 AM
 Loading...