8 English
• For left drain pipe outlet, remove the rubber plug and the
insulation on the drain pipe connecting opening on the
left side of the unit and change the position to the right
side.
• Insert the rubber stopper securely, all the way to the
base, in order to prevent water leakage.
• The diameter of the drain pipe should be greater than or
equal to the diameter of the connecting pipe. (Vinyl tube;
pipe size: 20 mm; outer dimension: 26 mm)
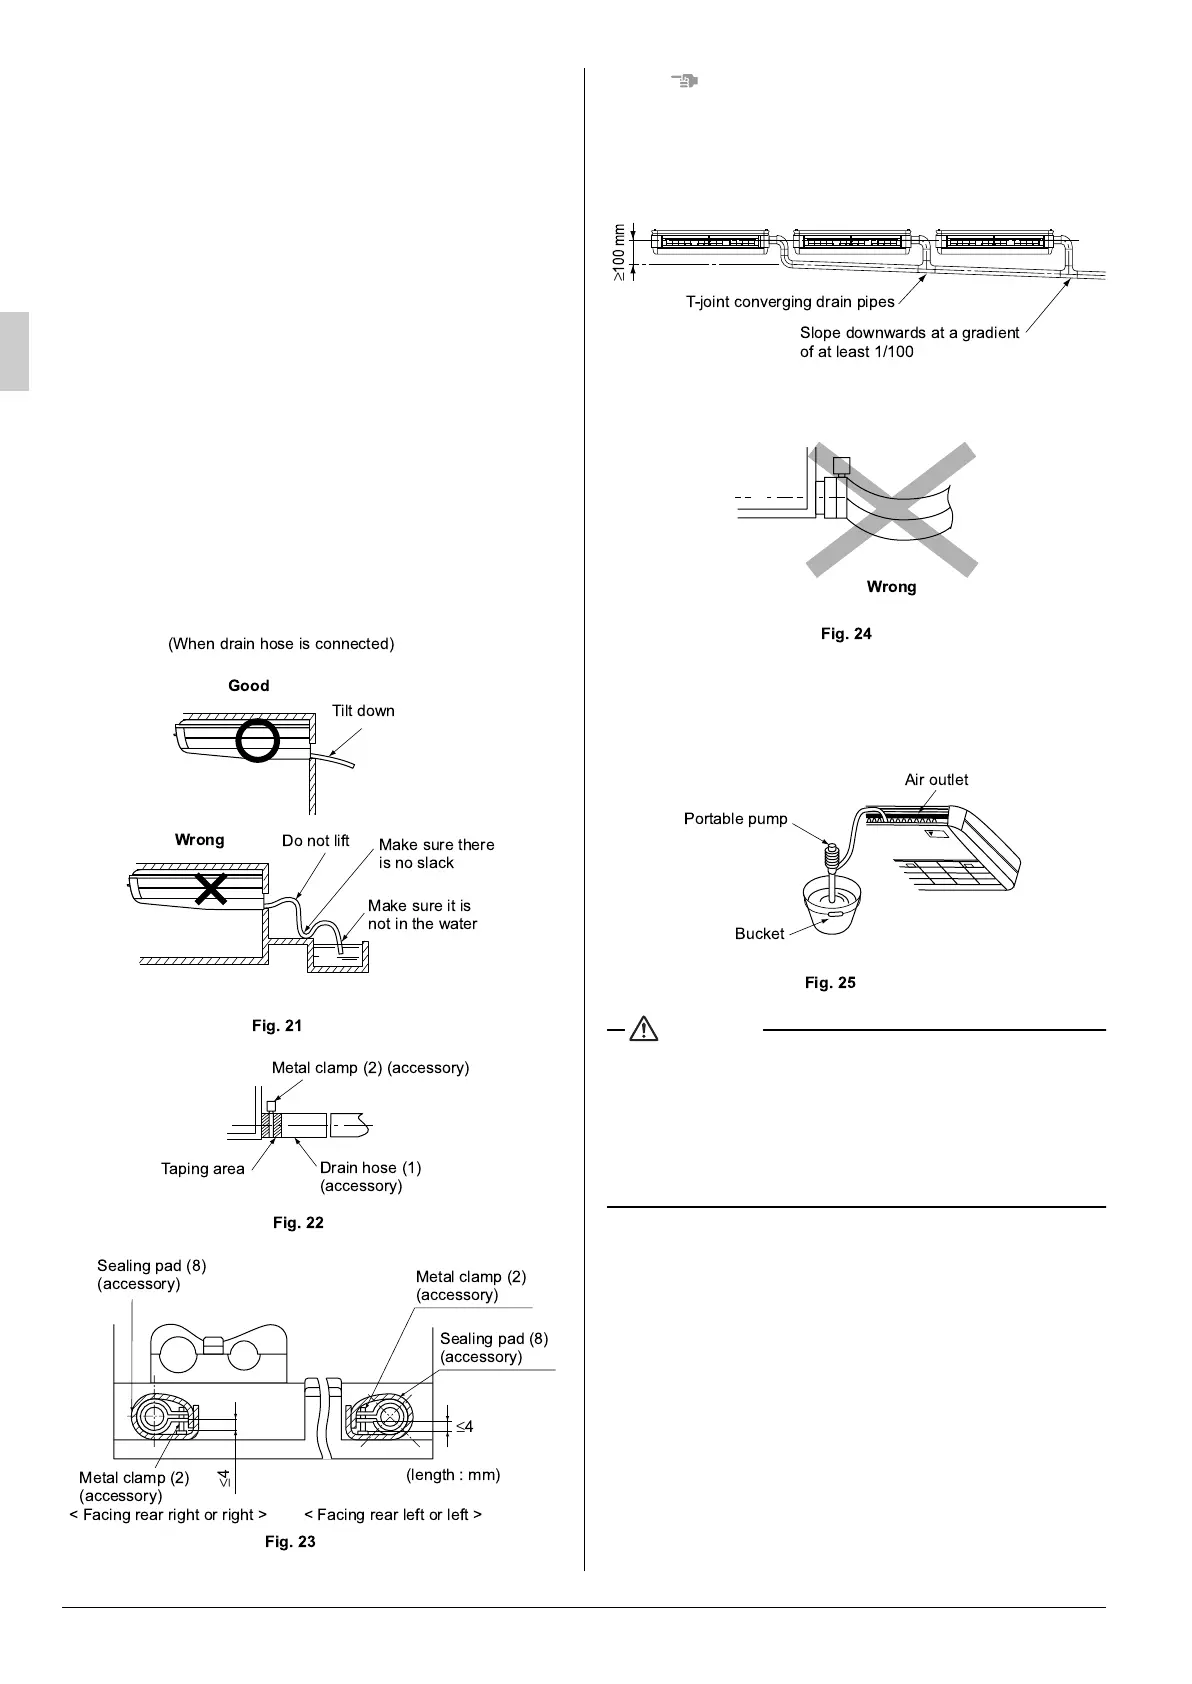
• Keep the drain pipe short and sloping downwards at a
gradient of at least 1/100 to prevent air pockets from
forming. (Refer to Fig. 21)
• Use the drain hose (1) and the metal clamp (2).
Insert the drain hose into the drain socket, up to the gray
tape. (Refer to Fig. 22)
Tighten the metal clamp until the screw head is less than
4 mm from the hose. (Refer to Fig. 23)
(Be careful of the installation direction. Install so that the
metal clamp does not contact the intake grill.)
• Wrap the sealing pad (8) (accessory) over the clamp and
drain hose to insulate. (Refer to Fig. 23)
• No folding of drain hose inside the indoor unit.
(Refer to Fig. 24)
(If there is slack in the drain hose, it may cause damage
to the intake grill.)
NOTENOTENOTENOTE
• To ensure no excessive pressure is applied to the included
drain hose (1), do not bend or twist when installing. (This may
cause leakage.)
• If converging multiple drain pipes, install according to the
procedure shown below.
Select converging drain pipes whose gauge is suitable for the
operating capacity of the unit.
(2) Confirm that smooth drainage is achieved after the pip-
ing work.
• Add 0.6 liter of water in the drain pan from the air outlet
for confirming drainage. (Refer to Fig. 25)
CAUTION
• Drain piping connections
Do not connect the drain piping directly to sewage pipes that
smell of ammonia. The ammonia in the sewage might enter
the indoor unit through the drain pipes and corrode the heat
exchanger.
• Keep in mind that it will become the cause of getting drain
pipe blocked if water collects on drain pipe.
8. ELECTRIC WIRING WORK
8-1 GENERAL INSTRUCTIONS
• Make certain that all electric wiring work is carried out by
qualified personnel according to the applicable legislation
and this installation manual, using a separate dedicated cir-
cuit.
Insufficient capacity of the power supply circuit or improper
electrical construction may lead to electric shocks or a fire.
• Make sure to install an earth leakage breaker.
Failure to do so may cause electric shocks and a fire.
• Do not turn on the power supply (branch switch, branch over-
current circuit breaker) until all the works are finished.
Tilt down
Do not lift
(When drain hose is connected)
Make sure there
is no slack
Make sure it is
not in the water
Fig. 22
≤
≤
Fig. 23
≥
100 mm
T-joint converging drain pipes
Slope downwards at a gradient
of at least 1/100
Air outlet
Portable pump
Bucket
Fig. 25
01_EN_3P172532-7B.fm Page 8 Wednesday, October 14, 2015 6:17 PM
 Loading...