LREQ5~20B7Y1
Air cooled refrigeration condensing unit
4PW74302-1 – 2012.06
Installation manual
8
2. Removing Pinch Piping
Never remove the pinched piping by brazing.
Failure to observe the instructions in procedure below properly may
result in property damage or personal injury, which may be serious
depending on the circumstances.
Use the following procedure to remove the pinched piping:
1 Remove the valve lid and make sure that the stop
valves are fully closed.
2 Connect a charge hose to service ports of all stop valves.
3 Recover gas and oil from the pinched piping by using a recovery
unit.
4 When all gas and oil is recovered from the pinched piping,
disconnect the charge hose and close the service ports.
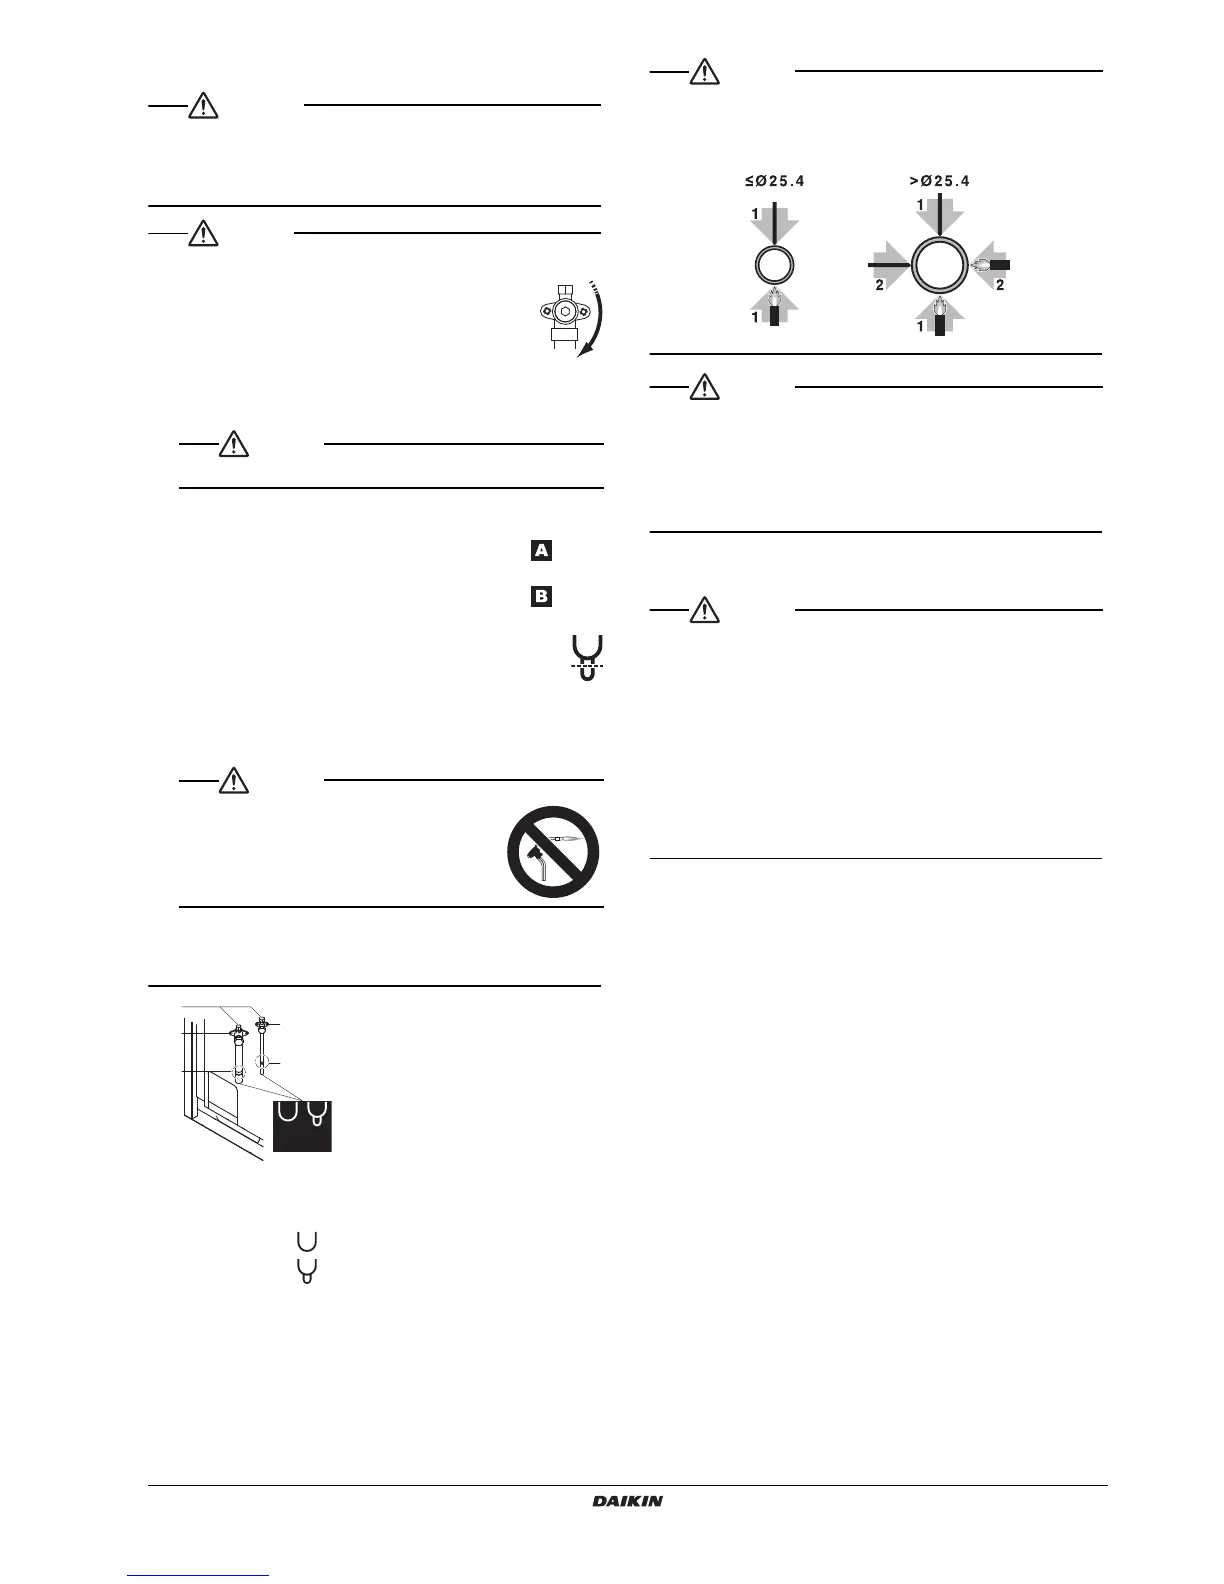
5 In case the pinched piping lower part looks like detail in the
figure below, follow instructions as per procedure steps 7+8.
In case the pinched piping lower part looks like detail in the
figure below, follow instructions as per procedure steps 6+7+8.
6 Cut off the lower part of the smaller pinched piping with an
appropriate tool (e.g. a pipe cutter, a pair of nippers, ...) so
that a cross-section is open, allowing remaining oil to drip
out in case the recovery was not complete.
Wait until all oil is dripped out.
7 Cut the pinched piping off with a pipe cutter just above the brazing
point or just above the marking in case there is no brazing point.
8 Wait until all oil is dripped out in case the recovery was not
complete, and only then proceed with connection of the field
piping.
1 Service port
2 Stop valve
3 Point of pipe cutting just above brazing point or above marking
A Pinched piping
B Pinched piping
Precautions when connecting field piping.
• Perform brazing at the gas stop valve before brazing at the liquid
stop valve.
• Add brazing material as shown in the figure.
• Be sure to use the supplied accessory pipes when carrying out
piping work in the field.
• Be sure that the field installed piping does not touch other pipes,
the bottom panel or side panel. Especially for the bottom and side
connection, be sure to protect the piping with suitable insulation, to
prevent it from coming into contact with the casing.
Operation Method of Shutoff Valves
Follow the instructions below when operating each shutoff valve.
• Do not open the shutoff valve until the steps specified in
“8-3 Checking of device and installation conditions” is
completed.
Do not leave the shutoff valve opened without turning the power
on, otherwise refrigerant may be condensed in the compressor and
the insulation of the main power supply circuit may be degraded.
• Be sure to use an exclusive tool to handle the shutoff valve. The
shutoff valve is not of back sheet type. Excessive force imposed
may break the valve.
• Use a charge hose when using the service port.
• Make sure that there is no refrigerant gas leakage after the valve
cover and cap are securely tightened.
Do not vent gases into the atmosphere.
Never remove the pinched piping by brazing.
 Loading...