8
English
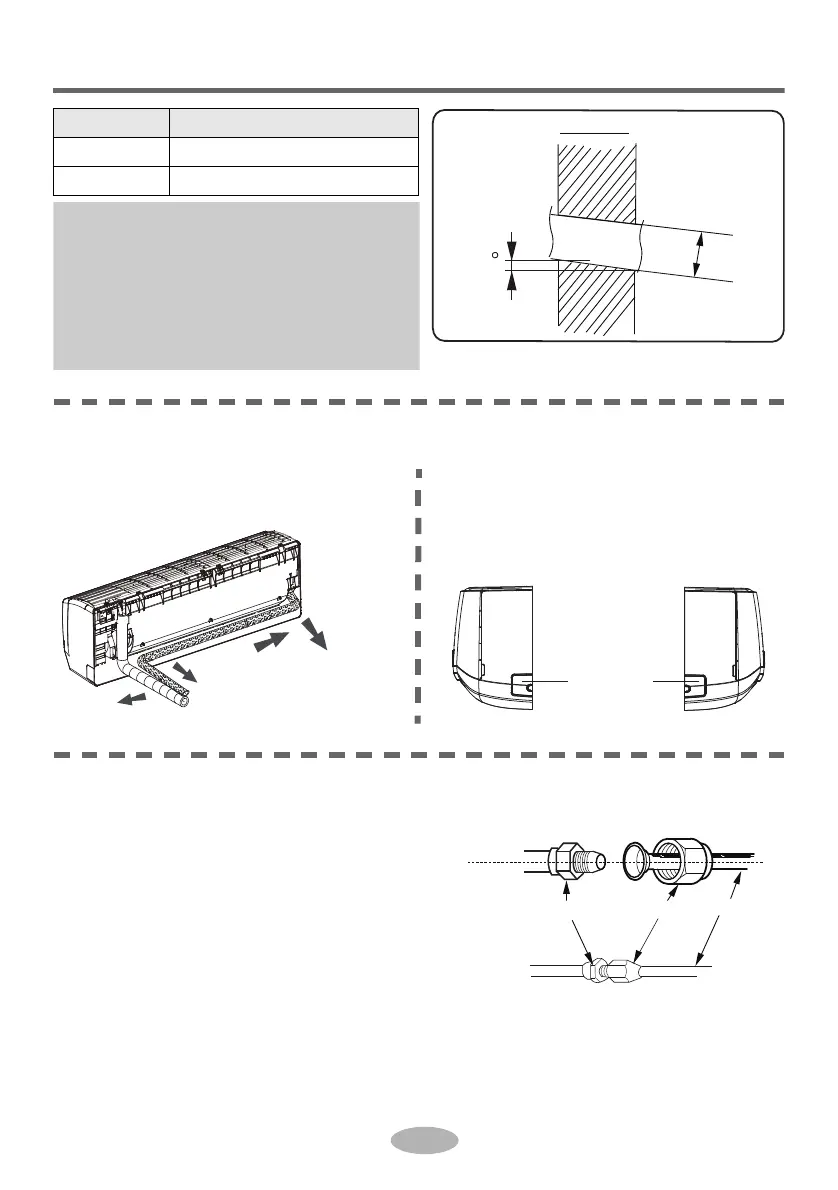
Installation of indoor unit
Step four: outlet pipe
Step five: connect the pipe of indoor unit
1. Aim the pipe joint at the corresponding
bellmouth.
2. Pretightening the union nut with hand.
3. Adjust the torque force by referring to the following sheet. Place the open-end
wrench on the pipe joint and place the torque wrench on the union nut. Tighten
the union nut with torque wrench.
Piping hole Model
Ø55 Cooling capacity < 6000W
Ø70 Cooling capacity ≥ 6000W
Note:
● Pay attention to dust prevention and
take relevant safety measures when
opening the hole.
● The plastic expansion particles are
not provided and should be bought
locally.
rear left
rear right
l
e
f
t
right
1. The pipe can be led out in the
direction of right, rear right, left
or rear left.
2. When selecting leading out the
pipe from left or right, please cut off
the corresponding hole on the
bottom case.
cut off
the hole
left right