Periodic Inspection Si50-203
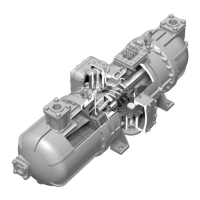
8 Semi-Hermetic Single Screw Compressor Version III
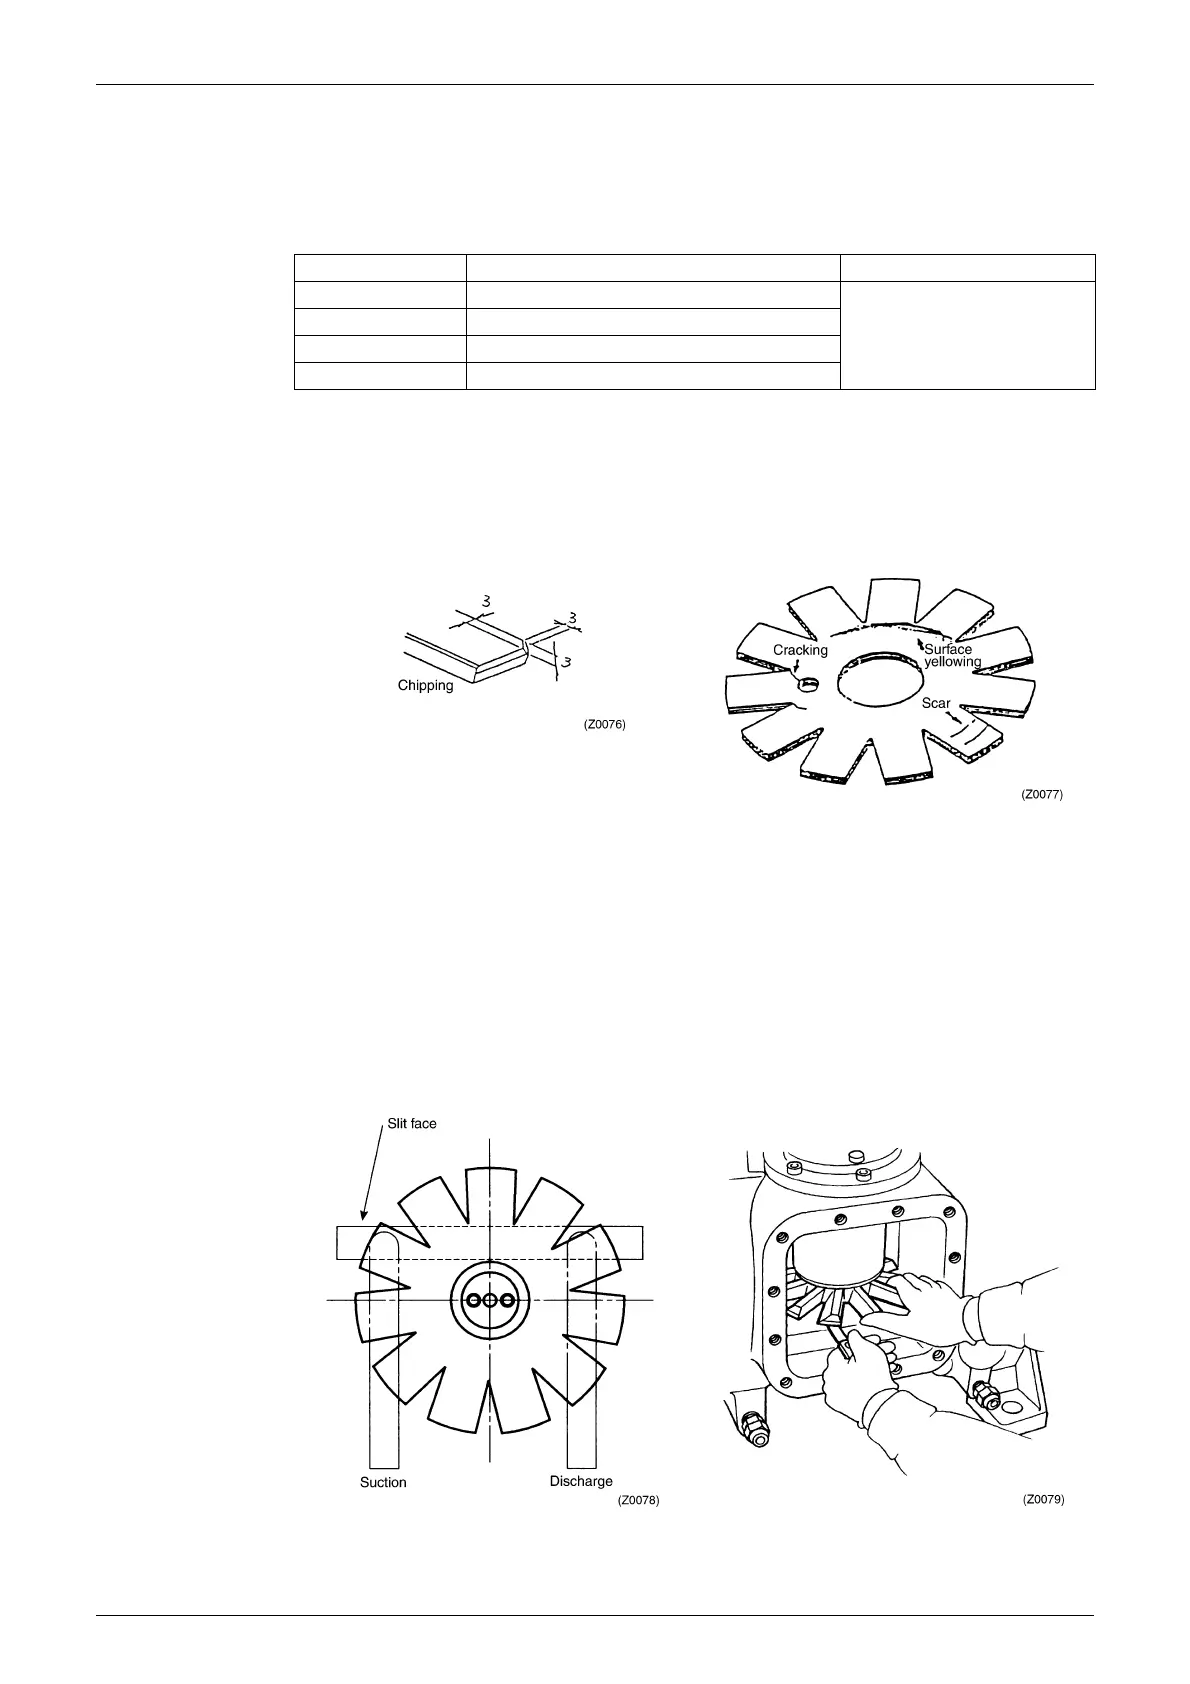
(4) Inspection of the gate rotor
Visually check the gate rotor surface for scar, chipping, cracking, etc. Check all gate rotor
teeth.
Table 3-1 Gate rotor inspection standards
* When the yellowing is observed on the gate rotor blade, remove gate rotor and check the
damage on outside of the screw rotor.
If the damage on screw rotor is found, conduct one of the following counter measures.
- Repair (deburr, etc.) the damaged part of the screw rotor.
- Replace the screw rotor.
(5) Measuring the slit clearance
The slit clearance is a gap between the gate rotor and casing, and it affects the compressor
performance and reliability to a great extent. Therefore, the slit clearance must be set
properly (60 to 90 µm).
While pressing the periphery of the gate rotor shaft with fingers, insert a thickness gauge into
the slit clearance to measure the gaps on both suction and discharge sides. Be careful not
to insert the thickness gauge too deep. If the thickness gauge is inserted to deep, it can be
caught between the screw rotor and gate rotor and break.
(See Fig. 3-7 and 3-8.)
Item Standard Remedy
Cracking No cracking
Replace
Chipping No chipping 3 mm or more long in long side
Scar No scar 1 mm or more deep
Surface yellowing* No yellowing
Fig. 3-5 Inspection of gate rotor chipping Fig. 3-6 Inspection of gate rotor surface
Fig. 3-7 Slit clearance measuring location Fig. 3-8 Measuring slit clearance on suction side
 Loading...