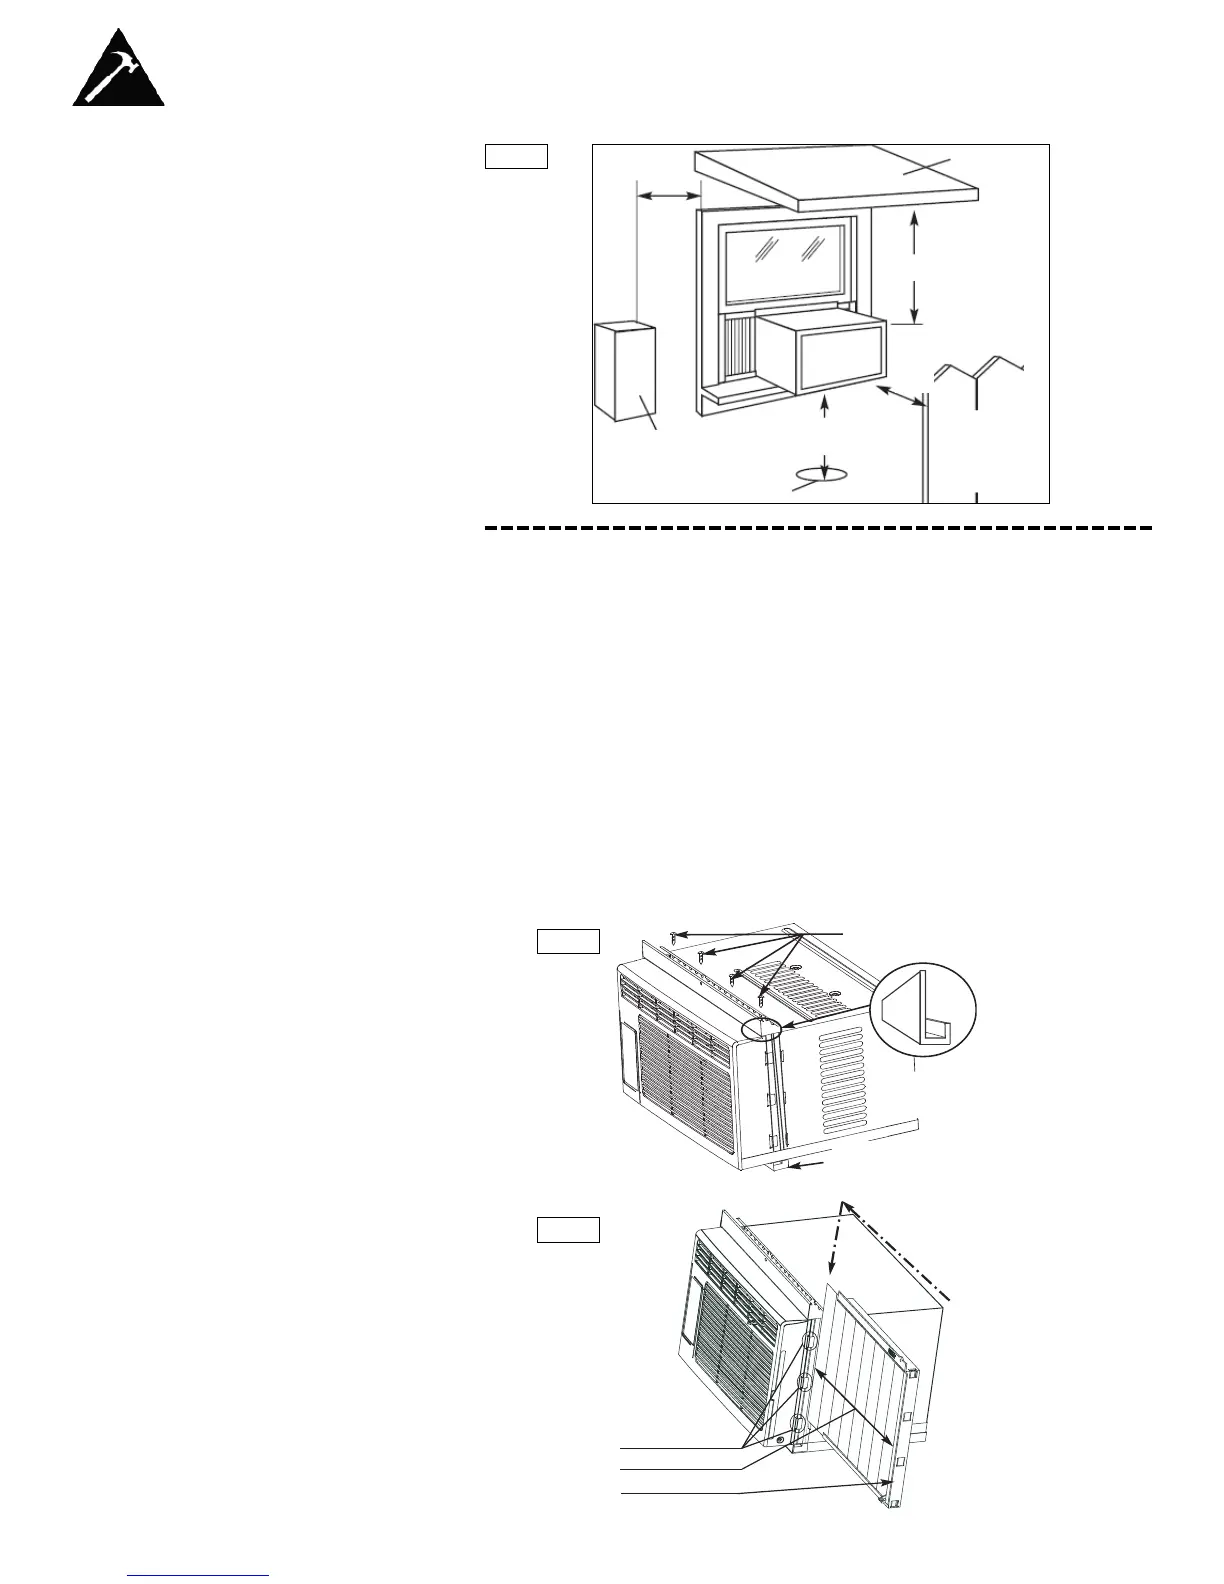
LOCATION
Installation Instructions
Awning
Fence,
wall, or
other
obstacle
Ground
Side
Obstruction
20”
Min
30”
Min
20”
Min
12” Min
Fig. 2
1) Assembly of the Upper Channel to Cabinet.
(Factory installed on some units)
• “L” Shaped Top Channel: Install the “L” shaped channel to the top of the
cabinet as shown in Fig. 3, using four (4) 3/8” screws.
2) Assembly of the Side Curtains to Cabinet.
• Extend the shutter from the shutter frame and slide it into the shutter tabs
on the side channel of the air conditioner, as shown in Fig. 4.
• Slide the shutters into the top (“L” Shaped) and bottom (“U” Shaped)
channels. The shutters are identified (on frame) as left and right.
3) Completing the Installation
• Cut the foam (non adhesive) sealing strip to fit the area of the window sill
that the air conditioner will rest on.
3/8” screws
“L” shaped mounting
bracket
“U” shaped Channel
(Factory Installed)
Slide down into tabs
Shutter tabs
Shutter
Shutter frame
Fig. 3
Fig. 4
6