Do you have a question about the Danby DDR050BJPWDB and is the answer not in the manual?
Remove device from packaging, allow to stand upright for 6 hours, and connect power cord buckle.
Place unit on a level floor with adequate air space (20cm sides, 40cm outlet) for air circulation.
Remove tapes or Styrofoam from bucket float; unit won't work otherwise.
Connect the power cord buckle in the bucket to the back of the unit.
Screw the direct drain connector to the drain port securely.
Insert the direct drain hose firmly into the connector to prevent leaks (max 5m).
Insert the pump drain hose firmly into the pump drain port.
This document provides a quick-start guide for Danby dehumidifiers, specifically models DDR050BJPWDB and DDR050BJPWDB-6. It covers the initial setup, positioning, and basic operation of the device.
The dehumidifier is designed to remove excess moisture from enclosed spaces, helping to maintain a comfortable and healthy indoor environment. By reducing humidity, it can prevent issues such as mold growth, mildew, and musty odors. The device collects water in a removable bucket, and also offers options for continuous drainage or pump drainage for extended operation without manual emptying.
Unboxing and Initial Setup: Upon receiving the dehumidifier, it's crucial to allow the device to stand upright for at least 6 hours, especially if it was placed on its back or side during transit. This allows the refrigerant to settle properly, preventing potential damage when the unit is first turned on. After this waiting period, the device can be removed from its packaging.
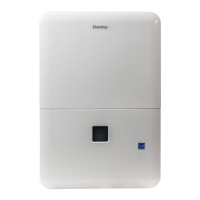
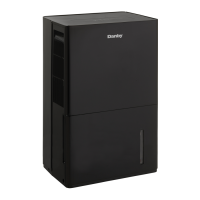
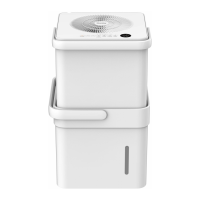
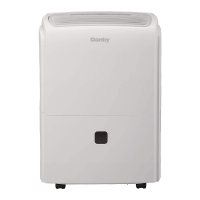
Component Identification: The dehumidifier features a control panel for user interaction, handles on both sides for easy portability, and a water level window to monitor the collected water. The air outlet grille is where dehumidified air is expelled, and an air filter is included to help clean the air. For drainage, there's a continuous drain hose outlet and, on some models, a pump drain hose outlet. A power cord buckle is provided, typically found in the water bucket, for securing the power cord when storing the unit. Casters are integrated for easy movement.
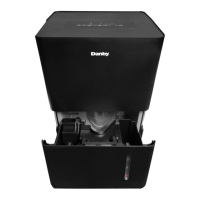
Pre-Operation Steps: Before operating the unit, open the water bucket and remove any tape or Styrofoam that might be securing the bucket float. The unit will not function correctly if these materials are not removed. Similarly, any accessories contained within the bucket should be taken out.
Positioning for Optimal Performance: For effective operation, the dehumidifier must be placed on a smooth, level floor that is strong enough to support the appliance, even when the water bucket is full. Adequate air circulation is vital; ensure there is at least 20 cm (approximately 8 inches) of air space on all sides of the unit. More specifically, allow at least 40 cm (approximately 16 inches) of air space around the air outlet to ensure proper airflow and efficiency. The dehumidifier is intended for use in enclosed spaces only, as open areas would significantly reduce its effectiveness.
Drainage Options: The dehumidifier offers multiple drainage methods to suit different user needs:
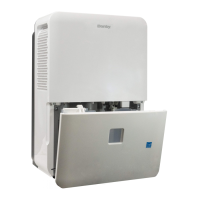
Water Bucket: For manual emptying, the collected water accumulates in the removable water bucket. The water level window allows users to monitor the fill level.
Continuous Drain: For extended operation without manual intervention, a continuous drain option is available. To set this up, screw the direct drain connector tightly to the drain port. Then, firmly insert the direct drain hose into the connector to prevent leaks. The maximum recommended length for this hose is 5 meters (approximately 16.4 feet).
Pump Drain (on some models): Certain models include a pump drain feature, which is useful for draining water to a higher elevation or over a longer distance. To use this, firmly insert the pump drain hose into the pump drain port, located at the bottom right of the unit.
Powering the Device: Once the dehumidifier is positioned and the desired drainage method is set up, plug the unit into an electrical socket outlet with an earth connection. It is crucial to avoid plugging the dehumidifier into a multiple socket outlet that is already being used by other electrical appliances, as this could overload the circuit.
Initial Operation Recommendation: When using the dehumidifier for the first time, it is recommended to operate the unit continuously for 24 hours. This helps to stabilize the internal components and ensures optimal performance from the outset. During this initial period, ensure that the plastic cover of the continuous drain hose outlet (if not using continuous drain) is properly installed to prevent any leaks.
Humidity Settings: The dehumidifier will only start operating if the set humidity level is lower than the ambient humidity. For normal conditions, it is recommended to set the humidity between 45% and 55% for optimal comfort and moisture control.
Accessory Management: The power cord buckle, typically found in the water bucket, is designed to help manage the power cord when the unit is not in use or being stored. This helps keep the cord tidy and prevents tangling.
Filter Maintenance: The dehumidifier includes an air filter, which helps to remove dust and other particles from the air. Regular cleaning or replacement of this filter is essential to maintain air quality and the efficiency of the dehumidifier. While specific instructions for filter maintenance are usually detailed in the owner's manual, it's a general maintenance feature to be aware of.
Troubleshooting: If the unit does not start, a common issue could be that the tape or Styrofoam securing the bucket float has not been removed. Always ensure these materials are cleared from the water bucket before operation.
For detailed information on operating the device, including specific settings, troubleshooting, and advanced features, users should refer to the comprehensive Owner's Manual.
| Model | DDR050BJPWDB |
|---|---|
| Category | Dehumidifier |
| Dehumidification Capacity | 50 pints per day |
| Energy Star Certified | Yes |
| Auto Restart | Yes |
| Continuous Drain Option | Yes |
| Fan Speeds | 2 |
| Weight | 41.9 lbs |
| Automatic Defrost | Yes |
| Automatic Humidistat Control | Yes |
| Filter Type | Washable |
| Refrigerant | R410A |
| Noise Level | 51 dB |
| Voltage | 115V |
| Color | White |
| Operating Temperature | 41°F - 89.6°F |