EasyManua.ls Logo

Dash ORBIT - User Manual

Dash ORBIT
2 pages
Print Icon
To Next Page IconTo Next Page
Loading...
About the Guide
This quick start guide is for reference only. Minor
difference might be found in user interface.
All the design and software here are subject to
change without prior written notice.
All trademarks & registered trademarks mentioned
are the properties of their respective owners.
Please visit our website or contact your local
service engineer for more information.
If there is any uncertainty or controversy, please
refer to our final explanation.
-
-
-
-
-
Step 1 Use the guide to mark & drill holes for the drywall anchors.
Step 2
Attach the mounting plate by drilling the provided screws
into the anchors from step 1.
Step 3
Attach the camera to the magnetic mounting plate,
and adjust lens as needed.
Step 1
Step 3
Connect the camera to a power source.
Scan the QR code or search “IC Realtime” in the Google Play
or App Store to download and install DASH App.
Step 5
Step 4
With your mobile device connected to a 2.4 GHz band, add a
camera by following the steps depicted below.
Run the DASH App, and then register a new account if you
do not already have one.
Step 2
The camera LED indicator will flash green when it is fully booted on.
Note:
Note:
If camera fails to to add or the WiFi connection is
changed. Reset the camera and repeat step 5.
Repeat step 5 for adding multiple cameras.
Mounting Surface
Hole Guide
Drywall Anchors
Mounting Plate
Self-tapping Screw
Camera
Make sure the mounting surface can hold at least 1lb.
Using the Dash App Camera Installation
Question and Answer IconNeed help?

Do you have a question about the Dash ORBIT and is the answer not in the manual?

Summary

Using the Dash App

Download and Install DASH App

Scan QR code or search for "IC Realtime" to download and install the DASH App.

Register DASH App Account

Run the DASH App and register a new account if you do not have one.

Connect Camera to Power

Connect the camera to a power source.

Camera Boot Indicator

The camera LED indicator will flash green when fully booted.

Add Camera via DASH App

Add a camera by following the app steps with a mobile device on a 2.4 GHz band.

Camera Installation

Mounting Surface Requirements

Ensure the mounting surface can hold at least 1lb.

Physical Camera Mounting

Mark and drill holes, attach mounting plate, and secure the camera.

Whats in the Box

Product Components

Lists the camera, power adapter, cable, hole guide, mounting plate, and hardware package.

Know your Orbit

Orbit Device Components

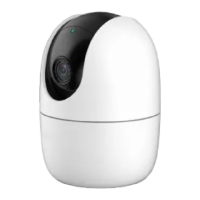
Identifies key components like LED indicator, lens, mic, speaker, and ports.

Reset Button and Ports

Details the reset button, Ethernet port, and power port on the device.

LED Indicator Status Guide

Explains the meaning of different LED indicator patterns and their corresponding device status.

Overview

This document serves as a quick start guide for the IC Realtime DASH ORBIT camera, providing instructions for setup, installation, and an overview of its features.

Device Function Description

The DASH ORBIT is a smart camera designed for monitoring, offering features such as remote access via a mobile application, easy installation, and network connectivity. It is capable of capturing video and can be integrated into a home or office surveillance system. The camera is equipped with an LED indicator that communicates its operational status, a lens for capturing visuals, and a built-in microphone for audio capture. It also includes a Micro SD card slot for local storage, an Ethernet port for wired network connection, and a built-in speaker, suggesting two-way audio capabilities. The device is powered via a power port and includes a reset button for troubleshooting.

Usage Features

The DASH ORBIT camera is designed for user-friendly operation, starting with its setup and installation.

Initial Setup and App Integration:

To begin using the camera, users must first download and install the "IC Realtime" DASH App from either the Google Play Store or Apple App Store. Once the app is installed, users need to register a new account if they don't already have one. The camera is then connected to a power source, and its LED indicator will flash green once fully booted, signaling readiness for configuration.

Adding the Camera to the App:

The camera is added to the DASH App via a mobile device connected to a 2.4 GHz Wi-Fi band. The process involves a series of steps within the app:

  1. Add Device: Users initiate the process by selecting "Add Device" in the app.
  2. Scan: The app likely prompts the user to scan a QR code on the camera or follow an on-screen prompt to discover the device.
  3. Setup (Wi-Fi Name): Users will enter their Wi-Fi network name.
  4. Setup (Admin Password): Users will input the camera's admin password for secure access.
  5. Setup (Add Successfully): Upon successful configuration, the app confirms that the camera has been added.
  6. Live View: Users can then access the live video feed from the camera. The app supports adding multiple cameras by repeating these steps.

Installation:

The physical installation of the camera is straightforward and involves three main steps:

  1. Marking and Drilling: A provided hole guide is used to mark and drill holes for drywall anchors on the chosen mounting surface. It's important to ensure the mounting surface can support at least 1lb.
  2. Attaching Mounting Plate: The mounting plate is then secured to the surface by drilling the provided screws into the installed anchors.
  3. Attaching Camera: The camera attaches to the magnetic mounting plate, allowing for easy adjustment of the lens angle as needed.

LED Indicator Status:

The camera's LED indicator provides visual cues about its operational status:

  • Off: Indicates the camera is powered off or the LED is turned off, or that it is rebooting after a reset.
  • Red light on: Signifies that the device is booting or experiencing a malfunction.
  • Green light flashing: Indicates the camera is waiting for a network connection.
  • Green light on: Confirms that the camera is operating properly.
  • Red light flashing: Signals a network connection failure.
  • Green and Red light flashing alternately: Denotes that the camera is undergoing a firmware update.

Maintenance Features

The DASH ORBIT camera incorporates features that facilitate troubleshooting and ensure continued functionality.

Reset Functionality:

A dedicated reset button is provided on the camera. Pressing and holding this button for 10 seconds will reset the camera to its factory default settings. This is a crucial maintenance feature for resolving issues such as:

  • Failed Camera Addition: If the camera fails to add to the app during the initial setup.
  • Wi-Fi Connection Changes: If the Wi-Fi network connection changes or experiences problems, a reset can help re-establish connectivity.
  • General Troubleshooting: A reset can often resolve various software-related issues or unexpected behavior.

Firmware Updates:

The LED indicator's "Green and Red light flashing alternately" status specifically indicates that the camera is undergoing a firmware update. This suggests that the device supports over-the-air (OTA) firmware updates, which are essential for:

  • Security Enhancements: Keeping the camera secure against potential vulnerabilities.
  • Feature Improvements: Adding new functionalities or improving existing ones.
  • Bug Fixes: Addressing any software bugs or performance issues.

Local Storage:

The presence of a Micro SD card slot allows for local storage of video footage. This provides a backup or primary recording option, independent of cloud services, and can be useful for reviewing past events even if network connectivity is interrupted.

Network Flexibility:

The inclusion of an Ethernet port offers an alternative to Wi-Fi for network connectivity. This can provide a more stable and secure connection, especially in environments where Wi-Fi signals are weak or unreliable.

Support and Information:

The guide emphasizes the importance of visiting the manufacturer's website or contacting a local service engineer for more information or in case of uncertainty or controversy regarding the device's operation. This highlights the availability of professional support for maintenance and troubleshooting beyond the scope of the quick start guide.

In summary, the DASH ORBIT camera is designed to be an accessible and reliable monitoring solution, with a focus on ease of use, clear status indicators, and built-in features for both initial setup and ongoing maintenance.

Dash ORBIT Specifications

General IconGeneral
Two-Way AudioYes
Motion DetectionYes
StorageCloud storage (subscription required)
ConnectivityWi-Fi
Weather ResistanceIP65

Videos

How to use Geko Orbit 130 Dash Cam?

Related product manuals