EasyManua.ls Logo

Datalogic Connection Box C-BOX 100 - User Manual

Datalogic Connection Box C-BOX 100
2 pages
Print Icon
To Next Page IconTo Next Page
Loading...
C-BOX 100
Instruction Manual
The C-BOX 100 is a connection box which can be used as an accessory
to several Datalogic family scanners to facilitate the system connections.
System cabling is made through spring clamp terminal blocks inside the
C-BOX 100 while the scanner is connected to the C-BOX 100 through a
25-pin connector placed on the left side of the housing.
A 9-pin connector placed inside the C-BOX 100 facilitates connection
between an external PC and the auxiliary serial interface of the scanner
for configuration or data monitoring.
GENERAL VIEW
C-BOX 100
Figure A
25-pin scanner connector
Cover screws (4)
Compression connectors
1
2
3
Figure B
Power switch (ON/OFF)
1
2
Chassis grounding selector
3
INT-30 power connector for 20 mA C.L.
5
4
Power on LED (green)
Power Polarity Error LED (red)
6
Scanner selection switch
A
uxiliary port connector
7
OM4000 jumpers
8
Termination resistance switch
9
Spring clamp terminal blocks
10
SAFETY PRECAUTIONS
ATTENTION: READ THIS INFORMATION BEFORE INSTALLING THE PRODUCT
POWER SUPPLY
This product is intended to be installed by Qualified Personnel only.
This device is intended to be supplied by a UL Listed NEC Class 2 power
source, rated 10-30V, minimum 0.50A.
CAUTION
The overall value of power consumption of the
system (C-BOX 100 + scanner) is given by adding
the scanner power consumption to that of the C-BOX
100. Refer to the manual of the connected scanner
for details about minimum/maximum supply voltage
and power consumption.
SUPPORTED SCANNER MODELS
The C-BOX 100 can be connected to the following readers through the
25-pin connector illustrated in Figure A.
Linear Scanners 2D Readers/Cameras
DS2100A *DS1100 DS4600A DS6XXX MATRIX-1XXX DV9500
DS2400A *DS2200 DX6XXX MATRIX-2XXX
DS8100A
* It is necessary to use 10-30 V versions for DS1100 and DS2200
scanners.
OPENING THE DEVICE
To install the C-BOX 100 or during normal maintenance, it is necessary
to open it by unscrewing the four cover screws:
CAUTION
The C-BOX 100 must be disconnected from the
power supply during this operation.
MECHANICAL INSTALLATION
The diagram below gives the overall dimensions of the C-BOX 100 and
may be used for its installation.
mm
inch
Ø3.5
[Ø0.14]
12
[0.47]
66
[2.60]
12
[0.47]
5
[0.20]
150
[5.91]
5
[0.20]
40
[1.57]
161
[6.34]
90
[3.54]
89.8
[3.54]
114.5
[4.51]
Figure 1 - Overall Dimensions
ELECTRICAL CONNECTIONS AND SETUP
The following figure shows the typical layout.
Figure 2 – System Layout
The dotted line in the figure refers to an optional (temporary) hardware
configuration in which a portable PC can be quickly connected to the C-
BOX 100 (and consequently to the scanner auxiliary interface) through
the internal 9-pin connector. This allows monitoring of the data
transmitted by the scanner or configuration through the utility program
(see the scanner Installation Manual for more details). The scanner
auxiliary interface signals are also available on the internal spring clamp
connectors.
After making system cabling and switch settings, connect the scanner to
the 25-pin connector on the left side of the C-BOX 100 housing.
Switch ON the C-BOX 100 power switch (see Figure 3). The correct
polarity of the power connection is signaled by the green LED, while the
red LED turns on in case of wrong polarity.
NOTE
Power is supplied to the connected scanner (25-pin
connector only) through an electronic circuit which:
limits the inrush current; provides short circuit
protection and over current protection (automatic
retry).
After system functioning has been verified, close the C-BOX 100 using
the 4 cover screws making sure the rubber seal is fitted correctly
between the parts of the housing.
POWER SUPPLY
Power is supplied to the C-BOX 100 through the pins provided on the
spring clamp connector.
The power switch (see Figure 3) switches the power supply ON or OFF
for both the C-BOX 100 and the connected scanner.
S1
ON
OFF
Figure 3 - Power Switch ON/OFF Positions
C-BOX 100
1
2
VS
GND
USER INTERFACE
GND
V+ (10 - 30 Vdc)
Figure 4 - Power Supply Connections
NOTE
Pin 1 is also electrically connected to pins 3 and 5,
just as pin 2 is electrically connected to pins 4 and 6.
This is useful for external trigger/inputs connections.
The power supply must be between 10 and 30 Vdc only.
POWERING C-BOX 100 FROM A SCANNER
In order for C-BOX 100 to accept
power from the scanner through the
25-pin connector, a solder bridge
must be made at the two pads
indicated in Figure 5.
This is useful for example, to pass
power to connected accessories
such as Encoder and Presence
Sensor from DX8200A VAC models
or other scanner layouts. See the
relative scanner Reference Manual
for details.
Figure 5– Scanner Power Solder Bridge
SYSTEM WIRING
The connection and wiring procedure for C-BOX 100 is described as
follows:
1) Open the C-BOX 100 by unscrewing the 4 cover screws.
2) Verify that the C-BOX 100 power switch is off (see Figure 3).
3) Unscrew the compression connectors and pass all the system
cables through them into the C-BOX 100 housing.
4) To connect the power and input/output signals:
Prepare the individual wires of the system cables by stripping
the insulation back approximately 1 cm.
Using a device such as a screwdriver, push down on the lever
directly next to the clamp (see Figure 6).
Insert the wire into the clamp and release the lever.
The wire will now be held in the spring clamp.
Figure 6 - System Cable Connections
The wiring used can be solid or stranded but must meet the following
specifications.
All positions: 24 - 16 AWG 0.2 - 1.5 mm²
The C-BOX 100 spring clamp connector pinouts are indicated in the
Pinout tables.
Refer to the scanner Installation Manual for signal details.
CHASSIS GROUNDING JUMPER SETTINGS
The scanner chassis grounding method can be selected by positioning a
jumper (see Figure 7). In this way the scanner chassis can be
connected to earth ground (only if pins 7 or 8 are connected to a good
earth ground). For 1, 2, or 4K scanners the chassis can alternatively be
connected to the power supply ground signal (GND) or it can be left
floating but, in this case, the jumper must be removed. For 6, 8K
scanners the chassis is internally connected to GND.
to EARTH
GROUND
(default)
to GND floating
1, 2, 4K Family Scanners
to EARTH
GROUND
(default)
The scanner chassis
is internally
connected to GND
6, 8K Family Scanners
Figure 7 – Chassis Grounding
1
2
3
2
1
10
9
8
7
6
5 4
3
1
21
40
20
Scanner Configuration PC
System Cables
SCANNER
C-BOX 100
Scanner
Auxiliary
Interface
Question and Answer IconNeed help?

Do you have a question about the Datalogic Connection Box C-BOX 100 and is the answer not in the manual?

Summary

Safety Precautions

Electrical Connections and Setup

System Layout and PC Connection

Details typical system layout, PC connection via 9-pin connector, and scanner connection to C-BOX 100.

Power Switch and Polarity Indication

Operation of the C-BOX 100 power switch and indication of correct/incorrect power polarity via LEDs.

Powering C-BOX 100 From Scanner

System Wiring

Wiring Procedure and Cable Prep

Step-by-step guide for opening the device, preparing wires, and connecting system cables using spring clamps.

Mechanical Installation

Chassis Grounding

9-Pin Scanner Auxiliary Interface

Technical Features

Electrical Specifications

Specifies supply voltage range (10-30 Vdc), power consumption, and maximum current consumption.

Overview

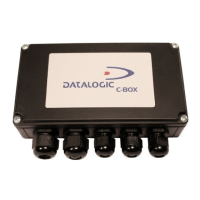
The Datalogic C-BOX 100 is a connection box designed as an accessory for various Datalogic family scanners, facilitating system connections.

Function Description

The C-BOX 100 primarily serves as an interface for Datalogic scanners. It handles system cabling through internal spring clamp terminal blocks. The scanner itself connects to the C-BOX 100 via a 25-pin connector located on the left side of the housing. Additionally, a 9-pin connector inside the C-BOX 100 allows for connection to an external PC, enabling access to the scanner's auxiliary serial interface for configuration or data monitoring.

The device supports a range of Datalogic linear scanners (DS2100A, DS1100, DS2400A, DS2200) and 2D readers/cameras (DS4600A, DS6XXX, MATRIX-1XXX, DV9500, DX6XXX, MATRIX-2XXX, DS8100A). For DS1100 and DS2200 scanners, it is necessary to use 10-30 V versions.

Power is supplied to the C-BOX 100 through the pins on the spring clamp connector. An internal electronic circuit limits inrush current, provides short-circuit protection, and offers overcurrent protection with automatic retry. The power switch controls power for both the C-BOX 100 and the connected scanner.

The C-BOX 100 also features a chassis grounding selector, allowing the scanner chassis to be connected to earth ground, power supply ground (GND), or left floating, depending on the scanner family (1, 2, 4K, 6, 8K).

Important Technical Specifications

Physical Features:

  • Dimensions: 161 x 114.5 x 40 mm (6.34 x 4.51 x 1.57 in.)
  • Weight: Approximately 330 g (11.6 oz.)

Environmental Features:

  • Operating Temperature: -10 to 50 °C (14 to 122 °F)
  • Storage Temperature: -20 to 70 °C (-4 to 158 °F)
  • Humidity Max.: 90% non-condensing
  • Vibration (EN 60068-2-6): 1.5 mm from 10 to 55 Hz, 2 g at 55 to 200 Hz (3 axes, 2 hours each axis)
  • Shock (EN 60068-2-27): 30 g (3 axes, 3 shocks each axis)
  • Protection Class: IP54 (when enclosure screws are tightened)

Electrical Features:

  • Power Supply Voltage: 10 to 30 Vdc (UL Listed NEC Class 2 power source)
  • Power Consumption: 0.5 W scanner power consumption
  • Max Current Consumption (including scanner): 2 to 2.5 A
  • LED Indicators: Power ON LED (green), Power Polarity Error LED (red)

Connections:

  • 25-pin scanner connector: For connecting the scanner.
  • 9-pin auxiliary serial interface: For PC connection (configuration/monitoring).
  • Spring clamp terminal blocks: For system cabling (power, input/output signals).
  • INT-30 power connector: For 20 mA Current Loop.

Supported Interfaces:

  • RS232, RS485/422, RS485-FDX, RS485-HDX: Various serial communication interfaces are supported, with specific pinouts for different scanner models and functionalities (TxD, RxD, RTS, CTS, GND, etc.).
  • OM4000 Jumpers: Allow connection to the OM4000 TRIG signals on spring clamp terminals for applications where the OM4000 is externally connected.
  • Termination Resistance Switch: For RS485 bus termination.

Usage Features

System Cabling and Wiring:

  1. Open the C-BOX 100 by unscrewing the four cover screws.
  2. Ensure the C-BOX 100 power switch is off.
  3. Unscrew compression connectors and pass system cables through them into the C-BOX 100 housing.
  4. Prepare individual wires by stripping insulation approximately 1 cm.
  5. Use a screwdriver to push down on the lever next to the clamp, insert the wire, and release the lever.
  6. After making system cabling and switch settings, connect the scanner to the 25-pin connector.
  7. Switch ON the C-BOX 100 power switch. A green LED indicates correct power polarity, while a red LED indicates wrong polarity.

Powering from Scanner: To enable the C-BOX 100 to accept power from the scanner via the 25-pin connector, a solder bridge must be made at specific pads inside the device. This feature is useful for passing power to connected accessories like encoders or presence sensors from certain scanner models (e.g., DX8200A VAC).

Chassis Grounding: The chassis grounding method is selected by positioning a jumper. For 1, 2, or 4K scanners, the chassis can be connected to earth ground, power supply ground (GND), or left floating. For 6, 8K scanners, the chassis is internally connected to GND.

RS485 Bus Termination: A switch allows enabling or disabling the termination of the RS485 bus. In multi-drop configurations, only the first and last devices on the bus should have the termination enabled.

Auxiliary Serial Interface: The internal 9-pin connector provides access to the scanner's auxiliary serial interface, allowing for data monitoring or configuration via a PC. The signals are also available on the internal spring clamp connectors.

Maintenance Features

Opening the Device: To install or perform maintenance, the C-BOX 100 must be opened by unscrewing the four cover screws. It is crucial to disconnect the C-BOX 100 from the power supply before opening it.

Closing the Device: After verifying system functionality, close the C-BOX 100 by tightening the four cover screws, ensuring the rubber seal is correctly fitted between the housing parts.

Scanner Selection: A switch (S3) is used to select the scanner type (DS1100, DS2100, DS2200, DS2400) connected to the C-BOX 100. For other devices, S3 must be set to B.

Datalogic Connection Box C-BOX 100 Specifications

General IconGeneral
BrandDatalogic
ModelConnection Box C-BOX 100
CategoryNetwork Hardware
LanguageEnglish

Related product manuals